How to set up SEO on WordPress: a step-by-step guide


WordPress is suitable for blogs, corporate websites, catalogs, and online stores, but after installing the CMS, the site isn't yet ready for full search engine optimization. You need to open the required pages for indexing, configure the URLs, remove technical duplicates, connect Google Search Console, collect semantics, and distribute queries across pages.
WordPress SEO involves working with page content, site structure, loading speed, images, internal links, and technical parameters. Skipping any of these steps can result in a page with good text that Google doesn't crawl well, considers a duplicate, or doesn't link to other sections of the site.
In English-language search results, the same task is often searched for using the queries “how to do SEO in WordPress”, “how to SEO in WordPress”, “how to SEO on WordPress”, and “how to SEO WordPress”. The wording varies, but the user's goal is the same: to understand which WordPress settings affect SEO and in what order to apply them.
Below, we'll walk you through the process from the initial review of a new website to regular work with Search Console, content, and external links. The settings are designed so they can be applied step-by-step, without mixing technical SEO, semantic core, and individual page optimization.
What is WordPress SEO and what needs to be configured?
WordPress SEO is the search engine optimization of a website running on this CMS. Some technical capabilities are already built into the engine, while others are added by the theme, SEO plugin, and server settings. The result itself depends on how well Google can find pages, understand their content, and see logical connections between sections.
The question “What is SEO in WordPress” usually arises among new website owners, who see dozens of settings in the admin panel and don't understand which ones relate to search engine optimization. It's worth starting with indexing, URL structure, primary domain, sitemap, and architecture. After that, move on to semantics, meta tags, content, interlinking, and speed.
For a small website, most of the basic work can be done independently. On larger projects, additional tasks quickly arise: template duplicates, filters, pagination, archives, automatic meta tag generation, query cannibalization, and internal linking errors.
What does WordPress do for SEO out of the box?

WordPress allows you to create pages and posts, assign them user-friendly URLs, organize content into categories, build menus, and manage the basic site structure. The CMS also generates a basic XML sitemap, which search engines can use to discover URLs.
The editor lets you set H1–H6, add images, enter alt text, create links, and edit page content. This is sufficient for preparing the document itself, but the standard features are usually insufficient for managing the Title, Description, Canonical, extended meta robots, and structured data.
In practice, SEO setup begins even before the first large piece of content is published. By defining the site structure, page types, and URL formation rules in advance, you won't have to massively change URLs and set up hundreds of 301 redirects later.
You need to pay special attention to your WordPress theme. A template is responsible for the HTML markup, mobile version, and some CSS and JavaScript, so a poorly designed theme can slow down your site, create multiple H1s, or display identical blocks on thousands of pages.
What is a WordPress SEO plugin?
The query “what is a WordPress SEO plugin” refers to extensions that add additional SEO settings to the admin panel. Websites most often use Yoast SEO, Rank Math, or another plugin with a similar feature set.
An SEO plugin makes it easy to set Title and Description tags, manage canonical tags, generate XML Sitemaps, and change indexing rules for specific page types. Some solutions also support breadcrumbs, Schema.org, redirects, social meta tags, and templates for bulk SEO parameter generation.
A plugin should be viewed as a settings control panel. If your site has a chaotic structure, dozens of duplicates, and a slow theme, installing an extension alone won't fix these issues.
It's best to choose an extension before you begin populating your site. This way, you can define indexing rules for categories, posts, archives, and other URL types in advance and avoid having to rework them once organic traffic starts to arrive.
What tasks does the SEO plugin solve?
The main practical benefit of the SEO plugin is centralized management of page parameters. For each URL, you can specify a custom Title and Description, check the canonical tag, edit meta robots, and determine whether the document should be included in the XML Sitemap.
Templates are especially useful for large websites. For example, an online store might generate category titles according to a predetermined structure, while a blog might use separate rules for posts, categories, and archives. After this, priority pages should still be optimized manually.
Some plugins add BreadcrumbList, Article, Organization, and other types of structured data. Schema.org should only be used where the markup matches the page content and actual data.
Before installation, it's worth checking what features the theme or developers have already implemented. Duplicating sitemaps, canonicals, or schemas across different components often creates technical conflicts that must then be addressed during an SEO audit.
Answers to your questions
Is it possible to set up SEO on WordPress yourself?
Basic SEO setup for a small website can be done on your own if you have access to WordPress, your domain, and Google Search Console. The website owner can check indexing, configure friendly URLs, enable an SEO plugin, submit a sitemap, and prepare meta tags.
Complexities usually arise with large projects. WooCommerce, filters, multiple languages, dozens of page templates, and mass URL generation require technical analysis and meticulous indexing rules.
Before changing global settings, it's best to back up your site. This is especially true for the permalink structure, redirects, and plugins, which affect thousands of pages at once.
Which SEO plugin is best for WordPress?
Yoast SEO and Rank Math are suitable for most basic tasks. Both solutions help manage meta tags, sitemaps, and indexing parameters, so it's best to choose based on the desired feature set and your current website configuration.
If one plugin is already configured and working correctly, there's no need to switch to another without a specific reason. Migration creates an additional risk of losing certain SEO parameters.
After installing or replacing a plugin, check the actual pages in the browser and the original HTML. The settings in the admin panel should match what users and search engine crawlers see.
Do I need to add keywords in a dedicated field in WordPress?
Google doesn't require a separate meta keywords field. Keywords are placed in page elements where they accurately describe the topic and answer the user's query.
The main cluster is usually reflected in the Title, H1, some subheadings, and body text. Additional phrases are distributed among the corresponding semantic blocks.
The “focus keyword” field within the SEO plugin can be used to provide editor suggestions. Filling it out by itself does not give the page any additional rankings.
How to add WordPress to Google Search Console?
First, create a property in Google Search Console and select the appropriate type. For the entire domain, it's convenient to use Domain Property if you have DNS access.
After verifying ownership, add the current XML Sitemap and wait for the data to be processed. You can then use URL Inspection to check individual pages.
Once connected, regularly monitor Performance, Page Indexing, and Core Web Vitals. These reports show search queries, indexing issues, and groups of pages with technical deviations.
Why is my WordPress site loading slowly?
Common causes include a heavy theme, large images, excessive JavaScript, third-party widgets, slow hosting, and suboptimal plugins. It's best to determine the cause based on measurements rather than the number of installed extensions.
PageSpeed Insights helps you identify problematic resources and Core Web Vitals metrics. Developer tools and server data are used for deeper analysis.
After each change, it's helpful to re-measure the results. Installing multiple optimizers simultaneously complicates diagnostics and can create caching conflicts.
Is it possible to promote a large website or online store on WordPress?
Yes, WordPress and WooCommerce are used on projects with large numbers of pages, but architecture and performance requirements grow with scale. Particular attention must be paid to categories, filters, and parametric URLs.
For large catalogs, indexing, canonical, sitemap, and interlinking rules are defined in advance. Otherwise, the number of technical pages can grow significantly faster than the useful content.
Server, caching, and development quality also become more critical. With a good technical foundation, a CMS itself won't hinder search engine optimization.
What to set up in WordPress before starting SEO?

Before working with text, you need to ensure that search engines are receiving the correct version of the site and that the required documents are available for indexing. An error at this stage can affect the entire project, so it's best to follow the basic settings checklist.
The process is simple: check indexing, select the primary domain version, standardize the URL format, and address technical duplicates. After that, you can connect Google Search Console and move on to the page structure.
The initial setup diagram looks like this:
Indexing → HTTPS → Main Domain → Friendly URLs → Duplicates → Sitemap → Search Console
This order helps to first fix the site's global problems, and then work on specific landing pages.
Open the site for indexing
WordPress has a search engine visibility setting. It's located under Settings → Reading → Search Engine Visibility. On a test site, developers often disable indexing to prevent temporary pages from appearing in search results before the launch.
This setting should be verified before publishing the project. If the ban remains active after the site is moved to the main domain, the search engine may be instructed not to index the pages, and the site owner will look for problems in the content or links.
A single admin setting isn't enough for complete control. Additionally, they look at meta robots, HTTP headers, robots.txt, and the actual page response to the search engine crawler.
It's the indexable URLs that need checking. Service pages, internal search, some filters, and technical sections may require separate rules depending on the project architecture.
Set up HTTPS and the primary domain version
The website must reliably open over HTTPS. Old HTTP addresses are redirected to the corresponding HTTPS pages using a permanent 301 redirect to prevent search engines and users from seeing multiple versions of the same document.
The same rule applies to both www and non-www versions. Choose one primary option and configure a redirect from the second. Internal links, canonicals, and sitemaps should then contain the primary URLs.
When a single document is accessible via multiple URLs simultaneously, duplicates occur. Search engines typically try to choose the primary URL themselves, but it's better to establish consistent rules at the site level.
After setting it up, it's worth opening a few pages manually and examining the redirect chain. Ideally, the alternative address immediately redirects the user to the final URL without two or three intermediate steps.
Set up WordPress permalinks
The Settings → Permalinks section controls the format of page and post URLs. For most projects, short URLs are suitable, as they allow you to understand the topic of the document without viewing the text itself.
An address like site.com/seo-wordpress/ is easier to read than site.com/?p=152. Short URLs are easier to use in internal links, external publications, and analytics reports.
It's best to choose a permalink structure before actively filling the site with content. Changing already indexed URLs will require 301 redirects from the old URLs to the new ones.
There's no need to repeat the entire H1 tag or include a bunch of keywords in the URL. The slug should be short, clear, and resilient to future changes to the page text.
If the site is multilingual, it's best to define URL generation rules separately for each language version. The slug itself should be translated if the project architecture allows for localized URLs.
Remove technical duplicates
WordPress can create multiple paths to similar content through categories, tags, author archives, date archives, and other system pages. Not every such URL poses an SEO problem, but uncontrolled indexing quickly increases the number of weak documents.
First, you need to determine which pages are valuable in their own right. A category with unique content, products, or articles may rank, but an empty author's archive on a corporate website often has no use in the index.
URLs with parameters, attachment pages, internal search, and technical pagination are checked separately. The solution depends on the type of site and its content, so it's impossible to universally close all archives or all paginated pages.
For duplicates of the main document, use the correct canonical or redirect if the alternative URL is not needed by users at all. For widespread issues, it's better to correct rules at the template or server level rather than manually for each page.
Lead SEO specialist — Gennady
When setting up WordPress for SEO, I first check that Google can crawl and index the site properly: the main domain version, robots, sitemap, canonical, URLs, and structure. After that, I move on to meta tags and content. An SEO plugin speeds up the process, but poor architecture and technical duplications have to be fixed separately.
How to set up a WordPress SEO plugin?
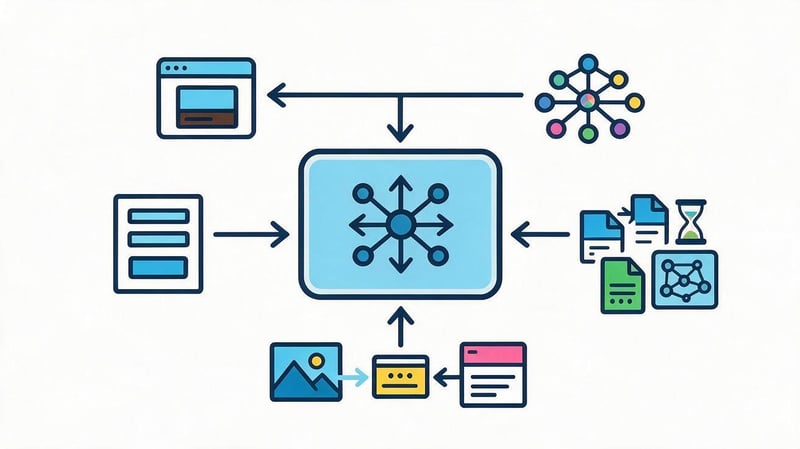
After a basic check, you can move on to the SEO plugin. Its purpose is to provide the website owner with convenient access to settings that are difficult or inconvenient to change through the standard WordPress admin panel.
For most projects, a single, fully functional extension is sufficient. Before setting it up, check what features are already added by the theme, a previous plugin, or the developers' own code.
Particular attention is paid to indexed page types, meta tag templates, canonical, and sitemap. These parameters affect large groups of URLs at once, so an error in one switcher can spread to the entire section.
Yoast SEO or Rank Math – Which One to Choose?
Yoast SEO and Rank Math cover basic WordPress SEO tasks. Both solutions support meta tags, index management, sitemaps, and additional settings for individual pages.
The choice depends on the current project, the feature set, and the interface the team is most comfortable with. For one site, simple Title and Description management may be enough, while another will require redirects, an extended Schema, and additional indexing rules.
Changing an already configured plugin just for a different interface usually doesn't make sense. First, it's worth checking which features are actually used and what will need to be migrated.
For SEO, proper configuration is more important than the extension's name. One carefully configured plugin is safer than several solutions that simultaneously attempt to manage the same page elements.
What settings should I configure after installation?
After activation, you need to enter your site details and check the rules for the main content types. Typically, posts, pages, categories, products, and other entities created by the theme or installed plugin are configured separately.
For each type, you need to determine whether it needs to be indexed and included in the sitemap. Then, configure Title templates, Description rules, canonical, breadcrumbs, and available structured data types.
Check categories and archives separately. On one project, they might be full-fledged landing pages with search engine demand, while on another, they create dozens of nearly empty URLs.
After bulk settings, open the source code of several different pages. They should contain the expected Title, Description, Canonical, and Meta robots tags, with no duplicates or conflicting values.
Why can't I use two SEO plugins at the same time?
Two active SEO plugins can simultaneously output identical HTML elements. This can result in two canonical URLs, multiple sets of meta tags, or different robots rules for a single page in the source code.
The conflict may not be immediately apparent. In the admin panel, each plugin displays its own fields, but the problem is only discovered by viewing the HTML or performing a technical scan of the site.
A separate situation arises with sitemap and Schema.org. The two extensions can create different sitemaps and two sets of structured data that describe the same document differently.
Before changing a plugin, it's best to first prepare the settings migration, disable the old solution, and only then activate the new one. After migration, check your priority URLs to ensure meta tags, canonical tags, and indexing rules are preserved.
How to connect Google Search Console to WordPress?
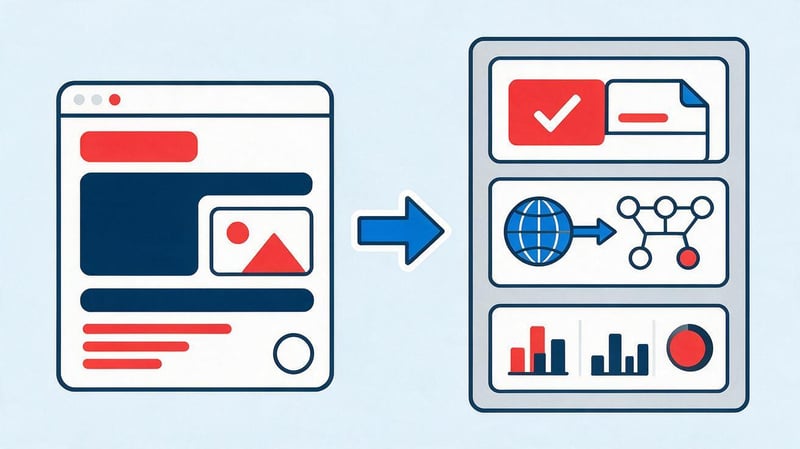
Google console WordPress and search console WordPress queries typically appear immediately after a website launches. Search Console helps you see how Google discovers pages, which queries the site is shown for, and which URLs it considers indexable.
The service is also useful after the initial setup is complete. Its data can be used to identify pages with declining clicks, new queries, indexing issues, and changes in Core Web Vitals metrics.
It's best to enable Search Console immediately after opening your project to search engines. This way, the first data will begin to be collected even before you actively publish content.
Adding a site to Google Search Console
In Search Console, you can add a property at the domain level or for a specific URL prefix. The Domain option covers various protocols and subdomains of the specified domain, making it convenient for overall project management.
A URL prefix is suitable when you need to track a specific version of a URL. For example, you can add only https://example.com/ if you analyze other subdomains separately.
After creating a property, you need to verify ownership. The verification method depends on the selected property type and the site owner's access to DNS, files, or HTML code.
For SEO, it's better to have access to the entire project's data, not just a randomly added URL version. This makes it easier to spot old HTTP pages, test subdomains, and other URLs that Google continues to crawl.
How to verify a WordPress site?
A DNS record is typically used for Domain Property. The record suggested by Google is created in the domain control panel, after which Search Console checks for the specified value.
Other verification options may be available for the URL-prefix property. These include an HTML file, a special meta tag, and verification via linked services, if the account and permissions are suitable for the selected method.
A WordPress plugin can sometimes simplify adding a meta tag, but installing a separate extension just for verification is usually not necessary. The code can be added through an existing SEO system or template if the team understands where the setting is stored.
Once verified, do not delete the record you're using without cause. If the verification method is removed, Search Console may lose the ability to verify ownership in the future.
How to add a Sitemap in Search Console?
First, determine the current XML sitemap address. WordPress may use a built-in sitemap or a sitemap created by an SEO plugin, so before adding it, you should open the URL and make sure it works.
In Search Console, open the Sitemaps section and enter the sitemap URL. Google retrieves the URL of the existing sitemap and uses it as an additional source for page discovery.
The sitemap should include canonical, indexable URLs. Pages closed via noindex, technical duplicates, and unnecessary archives should not be intentionally left in the sitemap.
After submitting, check the processing status and the number of pages found. If the sitemap contains thousands of URLs, and a significant portion of them shouldn't be indexed, the issue should be addressed in the sitemap generation settings.
Which Search Console reports should I use after setup?
The Performance report displays queries, pages, clicks, impressions, CTR, and average position. This data is useful for identifying pages that are already receiving impressions but require snippet or content improvements.
URL Inspection is used to check a specific URL. The tool displays the version of the page known to Google, indexing data, and the ability to request a recrawl after significant changes.
Page Indexing helps you see groups of excluded or problematic URLs. Sitemaps shows sitemap processing, and Core Web Vitals helps you track groups of pages with user experience issues.
Crawl Stats is useful for technical analysis of large projects. It allows you to see Googlebot activity, server response types, and changes in site crawl intensity.
How to properly build a WordPress website structure?
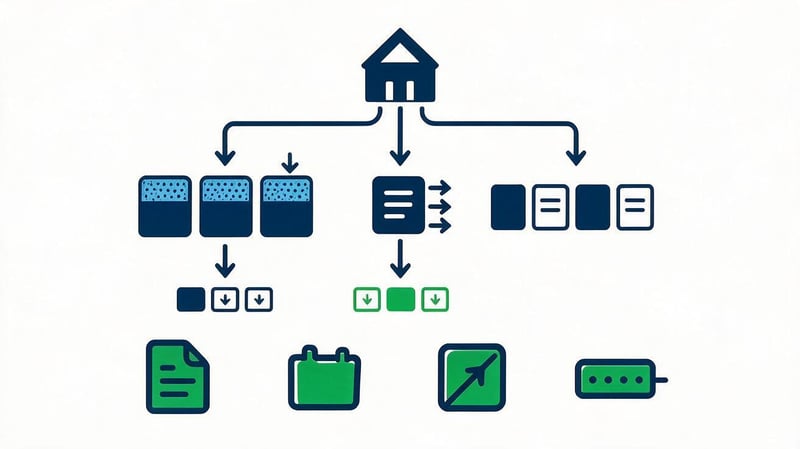
A WordPress website's structure impacts user navigation, internal linking, and understanding of thematic connections between pages. It's best to design it before mass document creation.
On a small corporate website, the structure might consist of services, industries, a blog, and contacts. An online store also requires categories, subcategories, product cards, and a well-thought-out filtering system.
When designing, we focus on search demand and the visitor's actual tasks. Each major cluster of queries should have a corresponding page if it has its own intent.
Build the structure before creating pages
Start at the top level of the website and gradually expand the architecture. A typical layout looks like this: Home → Section → Subsection → Final Page, but the specific number of levels depends on the scale of the project.
For a blog, the logic might be simpler: Blog → Category → Article. If you only have a few posts, there's no need to create dozens of empty categories for the sake of a neat structure.
Before development, it's helpful to create a spreadsheet with future URLs, page purposes, and target clusters. This way, you can spot duplicate intents in advance and decide where a separate landing page is needed.
Once the structure is approved, it becomes the basis for menus, breadcrumbs, sitemaps, and internal linking. The architecture can be modified later, but mass migration of already indexed URLs will require additional technical work.
How to use categories and tags?
Categories are suitable for stable thematic groups. For example, an SEO agency's blog might have sections on technical SEO, content, analytics, and link building, as long as each group contains sufficient content.
Tags work as an additional way to group posts together, but in practice, they're often created without a system. This results in pages containing a single article or several nearly identical sets of materials.
Before creating a new tag, ask yourself a simple question: will it have a useful page for the user and enough content for a separate collection? If the answer is no, the tag is usually unnecessary.
Categories and tags should be indexed selectively. A strong category with a unique purpose can attract search traffic, while hundreds of weak archives increase the number of low-value URLs.
Customize your menu and breadcrumbs
The main menu should lead to key sections and help users quickly understand the site's structure. Don't try to include every piece of content there, especially if the project contains hundreds of pages.
Breadcrumbs show the current document's position within the structure. For the user, this provides additional navigation, and for search engines, it's another signal about the relationship between sections.
On an article page, the chain might look like this: Home → Blog → WordPress → SEO on WordPress. For an online store, product categories and subcategories are typically used.
It's best to generate breadcrumbs consistently in a template. Manually adding the chain to each text increases the risk of errors and complicates subsequent changes to the structure.
What should be the page depth?
Depth indicates how many clicks are required from the website's starting point to a specific URL. Important commercial and informational pages should ideally be linked to the main sections so that users can find them without a long click path.
There's no hard and fast number for each project. A large catalog naturally has deeper levels than a twenty-page website.
The problem arises when an important URL exists in the sitemap but is almost never linked internally. Such a page receives fewer internal signals and is less well-integrated into the overall architecture.
For monitoring, it's useful to crawl the site and look at URL depth, the number of incoming internal links, and orphaned pages. Priority documents are then linked to categories, menus, blog posts, or other relevant sections.
How to create a semantic core for a WordPress website?

The question of how to create a WordPress semantic core is no longer related to CMS settings, but to page and content planning. A WordPress website's semantic core contains search queries that are then distributed among existing and future URLs.
It's best to start collecting keywords after identifying services, products, and key information areas. Otherwise, you'll end up with a long list of queries without any understanding of which page should answer each one.
Working with semantics consists of four stages: identifying page types, collecting queries, clustering them, and assigning them to URLs. This approach reduces the risk of cannibalization and helps plan content months in advance.
First, define the page types
A website can have commercial, informational, navigational, or mixed pages. The homepage typically represents the brand and its overall focus, services address commercial needs, and a blog addresses user questions and information needs.
The online store additionally uses categories, subcategories, filters, and product cards. Each type requires its own approach to semantics and meta tag templates.
Before collecting queries, compile a list of existing page types. This will make it clearer which clusters already have a suitable URL and which will require a new document.
There's no need to create a separate landing page for each search query. Several related keywords often relate to the same intent and are easily addressed on a single page.
Collect search queries
Sources of semantic data can include Google Search Console, Google Keyword Planner, Ahrefs, Semrush, Serpstat, and other services. For an active website, real queries for which pages are already receiving impressions are especially valuable.
The keywords, clarifying queries, questions, and related phrases should be collected. The list is then purged of irrelevant topics, third-party brands, and queries that the site can't adequately address.
For local businesses, geography is a separate consideration. For online stores, product categories, characteristics, brands, and commercial modifiers are important.
At this stage, don't evaluate a query solely by search volume. A low-volume keyword can attract a user with very specific intent and convert well.
Cluster queries
Clustering combines phrases that can be promoted on a single page. The primary guideline is the intent and composition of search results, while search volume helps determine priority within the group.
For example, the queries “how to set up WordPress SEO” and “wordpress seo how to set up” lead users to the same task. There's no point in creating two nearly identical articles for them.
If the results for two queries differ significantly, it's best to separate them. A commercial service, a manual, and a plugin review may contain common keywords but address different user expectations.
After clustering, a working map of topics is obtained. This can be transferred to the content plan and used when preparing technical specifications for copywriters.
Distribute semantics across URLs
A target URL is assigned to each cluster. If a suitable page already exists, it is modified; if the required document does not exist, it is added to the structure.
The table is convenient for storing the main query, additional phrases, intent type, URL, Title, H1, and page status. For larger projects, add priority, traffic, position, and last update date.
Each cluster should have a clear primary page. If two URLs are promoted for nearly identical search queries, there is a risk of cannibalization.
Once the semantics are distributed, it becomes easier to plan internal links. An informational article can link to a commercial page, and categories can convey internal weight to key child documents.
How to add keywords in WordPress?

Queries on how to add keywords to WordPress, how to add keywords to a WordPress site, and how to enter keywords in WordPress often arise due to old instructions, where SEO was reduced to filling out a separate keywords field.
In modern SEO, semantics are distributed among the elements of the page itself. The primary query helps formulate the topic of the document, while related phrases address additional user questions.
There's no need to add each keyword to a separate field in WordPress. It's much more important to use queries correctly in your text structure, meta tags, URLs, and internal linking.
Where to add keywords?
The primary keyword typically appears in the Title, H1, and the first content blocks of the page. Additional keywords are distributed across H2, H3, and the body text where relevant to the section's content.
The keyword can be present in the slug if the short URL remains clear. For images, use an alt attribute that describes the specific image rather than repeating the query just to include it.
Use meaningful anchors for internal links. The phrase should suggest what the user will see after clicking the link, so an anchor like “WordPress SEO setup” is more useful than something more abstract like “read here”.
There's no need to try to cram the entire semantic list into the first screen. The text reads more naturally when each query appears in the section that addresses the relevant question.
Do I need to fill in meta keywords?
Google doesn't use the meta keywords field as an indexing or ranking factor. Therefore, there's no point in looking for a separate plugin just to add a list of queries.
Old WordPress instructions sometimes recommend opening an SEO plugin and entering keywords separated by commas. This approach is a holdover from an earlier era of search engine optimization and is no longer a solution for SEO.
Semantics are best used in visible and meaningful page elements. These primarily include the Title, H1–H3, body text, URLs, image alt text, and internal link anchors.
If the installed plugin still displays the additional field for the focus query, it can be used for internal text analysis. Filling in such a field does not mean that the search engine has received a separate ranking signal.
How many times to use keywords?
There's no universal rule like “the main keyword should take up three percent of the text”. Density depends on the topic, length of the material, grammar, and the number of natural wording variations.
The primary keyword should be used where it helps clearly define the topic. Additional keywords are best distributed among semantic sections, avoiding repeating the same phrase in every paragraph.
Word forms, synonyms, and topic-specific vocabulary make the text more natural. For example, phrases like “loading speed”, “caching”, “Core Web Vitals”, and “image optimization” naturally appear next to “how to speed up a WordPress website”.
If keyword repetition becomes noticeable during normal reading, the frequency should be reduced. Page SEO should support the content, not turn it into a jumble of identical phrases.
How to optimize Title, Description and headings?
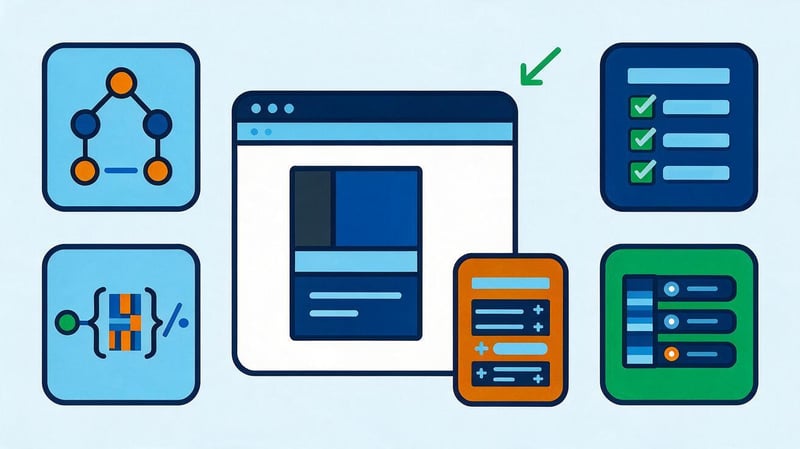
Title, Description, and H1 help describe the page's content to users and search engines. They are best written after the main query cluster has been identified and the document's intent is clear.
It's advisable to prepare custom values for each indexed page. Mass templates are suitable for large catalogs, but high-priority commercial and informational URLs usually require manual modification.
Meta tags should be checked alongside the actual content. If the title promises a detailed guide, but the page contains three short paragraphs, a good title alone won't solve the problem.
Title
The title appears in the HTML document and is often used by search engines when generating snippets. It's best to place the main topic of the page closer to the beginning if it reads naturally.
For an article about WordPress, you can use the “WordPress SEO: How to Set Up Website Optimization Step by Step” option. It immediately makes the topic and format of the material clear.
There's no need to list all the semantic core queries separately, separated by commas. This makes the title difficult to read and rarely helps better explain the page's content.
On large sites, check Title tags for uniqueness en masse. Identical templates across dozens of categories often appear after importing or improperly configuring an SEO plugin.
Description
The description briefly describes the page and helps create an attractive snippet. It can naturally use the main query and a few related words, as long as they fit into a reasonable sentence.
The description should convey specific content. For a WordPress tutorial, it's logical to mention indexing, Search Console, semantics, meta tags, speed, and interlinking.
There's no need to repeat the entire title. It's better to add details that help the user understand what's inside the content.
Google may generate a different fragment of text if it better suits a specific query. Therefore, the description should be considered a prepared description of the page, while the document's content remains the primary source of information.
H1–H6
H1 sets the main topic of the page, while H2–H6 establish the content hierarchy. In practice, it's more convenient to use one main H1 and break the content into successive semantic levels.
H2s are suitable for major sections, H3s for subsections within them, and H4s for more specific topics. This order makes a long article easier to read and helps generate an automatic table of contents.
Font size shouldn't determine heading level. Visual design is controlled via CSS, and H1–H6 describe the document's structure.
Before publishing a long article, it's helpful to review the list of headings separately from the text. If they help you understand the flow of the article, the structure is correct.
How to create an SEO-optimized article in WordPress?
A good article starts with the user's goal, not the number of keywords. First, the intent is determined, then the H2-H4 structure is built, and only then is the semantics distributed among the predefined semantic blocks.
For WordPress, it's convenient to prepare an article template in advance: H1, short introduction, table of contents, main sections, images, tables, internal links, and FAQ. This template speeds up the editorial process, but the actual structure of each article should depend on the topic.
Long text should be formatted so that readers can quickly find the section they need. A table of contents, clear headings, lists, and tables help with this.
How to create a table of contents for an article in WordPress?
The query “how to create a table of contents for an article in WordPress” refers to a table of contents with anchor links. For long instructions, this block helps users jump straight to the desired section.
The table of contents is typically built from H2 and H3 headings. Each item leads to the corresponding section of the page via an anchor link, so headings should be clear and self-contained.
The table of contents can be generated using a theme, editor, or a separate plugin. The choice of method depends on the site's current stack, so installing an additional extension unless absolutely necessary is not recommended.
After adding the table of contents, check the anchors on the mobile version. The link should take the user to the desired heading and not be obscured by the fixed menu.
How to format text correctly?
Long paragraphs are difficult to read on a phone, so it's best to break a long thought into several connected chunks. Each chunk should address a specific issue, and the title should accurately describe its content.
Lists are well suited for sequences and comparisons. For example, basic article optimization involves several repetitive steps:
- determine the search intent and the main cluster of queries;
- prepare H1 and H2–H4 structure before writing the text;
- to address user questions without artificially increasing the volume;
- add tables, examples and images where they help to understand the material;
- Link the article internally to other relevant pages.
After the list, the text should continue the flow of the thought rather than break off. In the finished material, it's worth checking for sections that consist solely of a list without explanation.
Tables are especially useful for checklists and comparisons. They help compactly present data that would take up significantly more space in regular paragraphs.
How to optimize images?
Large images are often one of the causes of slow page loading. Before uploading, the file should be scaled to the actual block size and compressed without noticeable loss of quality.
For photographs and illustrations, you can use modern formats such as WebP or AVIF. In HTML, it's recommended to specify the width and height so the browser reserves space in advance and reduces the risk of elements shifting.
Lazy loading is suitable for images below the fold. The main visual element above the fold is loaded with consideration for its impact on the LCP.
The alt attribute should describe the image's content. If the screenshot shows the WordPress permalinks section, such a description is more useful than repeating a commercial keyword that has no connection to the image.
How to speed up a WordPress website?

Queries like “how to speed up a WordPress website” and “how to speed up a site on wordpress” usually arise after checking PageSpeed Insights or noticing a noticeable slowdown. The cause is rarely limited to a single setting.
Speed depends on the theme, server, images, JavaScript, CSS, third-party widgets, database, and installed extensions. Therefore, it's best to start with measurements and then fix the most demanding elements.
SEO optimization of a WordPress template is also related to speed. The theme determines a significant portion of the HTML, styles, and scripts that load on every page.
Check your WordPress theme
Some themes include dozens of components that are used on only a few pages but are loaded throughout the entire site. This increases the CSS and JavaScript load and complicates rendering.
When choosing a template, consider responsiveness, HTML markup quality, number of dependencies, and developer support. A beautiful demo template may prove cumbersome once you add actual content.
If the site is already live, changing the theme without analysis is risky. First, you need to determine what issues the current implementation is creating and whether they can be addressed selectively.
Additionally, H1, breadcrumbs, canonical, and other elements that the theme automatically displays are checked. A template error applies to all pages of the corresponding type.
Set up caching
Caching reduces the number of operations the server performs each time a page is opened. For WordPress, this is especially useful for projects with dynamic HTML generation and numerous database requests.
The specific solution depends on the server. Some projects use LiteSpeed Cache, while others use WP Rocket, a server-side page cache, or a custom configuration.
After enabling the cache, you should check your forms, shopping cart, personal account, and other dynamic elements. Incorrect rules may display outdated or inappropriate data to the user.
Clear the cache after making changes to the template, styles, and some SEO settings. Otherwise, the team may see an old version of the page and mistakenly assume the edit didn't work.
Optimize images
Start with the largest files and images on the first screen. There's no point in uploading a 4000-pixel-wide photo to a block that takes up less than half the screen on a desktop.
Automatic generation of multiple sizes helps WordPress deliver the appropriate version for a specific device. You can also configure WebP or AVIF and intelligent compression.
Images below the fold are usually lazy loaded. For the page's main image, carefully check the loading priority, as excessive lazy loading can degrade LCP.
After optimization, measure the actual results. Reducing file size is beneficial, but overall performance may continue to suffer due to scripts, fonts, or slow server response.
Remove unnecessary plugins

The number of plugins alone doesn't determine website speed. One poorly written module can create more load than ten small extensions with simple logic.
First, you need to figure out which plugins are actually performing tasks. It's best to remove unused extensions, especially if they include CSS, JavaScript, or perform background requests.
Active plugins are analyzed for their impact on response time, database queries, and the frontend. For complex functionality, it's sometimes more cost-effective to find a different solution or move some of the logic into the project's codebase.
Before deleting, check dependencies. Some extensions are used in forms, imports, redirects, or other processes that aren't visible on a regular page.
Use CDN when necessary
A CDN stores static files on distributed nodes and can reduce latency for users in different regions. This solution is especially useful for international projects and image-heavy websites.
Cloudflare and other services also offer caching, protection, and network optimizations. These settings should be aligned with your server configuration to avoid double caching and unexpected conflicts.
For a local website with fast infrastructure, a CDN won't always provide a noticeable boost. First, measure the server response, resource size, and audience geography.
Once connected, check your images, CSS, JavaScript, forms, and cache updates. Old versions of static files on the CDN may prevent the latest changes from being properly verified.
Check Core Web Vitals
Core Web Vitals help evaluate the actual user experience of loading and interacting with a page. The key metrics are LCP, INP, and CLS.
LCP is related to the rendering speed of a large content element. INP reflects the responsiveness of the interface during interaction, and CLS indicates unwanted shifts in elements during loading.
For diagnostics, we use PageSpeed Insights, the Core Web Vitals report in Search Console, and browser developer tools. Lab tests are useful for identifying root causes, while field data reflects the experiences of real users.
Specific causes should be addressed: a large image, blocking JavaScript, a slow server, or an element without defined dimensions. Simply installing yet another “acceleration plugin” without proper diagnostics often creates additional conflicts.
How to set up internal linking in WordPress?

Internal linking connects website pages and helps users navigate between content. For search engines, links indicate the structure and relative importance of documents.
WordPress makes it easy to add links through the editor, but the mere presence of this feature doesn't create a good structure. Interlinking needs to be planned in conjunction with the semantic core and architecture.
New pages require special attention. If a URL is only added to the sitemap and isn't linked to the rest of the site, it's harder to discover through a regular link crawl.
From which pages should internal links be placed?
Link related documents. An article about setting up Search Console could link to a detailed article about indexing, and an informational guide could link to a relevant SEO audit service.
Categories pass internal links to child pages, and strong blog content can support commercial landing pages. This approach creates clear thematic connections.
It's useful to analyze URLs with a small number of incoming internal links. If an important page receives a single click from deep within the blog, it may require additional links to a section or other content.
There's no need to mechanically insert ten links from every text. A link should help the user continue reading or solve the next problem.
What anchors should I use?
The anchor text describes the destination page. The phrase “technical SEO audit” provides more context than a “learn more” link if the user navigates to the relevant service page.
However, the same precise commercial anchor text doesn't need to be repeated in all materials. A healthy internal link profile contains natural word forms and varied wording.
Branded and anchorless links can also be appropriate if they fit the sentence. The main goal is to maintain clear language and a logical connection between the two pages.
After extensive cross-linking, it's helpful to scan your site. This will reveal broken links, redirects, nofollow on internal URLs, and pages with insufficient incoming links.
What other technical SEO settings does WordPress need?
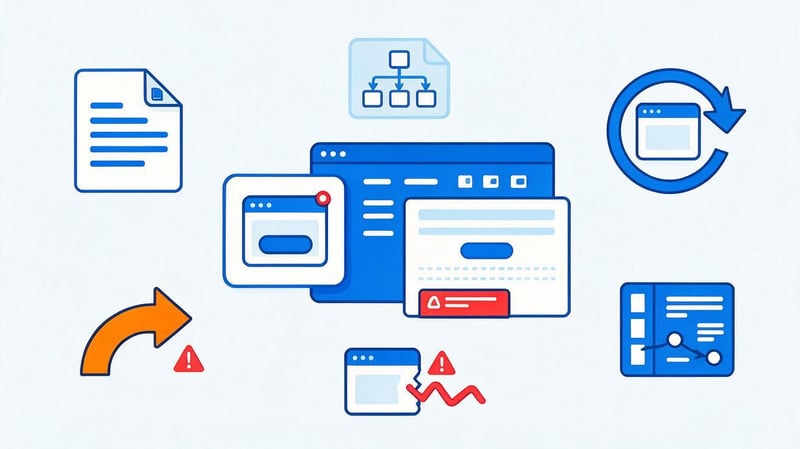
After the basic setup, the remaining elements are those most often checked during a technical SEO audit. These include sitemap, robots.txt, meta robots, canonical, Schema.org, 404, and redirects.
These settings should be considered together. For example, a URL should not be listed in the sitemap as indexable and set to “noindex” at the same time unless there is a clear technical reason for this combination.
On a small website, you can perform a manual check on several templates. For a larger project, it's more convenient to use an SEO crawler and analyze groups of pages based on common characteristics.
XML Sitemap
An XML sitemap contains the URLs a website offers search engines to crawl. It's recommended to include canonical pages intended for indexing in the sitemap.
WordPress can create a basic sitemap, but many SEO plugins generate their own sitemap structure. You should use one that's current and complies with the project's guidelines.
If a page is closed via noindex, leaving it in the sitemap without a good reason is not a good idea. This signal complicates diagnostics and creates unnecessary inconsistencies.
For large projects, the sitemap is split into multiple files by page type. This simplifies monitoring categories, products, articles, and other URL groups through Search Console.
robots.txt and meta robots
Robots.txt controls search engine bot access to specific website paths. Meta robots is defined at the page level and can pass instructions such as index, noindex, follow, or nofollow.
These mechanisms solve different problems. A robot may not be able to read a URL blocked by Disallow, so using robots.txt as a complete replacement for noindex is incorrect.
WordPress service sections are sometimes blocked from crawling, but the rules must take into account the actual site architecture. Accidentally blocking an important directory can prevent a large number of pages from being crawled normally.
After changing robots.txt, check critical paths and resources. The search robot must receive the CSS and JavaScript required to correctly render indexed pages.
Canonical
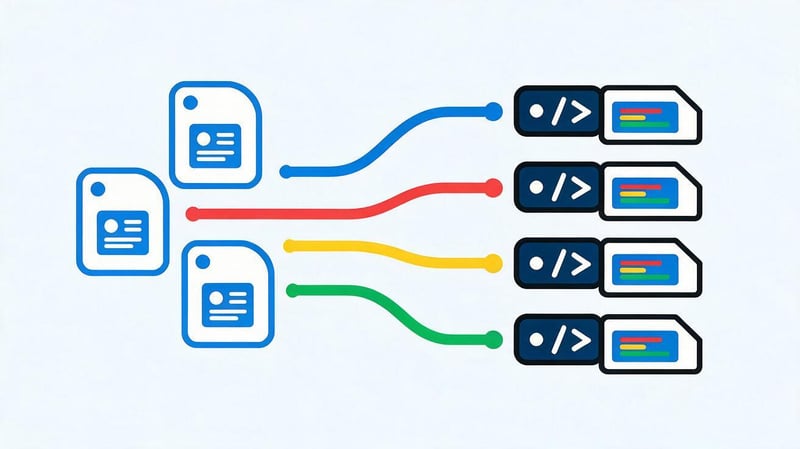
Canonical specifies the preferred URL for a document when the same or very similar content is available at multiple addresses. For a typical, unique page, self-canonical is most often used.
In WordPress, issues arise due to parameters, archives, filters, and alternative paths to the same content. A proper canonical helps direct these signals to the main URL.
A tag doesn't replace a redirect if the user doesn't need the alternative page at all. In this situation, a permanent 301 redirect usually solves the problem more directly.
Canonicals should be checked in the source HTML and during mass crawling. A template error can send hundreds of pages to a single foreign URL and seriously disrupt indexing.
Schema.org
Structured data helps search engines more accurately understand the entity type and content of a page. In WordPress, some markup can be added by a theme, SEO plugin, or a separate module.
For a company website, you can use Organization or a suitable LocalBusiness, for an article, Article or BlogPosting, and for navigation, BreadcrumbList. Product is used on actual product pages with actual data.
The markup must match the visible content. You cannot add fictitious ratings, reviews, prices, or other data just for the sake of enhanced display.
After implementing JSON-LD, validation and the absence of duplicates are checked. If the theme and plugin simultaneously describe the same entity with different values, it's best to align the markup with a unified logic.
404 and redirects
A deleted page without a suitable replacement may return a 404 or 410. Redirecting every old URL to the home page is not recommended, as such a redirect does not preserve the meaning of the original document.
If there's a closely related new page, use a 301 redirect. For example, after merging two pieces of content, the old URL can be redirected to the updated shared article.
Redirects are also necessary after changing the slug or permalink structure. For mass redirects, a “old URL → new URL” map is created in advance.
Periodically check internal links for 404 errors and redirects. Within your site, it's best to link directly to the final URL without any intermediate steps.
How to promote a WordPress website after basic setup?

The question of how to promote a WordPress website concerns ongoing promotion. After the technical setup, the site needs to be developed: expand the structure, publish content, improve existing pages, and gain relevant external mentions.
The logic is the same for a blog. Queries like “how to promote a WordPress blog” and “how to promote a blog on WordPress” are answered by regularly working on semantics, content quality, and internal links between posts.
SEO doesn't end with enabling the plugin and Search Console. Search demand changes, competitors update their pages, and your own website gradually accumulates data that helps you make more accurate decisions.
Develop semantics and structure
New pages should be created based on actual demand and unmet intent. If the semantic core has been compiled in advance, the content plan can be built around priority clusters.
For an existing website, Search Console becomes a source of new topics. Queries with impressions that don't fully match the current page sometimes indicate the need for a separate piece.
Before creating a URL, check to see if there's already a page with a similar purpose. Otherwise, you could end up with two documents competing for the same keywords.
The structure needs to be developed systematically. A new section should be linked to menus, categories, breadcrumbs, and internal links if it truly occupies a distinct place in the architecture.
Update existing materials regularly
Old articles can retain good rankings for years if the information remains relevant. Technical instructions require more frequent updates because the interfaces of WordPress, plugins, and third-party services change.
When updating, check the facts, screenshots, internal links, meta tags, and structure. Sometimes adding a few new sections is enough, while other times it's best to completely rework the material.
Search Console helps you identify pages where impressions or clicks are declining. Comparing periods shows which queries have lost visibility and which topics have appeared in search results.
Don't change the URL of a good article unless necessary. If the address is already receiving links and organic traffic, the content can be updated on the existing page.
Develop external links and mentions
External links help search engines find pages and evaluate their connections to other resources. For a commercial project, thematic and editorial mentions are more beneficial than mass links from unrelated sites.
Sources may include industry articles, expert commentary, research, PR publications, and partner materials. The link must be consistent with the site's content and lead to a relevant page.
Don't rely solely on precise commercial anchors for your link strategy. Branded anchors, URL anchors, and natural wording add variety to your profile.
For local and niche projects, the quality of the donor is often more important than the overall number of links. The topic, actual traffic, region, and trustworthiness of the platform should be assessed together.
Analyze Search Console data
Once the data is collected, Search Console becomes one of the main sources of SEO insights. The Performance report shows which pages receive clicks and for which queries they appear in search results.
High impressions with a low CTR may indicate a weak snippet or a mismatch with the intent. Positions near the first page can sometimes provide significant growth potential after content refinement and internal linking.
Compare similar periods and take seasonality into account. A drop in demand for a seasonal theme shouldn't be automatically interpreted as a technical issue on the site.
Pay close attention to pages that have begun ranking for new queries. This growth often suggests which sections should be expanded and what semantics should be added to the content plan.
WordPress SEO Checklist

After all the work, the website should have a clear technical foundation and structure. A checklist helps quickly go over the key elements before launching or after migrating the project.
| What to set up | Expected result |
|---|---|
| Indexing | The required pages are available to search robots |
| HTTPS | All main URLs are opened using a secure protocol. |
| Primary domain | www or non-www version is chosen uniformly |
| Permalinks | Clear human-readable URLs without random parameters |
| SEO plugin | One main plugin is active, no conflicts |
| Search Console | The site has been confirmed and data is being collected. |
| XML Sitemap | Canonical indexable URLs are included in the sitemap. |
| Semantic core | Queries are clustered and distributed across pages |
| Title and Description | Main pages have their own meta tags |
| H1–H6 | Headings reflect the logical structure of the content |
| Interlinking | Important URLs receive relevant internal links |
| Images | Compressed, have correct dimensions and alt |
| Speed | LCP, INP, CLS and root causes of problems are checked |
| Canonical | The main URLs are specified without conflicting values. |
| Schema.org | The markup matches the actual content |
| 404 and redirects | Old URLs are processed according to clear rules |
The implementation order can be conveniently represented as a sequential schedule:
| SEO setup stage | Share of work | What's included |
|---|---|---|
| Indexing | 15% | meta robots, sitemap, canonical, page accessibility for Google |
| Site structure | 14% | categories, nesting levels, URLs, menus, breadcrumbs |
| Semantic core | 12% | collection, clustering and distribution of queries across pages |
| On-page SEO | 14% | Title, Description, H1–H3, URL, Images, and Page Optimization |
| Website speed | 10% | Core Web Vitals, Caching, Images, CSS, and JavaScript |
| Internal linking | 10% | Page links, anchors, URL depth, and orphan pages |
| Content | 12% | creation and updating of texts for search intent |
| Analytics | 6% | Search Console, positions, clicks, impressions, CTR, and indexation control |
| Link development | 7% | thematic publications, PR, expert mentions and external links |
| Total | 100% |
The percentages show the approximate distribution of work required for basic SEO setup and further development of a WordPress website. The ratio varies for each specific project: for example, a technically challenged site will require more work on indexing and speed, while a new information project will require more work on semantics and content.
How long does it take to set up WordPress SEO?
A basic website with a few dozen pages can be put in order significantly faster than a large online store. The time frame depends on the number of URLs, theme quality, number of plugins, and any ongoing technical issues.
It's important to distinguish between setting up and seeing results from promotion. Meta tags or sitemaps can be changed immediately, but search engines will need time to re-crawl and process the pages.
Organic traffic growth also depends on competition, content quality, external links, and domain history. Therefore, the same set of tasks can yield different results on different projects.
It's easier to set up WordPress SEO in a step-by-step manner. First, you need to open the correct pages for indexing, align the domain and URLs, remove duplicates, and set up a sitemap. Then, you need to integrate Search Console, the semantic core, meta tags, content, and internal linking.
After the basic setup, work continues: pages are updated, speed is monitored using Core Web Vitals, semantics are expanded using Search Console data, and the structure is supplemented with new sections only if there is a separate search intent.
If your WordPress site is already up and running and you need to understand what's hindering its growth, start with a technical SEO audit. Seo-Gen will check indexing, structure, duplicates, meta tags, interlinking, speed, and semantics, and then create a specific list of edits for the developer and content team.


