How to add a website to Google Search Console?


After launching a new project, the owner typically needs to complete two related tasks: add the site to Google Search Console and ensure the search engine can find its pages. No separate paid registration is required for this, and the Search Console service itself is available to site owners free of charge.
Enabling Search Console doesn't guarantee that all URLs will be immediately indexed by Google. The service helps you verify website ownership, submit a sitemap, check individual pages, see crawl errors, and monitor how Google works with the site. Therefore, it's best to configure access and technical aspects first and then check indexing.
The general order of work looks like this:
The site is published → added to Google Search Console → verified ownership → submitted sitemap.xml → checked important URLs → monitored indexing.
Below, we'll look at each step separately, including situations where a site has already been added to Google, but individual pages are still missing from search results.
Do I need to add my website to Google manually?
Google can discover new websites automatically, so there's no separate, mandatory website registration with Google. The Googlebot crawler follows links, discovers new URLs, scans available content, and decides which pages should be indexed.
It's also helpful for website owners to add the site to Google Search Console immediately after launch. This way, they can see whether Google has found the pages, which URLs are indexed, where errors occurred, and which canonical URLs the search engine has selected. For a new project, this is much more informative than constantly searching for pages manually.
Queries like “add a website to Google for free” or “register a website with Google for free” usually refer to connecting to Search Console and submitting pages for indexing. There's no need to pay Google to add a regular website to organic search.
How to check if a website is on Google?
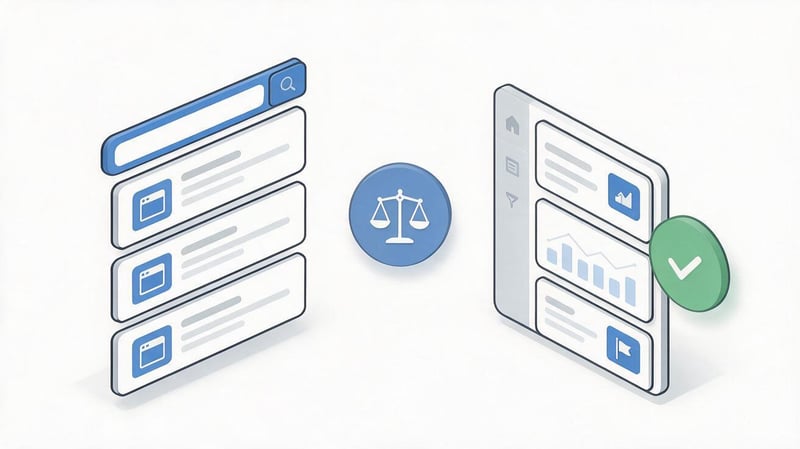
For a quick check, you can enter the site: operator into a search along with the domain, for example, site:example.com. If the project's pages appear in the results, Google already knows at least some of the URLs and has included them in the search index.
This method is suitable for a rough check, but it doesn't replace Search Console data. The site: operator may not show a complete set of pages, so it's best to check the exact status of a specific URL using the URL Inspection tool within the webmaster dashboard.
If there are no results for the site: operator, first check the site's technical accessibility. The page should open without authorization, return a valid HTTP code, not have an accidental noindex, and not be blocked by robots.txt rules.
Why might a new website not appear in search results?
A new domain may remain invisible to Google if the search engine hasn't yet received signals about its existence. This often happens with projects without external links, proper internal linking, or a submitted sitemap.
A site's absence from search results can also be due to technical limitations. For example, the developer left the noindex option after a test run, closed a section in robots.txt, configured an incorrect canonical, or the server started returning an error instead of a 200 status page.
Most often, there are a few things you need to check:
- the site is actually accessible to users and Googlebot without a password or IP restrictions;
- main pages return HTTP 200 and do not redirect the robot to invalid URLs;
- the source code does not contain an accidental noindex that prevents the page from being added to the index;
- robots.txt does not block important directories and files necessary for normal crawling;
- internal links lead to canonical versions of pages without unnecessary parameters and duplicates;
- sitemap.xml contains current indexable URLs and is available to search engines.
After such a check, it makes sense to add the site for indexing through Search Console and see the actual status of important pages.
Answers to your questions
Do I need to register my website with Google?
Separate website registration in Google's directory is not required for organic search. The search engine can find the website automatically through links and other signals.
For monitoring, it's best to add your site to Google Search Console, verify your rights, and submit your sitemap.xml. This will help you see page status, errors, and organic search data.
How to add a website to Google for free?
Google Search Console is free, so there's no need to pay extra to add a regular website. Create a property, verify your domain, and check your main pages.
Once connected, you can add your sitemap to Google and submit several priority URLs for re-crawl. Whether or not they are actually indexed remains the search engine's decision.
How to add a new website to Google Search Console?
Sign in to Search Console using your work Google account and create a new property. For most websites, it's convenient to select the Domain property and verify it with a TXT record via DNS.
Once confirmed, submit your sitemap.xml, check your robots.txt file, and check your primary URLs. Then, monitor the indexing report and address any specific reasons for page exclusions.
How quickly will Google index a new website?
There's no universal timeframe, as different websites and pages are processed at different speeds. Even pages from the same project may be indexed on different days.
If the URL remains missing for a long time, check technical accessibility, canonical, noindex, internal links, and page content. Resending the request without fixing the problem rarely helps.
Do I need to add all the site pages manually?
For a large site, manually submitting each URL is unnecessary. Google should find pages through internal linking and an up-to-date sitemap.xml.
URL checking is best used for individual, important pages after publication or a significant update. Bulk site indexing is built around proper site architecture and sitemap.
How to add a sitemap to Google?
Open the Sitemaps section in Search Console and enter the URL of the XML sitemap hosted on your domain. After submitting, check the read status and any errors found.
It is advisable to include only canonical indexable pages with a 200 status in the sitemap. Redirects, 404, noindex, and technical duplicates should generally be excluded.
Why does Search Console say the page is not indexed?
There are various reasons: noindex, crawl blocking, a different canonical, a server error, duplicates, or Google's decision not to index the URL yet. A single status without technical details doesn't explain the whole situation.
Open URL Inspection and examine the crawl, canonical, and page accessibility data. Then, address the specific issue rather than resubmitting the URL unchanged.
Do I need to add HTTP, HTTPS, www and non-www version separately?
It's usually not necessary to create all the variants separately for a domain property. It covers the protocols and subdomains of the selected domain after DNS confirmation.
When using a URL prefix, Search Console only works with the specified prefix. Therefore, before creating a property, you should determine whether you need a full domain or a specific version of the site.
What is Google Search Console and why should I add my site there?

Google Search Console, or GSC, is a free dashboard for website owners, SEO specialists, and webmasters. It displays data on crawling, indexing, search queries, clicks, impressions, and technical issues for a specific website.
Search Console lets you inspect URLs, submit an XML sitemap, view the Page Indexing report, and identify issues with HTTPS, Core Web Vitals, and structured data. The dashboard also provides information on external and internal links, manual actions, and detected security threats.
For a new website owner, the main benefit of GSC is control. Instead of guessing whether Google sees a page, you can open the URL and see whether it's been found, when it was last crawled, and what canonical URL the search engine has chosen.
Are Google Search Console and Google Analytics the same thing?
Google Search Console and Google Analytics work with different stages of user interaction with a website. Search Console displays data from before the click from organic search: queries, impressions, clicks, average position, and the technical status of pages.
Google Analytics collects information after a user visits a website. It analyzes traffic sources, page views, events, inquiries, purchases, and other visitor actions within the project.
Therefore, these services are usually used together. Search Console helps you understand how your site appears in Google Search, while Analytics shows what happens after a user lands on a page.
How to add a website to Google Search Console?
To add a new site to Google, first open Search Console using the Google account you plan to use to manage the project. After signing in, you'll need to create a property and select how Google will determine the site's boundaries.
At this stage, many people make the mistake of choosing the option out of habit, without considering the difference between a domain property and a URL prefix. For most regular websites, a domain property is more convenient, as it covers the entire domain, including protocols and subdomains.
Step 1: Log in to Google Search Console
Use a work Google account to which the project owner will have permanent access. Avoid connecting a business website using a temporary developer or contractor account if access to it may be lost after the work is completed.
After logging in, open the property selector and choose to add a new site. Two options will appear in the interface: a domain property and a property with a URL prefix. This choice determines the data coverage and available verification methods.
If the task sounds like “how to add a website to Google Search Console”, further steps come down to three operations: correctly specify the property, confirm ownership, and check whether Google has started collecting information.
Step 2: Select the property type

Domain properties and URL prefixes solve similar problems, but they work differently. Before adding a site, it's best to determine whether you need data for the entire domain or just a specific URL version.
| Parameter | Domain property | Property with URL prefix |
|---|---|---|
| Example | example.com | https://example.com/ |
| HTTP and HTTPS | Covers both protocols | Only the specified protocol |
| www and without www | Covers options | Only the given option |
| Subdomains | They are included | Need to be added separately |
| Separate directory | Cannot be limited to one directory | You can add the required prefix |
| Confirmation | Via DNS | There are several methods available |
| Suitable for | For the entire site | For a specific version or section |
Selecting a property doesn't change the site itself or affect its rankings. It determines what data Search Console will associate with the added object and how the owner will confirm access.
When is it best to choose a domain property?
A domain property is suitable for most websites if the owner needs a full overview of the domain. The field specifies the address in the format example.com, without https://, the page path, or additional directories.
This option includes HTTP, HTTPS, www, the non-www version, and existing subdomains. If shop.example.com or another subdomain is added later, its data will also be associated with the domain property.
Verification requires access to the DNS zone. If the site is hosted by one provider and the DNS is handled by another service, the TXT record must be added exactly where the domain's NS points.
When to use a URL prefixed property?
A property with a URL prefix is suitable when you only need to work with a specific version of the site. For example, you can separately add https://example.com/, a specific subdomain, or a directory if this scheme is needed for reporting and access control.
This option is also convenient when the owner cannot change the DNS zone. Alternative verification methods are available, including an HTML file, a meta tag, and linked Google services, provided the necessary conditions are met.
It's important to consider the boundaries of such a property. If https://example.com/ is added, information from a different protocol or a separate subdomain will not automatically be included.
How to verify website ownership?

After adding a property, Google must verify that the user has the right to manage the site. Until confirmation, full Search Console data and settings will be unavailable.
The verification method depends on the selected property type. For the domain option, DNS is used, while for the URL prefix, you can choose from several methods suitable for the access rights and CMS of a specific project.
DNS verification
When verifying via DNS, Search Console generates a special TXT record. This record should be copied unchanged and added to the domain's DNS zone through the control panel of your registrar, hosting provider, or separate DNS provider.
After saving the record, return to Search Console and run a validation check. Sometimes the change is detected almost immediately, but updating DNS can take additional time, so an immediate validation error doesn't necessarily indicate a configuration error.
For a domain property, this option is usually the most convenient. The record remains associated with the domain and is not affected by site templates, CMS updates, or changes to the <head> content.
What to do if Google doesn't see a DNS record?
First, make sure the TXT record is added to your domain's actual DNS provider. Your hosting panel may display a DNS editor, which isn't actually used if your NS points to a third-party service.
Then check the record value, hostname, and the absence of extra characters. If the data is entered correctly, it's better to wait for the changes to propagate and repeat the check later rather than creating multiple identical TXT records in a row.
If the error persists, it's worth checking the DNS zone with an external tool and making sure that the verification record is actually returned by the public DNS query.
Confirmation via HTML file
For a property with a URL prefix, Google may suggest a special HTML file. This file should be downloaded and placed in the site's root directory so that it opens at the address specified by Search Console.
After uploading, be sure to check the file in your browser. If the server returns a 404 error, redirects the request, or denies access, verification will not work.
After successful verification, it's best to leave the file in place. If you remove the verification method you're using, Search Console may eventually lose the ability to verify user rights.
Confirmation via HTML tag

The Google meta tag is added to the <head> section of the main page. After publishing, you should open the source HTML and verify that verification is actually present in the code retrieved by the search engine robot.
On sites with caching, it's a good idea to clear the CMS, CDN, and server cache after changing a template. It's possible that the administrator sees the new value in the dashboard, but the public version of the page continues to display the old HTML.
This method works for WordPress and other CMSs where you can safely add code to the <head> via theme settings, an SEO module, or a system field.
Verification via Google Analytics or Google Tag Manager
If Google Analytics or Google Tag Manager is already correctly installed on your site, Search Console can sometimes use the existing configuration to verify users. However, the account must have the necessary permissions in the associated service.
Before choosing this method, it's worth checking whether the code actually loads on the desired version of the site. The presence of the old container in the admin panel doesn't necessarily mean it's present in the public HTML and accessible to Google.
When in doubt, it's easier to use DNS or a separate verification tag. These methods are easier to verify technically and easier to pass on to the next specialist along with the project documentation.
Which verification method should I choose?
If an entire domain is needed and DNS access is available, the optimal solution is usually a domain property with TXT record verification. This option covers protocols and subdomains without creating multiple identical properties.
If DNS access is unavailable, you can add your site to Search Console via URL prefix and use an HTML file or meta tag. A separate directory will also require a URL prefix.
The method chosen should be based on actual access, not on the complexity of the instructions. The most important thing is that the confirmation remains valid after template updates, contractor changes, and site maintenance.
How to add a website to Google for indexing?

Once confirmed by Search Console, the site becomes available for analysis, but this does not automatically add each page to Google's index. Google makes individual decisions about crawling, canonicalization, and indexing each URL.
If you need to add your site to Google indexing, first provide the search engine with a clear structure through internal links and a sitemap.xml file. For several priority pages, you can also use URL Inspection and indexing requests.
Lead SEO specialist — Gennady
I don't use the “Request indexing” button as a way to force a page to be added to Google. Before submitting, I check the HTTP code, robots.txt, noindex, canonical, internal links, and the URL's presence in the sitemap. If the page is technically closed or Google considers it a duplicate, resubmitting requests won't fix the problem.
How to submit one page for indexing?
Open the URL inspection tool in Search Console and paste the full canonical URL of the page. The system will show whether Google knows the URL, whether it's allowed to be indexed, and what its last crawl status was.
If a page has been recently published or significantly updated, you can check the published version and request indexing. This submission notifies Google to re-evaluate the URL, but it doesn't guarantee its appearance in search results.
For important new pages, the order of actions is as follows:
- Open URL Inspection and paste the full page address with the correct protocol.
- Check whether the URL is accessible to the robot and whether there are any technical restrictions on indexing.
- If necessary, run a check of the published page to see the current version.
- After successful verification, submit an indexing request and wait for the next Googlebot crawl.
After a request, there's no need to submit the same URL dozens of times. If there are no technical errors, it's better to check the internal linking and give the search engine time to process the page.
When is it not necessary to submit each URL manually?
Manual submission is suitable for a few priority addresses, but doesn't scale well for an online store, catalog, or large information project. Hundreds of URLs need to be submitted through a sitemap and linked with proper internal links.
Googlebot should find the page naturally when crawling the structure. If the URL only exists in the sitemap and is not linked to other pages, this may indicate a weak site architecture.
To add new content en masse, it's best to maintain an up-to-date sitemap.xml, update lastmod correctly where necessary, and monitor the indexing report.
How to add a sitemap to Google?

An XML sitemap helps Google discover important pages and obtain a list of canonical URLs for a project. A sitemap is especially useful for new websites, large catalogs, online stores, and sites with frequently updated content.
Searches for “add a sitemap to Google” and “how to add a sitemap to Google” typically involve submitting the sitemap.xml address through Search Console. The file itself remains on your server.
What is sitemap.xml?
A sitemap.xml is an XML file containing a list of URLs that the website owner considers essential for search engine crawling. It can include page addresses and additional data, if supported by the chosen format.
A sitemap doesn't eliminate internal linking or force Google to index every URL listed. It helps with page discovery and makes it easier to control which URLs the owner submits to search engines.
Typically, the file is accessible at a URL like https://example.com/sitemap.xml. On larger projects, a sitemap index containing links to several individual sitemaps may be used instead of a single file.
How to submit a sitemap.xml via Search Console?
First, open the sitemap in your browser and ensure the server returns the correct file, without a 404 error or redirect to an unrelated page. Then, navigate to the Sitemap section of the relevant Search Console property.
Specify the path to the sitemap and submit it for processing. Google will then display the read status and the number of URLs found if the file is accessible and complies with the supported format.
The sequence looks simple:
- Check the public address of sitemap.xml and make sure the file opens without authorization.
- Open the desired Search Console property and go to the Sitemaps section.
- Add the path to the sitemap and submit the data to Google for processing.
- After processing, check the status and correct any errors the system detects.
There's no need to resubmit the same sitemap every day. Google automatically returns to the available sitemap and checks for changes.
What pages should be in the sitemap?
The sitemap should include canonical URLs with a status of 200 that are allowed for indexing and should actually appear in organic search. This list should be consistent with the current project structure.
Avoid filling your sitemap with redirects, 404 pages, service parameters, and noindex URLs. The presence of junk URLs complicates diagnostics and creates conflicting signals for search engines.
Before submitting the sitemap, it is advisable to check:
- all URLs use the current HTTPS protocol and the selected primary domain version;
- the sitemap does not contain pages that redirect the user to another address;
- sections closed from indexing are not included in the list of canonical pages;
- every important URL is also accessible through the site's internal linking;
- the sitemap is automatically updated after creating and deleting indexed pages.
After cleaning the sitemap, Search Console reports become clearer because the passed list better matches the actual indexed structure.
How can I check if Google has started indexing my website?

After connecting Search Console, don't rely solely on the homepage's presence in search results. You should test several URL types and see how Google handles the main sections of your site.
For a new project, it's helpful to select a home page, several categories, a commercial page, and a recent publication. This distribution helps you quickly spot a systemic issue if an entire page type is closed or canonicalized incorrectly.
Checking a single URL
The URL inspection tool displays the status of a specific page and helps you understand why it's not indexed. You can see whether Google knows the URL, whether crawling is enabled, and which canonical URL the search engine uses.
Statuses should be read in conjunction with the technical data. The phrase “URL not indexed” describes the result, but the cause could be canonicalization, noindex, a crawling issue, or Google's decision not to index the page yet.
When checking, pay attention to several parameters:
- last known crawl of the page by a search robot and availability of the URL for crawling;
- the presence of a prohibition on indexing via meta robots or HTTP header;
- the canonical URL set by the site owner and the address chosen by Google;
- the actual HTTP response and the ability to download the published version of the page;
- information about the sitemap and known internal or external links.
This type of analysis is more useful than simply resubmitting the page for indexing.
Checking the entire site
For a complete picture, use the Page Indexing Report. It categorizes URLs by status, and Search Console shows the reasons why some URLs are excluded from the index.
Compare the number of indexed pages with the actual site structure, not with the total number of technical URLs. An online store may have numerous filters and parameters that are specifically not allowed to be indexed by Google.
The site:domain.com operator can be used as an additional quick test. For a more comprehensive check, it's best to rely on Search Console, sitemaps, and selective diagnostics of specific URLs.
How long does it take for Google to index a new website?

There's no fixed indexing timeframe. Google may quickly discover one page and process another much later, even if both were published simultaneously and are in the same sitemap.
Indexing speed is affected by website availability, internal linking, crawl frequency, the number of new URLs, page quality, and the domain's history. Therefore, the promise of “adding a website to Google's index within 24 hours” isn't universally applicable.
After connecting Search Console, some reports also don't populate instantly. The service requires time to collect and process information about search impressions, indexing, and the property's technical status.
If a new page is missing from Google for a long time, first check its technical status and internal site connections. Constantly clicking the indexing request button doesn't replace fixing the underlying issue.
Why is my site listed in Search Console but not in Google?
Confirming a property doesn't guarantee that its pages will be indexed. Search Console provides access to information about a website, but Google makes the decision to include a URL in its index separately during the crawling and content processing process.
If the site is added correctly but the pages are missing from search results, you need to investigate the specific cause. To do this, check robots.txt, meta robots, canonical, HTTP response, internal links, and URL status in Search Console.
The page is closed with the noindex tag
The noindex directive tells the search engine that a page should not be indexed. It can be placed in the meta robots section of the HTML or passed via the X-Robots-Tag HTTP header.
After a website launch, people sometimes forget to remove this setting from the template used on the test domain. As a result, all pages are accessible to users, but search engines are directly prohibited from indexing them.
You need to check the actual HTML of the public page. The setting in the CMS may appear correct, even though the cached version still contains the old value.
Googlebot is blocked in robots.txt
Robots.txt controls crawling and can prevent Googlebot from accessing certain sections. An error in one general directive can sometimes prevent Googlebot from crawling a directory that should be included in the search.
Robots.txt and noindex serve different purposes. The former controls robot access to a URL, while the latter indicates that indexing of an accessible page is undesirable.
After changing the file, you should check the specific rules, especially if you are using Disallow templates for parameters, filters, and technical directories.
Google chose a different canonical

Canonical helps indicate the preferred version among similar URLs. If several pages are almost identical, Google can combine the signals and index only the selected canonical URL.
In Search Console, you can compare the canonical specified by the owner with the version selected by Google. If they differ, it's worth checking for duplicates, redirects, internal links, and page content.
Problems especially often arise after changing the protocol, domain, URL structure, or the mass introduction of filtering parameters.
The page returns an invalid HTTP status
An indexed page should typically reliably return an HTTP 200. If the server responds with a 404, 403, or 5xx code, or redirects Googlebot to another address, normal indexing becomes impossible or difficult.
You should check the status without authorization and preferably with the CDN, WAF, and other security systems in place. Sometimes the owner's browser opens the page normally, but the search engine crawler is restricted.
Once the error is resolved, the page can be re-checked through Search Console and a new crawl can be requested.
There are no internal links to the page
Internal linking helps Googlebot discover URLs and understand a page's place in the site's structure. If content exists only in the sitemap but is not accessible via a regular link, this architecture requires verification.
It's best to link new pages to relevant categories, sections, and other content. Anchors should describe the content of the linked page naturally, without constantly repeating the same commercial phrase.
A good structure makes a site easier to navigate while also helping users find related content without having to return to search results.
Google crawled the page but decided not to index it
The “crawled but not indexed” status does not automatically imply a penalty. Google had already received the page, but at the time of processing, it had not yet been included in the main index.
Reasons may include duplicates, very similar template pages, weak content, soft 404s, or a lack of sufficient URL value signals. Sometimes a page is indexed later without further action.
Instead of submitting multiple times, it's worth comparing the page with already indexed URLs of the same type and checking whether it has independent value, a correct canonical, and normal internal links.
Should I add www, non-www, HTTP, and HTTPS versions to Search Console?

Old instructions often recommend adding four separate variations of a single website to Search Console: HTTP, HTTPS, www, and a non-www domain. This scheme is no longer necessary for a domain property.
A domain property covers protocols and subdomains within the selected domain. Therefore, for general control, simply add example.com and verify it via DNS.
Using a URL prefix does impose stricter boundaries. The property https://example.com/ applies only to this prefix, so a different protocol or a separate subdomain may need to be added separately.
This approach reduces reporting confusion and makes the domain property a convenient option for most common projects.
How to add a WordPress site to Google Search Console?
The same rules apply to WordPress as to any other CMS. Search Console doesn't require a special plugin if the owner can verify the domain via DNS.
A plugin can simplify adding an HTML tag, but technically it's just a way to place a verification code. The actual process of connecting a site to Google isn't dependent on a specific WordPress extension.
Via DNS
Create a domain property, copy the TXT record, and add it to the domain's DNS zone. This method is independent of the WordPress theme, page builder, or SEO plugin used.
Once confirmed, it's best to leave the record in the DNS. Updating WordPress, changing the design, or replacing a plugin will not affect confirmation in this case.
If the domain is served through a separate DNS service, the record must be created exactly where the active NS are located.
Via HTML tag
If DNS can't be changed, create a property with a URL prefix and select confirmation via an HTML tag. The resulting code should be placed within the <head> of the live site.
In WordPress, this can be done through the SEO plugin settings, theme, or a system field provided by the developer. After saving, open the source code of the public page and verify that the meta tag is actually loading.
Don't insert verification into several random modules at once. A single, clear, and documented method is easier to maintain after site updates.
What to do after adding a site to Google Search Console?

Once a property is confirmed, the work is just beginning. In the first few days, it's helpful to check the technical accessibility of the main pages and ensure Google is receiving the correct version of the site.
Consistent testing helps find errors before they affect hundreds of pages. Websites that have recently moved to a new domain, HTTPS, or a different CMS require particular attention.
Once connected, follow these steps:
- Make sure that ownership is verified and the project owner retains full access.
- Add an up-to-date sitemap.xml and make sure Google can read it without errors.
- Check your robots.txt to ensure that important sections are not accidentally blocked from crawling.
- Open several key URLs through the URL Inspection tool and examine their status.
- Make sure there is no noindex on pages that should be included in organic search.
- Compare canonical with actual canonical URL versions and internal links.
- Look at the Page Indexing report and group the real reasons for page exclusions.
- Make sure the main version of the site is running on HTTPS without mixed or erroneous redirects.
- Check the internal linking between the main page, sections and priority materials.
- Once you've collected your data, examine your queries, impressions, clicks, and CTR in the Performance Report.
This checklist is more useful than trying to examine every section of Search Console at once. First, you need to make sure Google can crawl and interpret your site properly.
Common mistakes when adding a site to Google
Most problems arise not in the property addition form itself, but in the domain and website settings. The error may go unnoticed if no one verifies the public version of the pages after confirmation.
Below are some typical situations that are worth checking when connecting a project for the first time.
| Error | What's happening | What to do |
|---|---|---|
| Incorrect URL prefix selected | The data only applies to another version of the site | Check the protocol, www, and actual canonical URL |
| TXT added to the wrong DNS provider | Google can't find a confirmation record | Check active NS and DNS zone |
| Verification removed after setup | Confirmation may be lost | Save the used verification method |
| The sitemap contains 404 pages and redirects | Google receives a list of unnecessary URLs | Keep only indexable canonical URLs with status 200 |
| noindex remains on the pages | URLs are not indexed | Fix meta robots or X-Robots-Tag |
| An important directory is closed in robots.txt | Googlebot can't crawl the section properly | Review the Disallow rules |
| All pages are sent manually | The work does not scale well | Use sitemap and internal links |
| Indexing is expected to produce instant results | The status is checked before processing | Monitor technical reasons and dynamics |
Queries like “Google directory add site” or “add a site to the Google directory” refer to an outdated concept of website registration. There is no longer a separate, general Google directory where regular websites must be submitted to appear in organic search results.
To add your site to Google, start with Search Console, verify ownership, and check the technical availability of your main pages. For most projects, using a domain property is convenient, as it covers protocols and subdomains within a single domain.
Once connected, submit your sitemap.xml, check important URLs, and monitor the indexing report. If a particular page isn't listed in Google, look for the cause in accessibility, canonical, noindex, the link structure, and the quality of the URL itself.
If your site is already connected to Search Console but pages are indexing inconsistently, order a technical SEO audit from Seo-Gen. We'll check indexing, sitemap.xml, robots.txt, canonical, and internal linking, and prepare a list of specific fixes for the developer.
More articles about SEO Promotion


