How to verify rights in Google Search Console?


Before working with search reports, Google asks you to confirm that you actually manage the website or domain. This verification protects Search Console data and limits access to property settings for unauthorized users.
Google verifies a website in several ways: via a DNS record, an HTML file, an HTML tag, Google Analytics, or Google Tag Manager. The appropriate option depends on the type of property and the access rights the website owner has.
If you need to verify your entire website with Google, including subdomains and various protocols, you typically add a domain property and use DNS. For a separate version of your website, you can select a property with a URL prefix and verify it using another available method.
What does ownership verification mean in Google Search Console?
Ownership verification shows Google that you can manage the domain, website files, its source code, or related Google services. Once verified, your account gains access to Search Console data within the assigned permissions.
Simply adding a website address does not confirm ownership of the property. Until verification is completed, the user does not have full access to search reports, indexing settings, or management of other users.
Why do I need to verify my website rights?
Once confirmed, the owner can view queries and pages from organic search, track indexing, check for issues with individual URLs, and work with sitemap.xml. This data helps quickly identify technical errors and understand which pages Google actually considers in search results.
A verified owner can also grant access to other specialists and check the property's status in Search Console. Therefore, it is advisable to verify website ownership before starting a technical SEO audit and regular indexing monitoring.
Who can confirm ownership?
To verify, you'll need actual access to at least one element of the site's infrastructure. This could be the domain's DNS zone, the server's file system, the homepage's HTML code, Google Analytics, or a Google Tag Manager container.
Access to the CMS admin panel alone isn't always suitable for verification. For example, if domain ownership needs to be verified via DNS, the user must be able to modify records with the actual DNS provider.
The following access options are commonly used:
- access to the DNS zone where you can create TXT or CNAME records for the domain;
- access to server or file manager to upload the Google file;
- ability to edit the <head> of the home page and place the HTML tag;
- the necessary rights in Google Analytics or Google Tag Manager;
- owner access, which can already add a new user to Search Console.
Before choosing a method, it's best to find out who controls the domain, DNS, and website code. This will make the verification process much quicker and eliminate the need to try every possible option.
Answers to your questions
How do I verify website ownership in Google Search Console?
First, add your site as a domain property or URL prefix, then select Google's suggested verification method. Domain property verification uses DNS, while URL prefix verification can be done via DNS, an HTML file, an HTML tag, and some Google services.
When you need to verify website ownership in Google without DNS access, a URL prefix is typically chosen. With full domain access, DNS remains a convenient option for general control.
How to verify domain ownership?
Add a new domain property in Search Console and copy the suggested TXT record. Then, place it in the active DNS zone and wait for the record to become available through public DNS servers.
If the Google interface displays the message “verify domain ownership”, verification cannot be replaced with an HTML tag for this Domain property. Verification requires DNS access.
How long does it take to verify a domain via DNS?
Sometimes a new TXT record is detected very quickly, but DNS propagation can take several hours or longer. The exact time depends on the provider, caching, and the specific domain settings.
If the record isn't immediately detected, check it using an external DNS lookup. Creating multiple identical TXT records to speed up the process is usually not necessary.
What should I do if Search Console doesn't see the TXT record?
Check your current nameserver, DNS zone, Host value, and the full google-site-verification text. Then, use an external service to verify that the TXT is indeed accessible from the public DNS.
If the record appears correctly, check again after some time. If it doesn't, you need to fix the DNS settings, not the property within Search Console.
Where to insert the Google Search Console HTML tag?
The HTML tag must be placed within the <head> of the home page of the URL-prefix property. After publication, the code must be present in the HTML source, accessible to regular visitors without authorization.
If your CMS offers a separate Google Site Verification field, carefully read the format of this field. Some systems accept the entire <meta> tag, while others only require the content value.
Is it possible to delete a TXT record after confirmation?
Deleting a valid TXT record immediately after successful verification is not recommended. Google may re-check the token and, if it is missing, request new ownership verification.
Before deleting the old record, check if there are other valid verification methods. This should be done especially carefully when transferring a website between registrars, DNS providers, or agencies.
Which is better – DNS or HTML tag?
DNS is suitable for a domain property and covers its subdomains and protocols. The HTML tag is used for the URL prefix and is convenient when you have access to the website code but cannot change the DNS.
The choice depends on the specific project's objectives and infrastructure. For SEO, the stability of the chosen method and the retention of the verification token after successful verification are more important.
Is it possible to verify a website without DNS access?
Yes, if you use a property with a URL prefix and another supported verification method is available. You can place an HTML file, a verification meta tag, or, under suitable conditions, use Google Analytics or GTM.
If you need to verify a domain property, you will need DNS access. The HTML tag and file do not replace DNS verification for a Domain property.
Domain property or property with a URL prefix – which one to choose?

Search Console offers two main options for adding a website: a domain property and a property with a URL prefix. The choice determines which versions of the site will be included in reports and which verification methods are available to the user.
If a site uses subdomains, multiple protocols, or different technical versions, a domain property is usually more convenient for general control. For a specific address or individual section, a URL prefix can be used.
Domain property
The domain property is added without https://, http://, and the page path. For example, for the site https://www.example.com/, only example.com is specified in the domain field.
This property covers various protocols, both www and non-www versions, and subdomains of that domain. To verify domain ownership, you'll need to change your DNS records.
If Search Console asks you to verify your website ownership via DNS, you must work with the DNS zone pointed to by your current name servers. Your domain registrar and DNS provider may be different companies.
Property with URL prefix
A property with a URL prefix applies only to the specified address. For example, https://www.example.com/ and https://example.com/ are considered different URL prefixes by Search Console.
For this property, DNS, an HTML file, an HTML tag, and some related Google services are available. This option is convenient when DNS access is unavailable, but you can edit the HTML code or upload a file to the server.
Which type of property is better to choose?
The choice depends on the site structure and user access. For general domain control, the Domain property is usually convenient, while the URL prefix is suitable for a specific version of the site or situations where DNS verification is not possible.
Sometimes SEO specialists add both options because the domain property displays data for the entire domain, while the URL prefix helps target a specific version of the site. This does not create duplicate pages on the site.
| Parameter | Domain property | URL prefix |
|---|---|---|
| Takes subdomains into account | Yes | Only the specified prefix |
| Considers HTTP and HTTPS | Yes | Only the specified protocol |
| DNS verification | Yes | Yes |
| HTML tag | No | Yes |
| HTML file | No | Yes |
| Google Analytics or GTM | No | Upon fulfillment of the requirements |
Before adding a property, it's worth checking the main working version of the site and redirects between HTTP, HTTPS, www, and non-www addresses. This will help you choose the property wisely and avoid confusion in future reports.
How do I verify website ownership in Google Search Console?
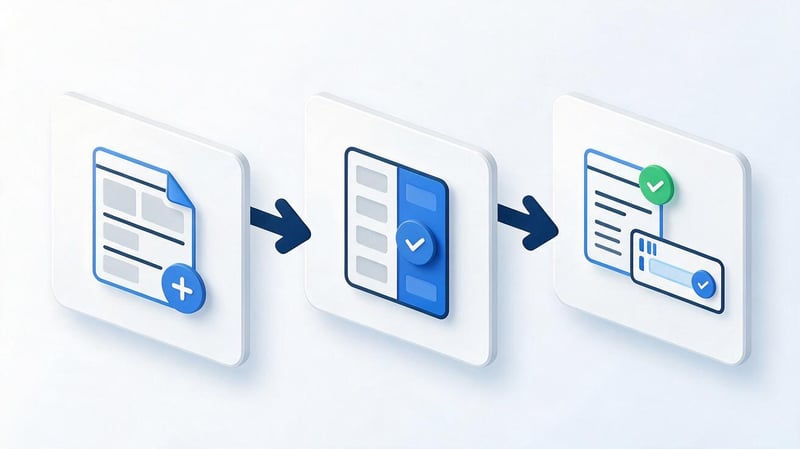
To verify your website, you must first add it to Search Console and select the appropriate property type. Google will then offer one or more verification methods depending on the option you select.
The general process is the same: add a property → select a method → deploy a verification token → wait for it to become available → initiate verification. After successful verification, it's a good idea to save the token, as Google may re-verify ownership.
Step 1: Add your site to Google Search Console
Sign in to Google using the account you plan to use for your website. Then open Search Console, select “Add property”, and enter the domain or full URL with the desired protocol.
Before confirming, double-check the address, especially if a URL prefix is used. An error between HTTP and HTTPS or www versions may result in a successful verification of a different property that doesn't match the main site version.
Step 2: Select a verification method
For a domain property, the primary option is Search Console DNS, as Google must verify domain management independently of the site-specific files. For a URL prefix, additional methods are available, including an HTML file and an HTML tag in Google Search Console.
It's best to choose a method based on actual access, not on the perceived simplicity of the instructions. If the DNS is hosted by a contractor but there is full access to the site's code, an HTML tag may be the faster option for a URL prefix.
Step 3: Perform a check
After placing the TXT record, file, or meta tag, return to Search Console and run the check. Google will try to find the previously obtained verification token in the specified location and report the result.
If the check fails, don't immediately create a new property and a new token. First, check that the current value is correctly placed, the file is accessible, or the DNS record is propagating.
How to verify domain ownership using DNS records?

Domain ownership verification using a DNS record is used for domain properties and is suitable for websites with subdomains or multiple technical versions. This method is independent of the CMS, template, or files of a specific website.
To verify this, Google issues a special value, google-site-verification, which is added to the DNS zone. Once this record is detected, Search Console considers domain management verified.
What is DNS verification?
DNS stores technical records that link a domain to various services. During the verification process, Google requests the creation of an additional TXT record containing a unique verification code.
This code doesn't change the website's address or affect its pages if added correctly. Its purpose is only to confirm access to the DNS zone of a specific domain.
When a user searches for “google dns console” or “search console dns”, this is usually the method they're referring to. Changes are made not within Search Console, but in the control panel of the domain's actual DNS provider.
How to get a TXT record in Google Search Console?
When adding a new property, select “Domain” and enter the domain name without the protocol or path. Once you continue, Google will display instructions and a unique value for the TXT record.
Typically the verification string looks something like this:
google-site-verification=XXXXXXXXXXXX
The value must be copied in its entirety and unchanged. Removing characters or spaces within the token or the google-site-verification portion will result in a verification error.
How to add a TXT record to a domain's DNS?
First, determine where the website's DNS zone is actually served. To do this, you can check the NS, or current nameserver, for the domain, and then open the relevant provider's control panel.
The further algorithm is similar for most services:
- Log in to your DNS control panel and open the desired domain, carefully checking its spelling.
- Go to DNS Records Management and create a new TXT record.
- In the name field, enter the value required by the provider, usually @ or a blank field.
- In the value field, paste the full google-site-verification code obtained from Search Console.
- Save the entry, wait for the DNS to update, and only then run Google's recheck.
Once added, the record should appear in the public DNS zone. If the user added the TXT record at the registrar, but the domain's NS points to a different service, Google won't see the record.
What should I specify in the Host, Name, Type, Value, and TTL fields?
Field names vary between DNS panels, so you should refer to the meaning of each value. Most often, Google only issues a token, and the user selects the remaining parameters in the DNS interface.
| Field | Value |
|---|---|
| Host / Name | Typically @ or empty value for the domain root |
| Type | TXT |
| Value / Content | The full string google-site-verification=... |
| TTL | Provider default value |
| Domain | The domain that is added to Search Console |
Changing the TTL to speed up verification is usually not necessary. The main thing is that the record is created in the correct DNS zone and contains the correct Google verification token.
When is CNAME used?
TXT remains the most common DNS verification option, but in some cases, Google may provide CNAME data. In this case, the record name and target address obtained directly in the Search Console interface are added to the DNS.
You can't convert a TXT record to a CNAME or create custom record values yourself. If Google shows a specific verification option, you should transfer the specified parameters without modification.
How to check if a TXT record has appeared?
To verify, you can use DNS lookup, the dig command, or Google Admin Toolbox. A query to the domain's TXT records should return the string “google-site-verification” with the same value returned by Google.
This check helps isolate a DNS issue from a Search Console issue. If the public service still doesn't see the TXT, re-verifying it with Google usually won't help either.
Should I delete the TXT record after confirmation?
It's best to leave the TXT in the DNS after successful verification if it's used to verify ownership. Google may recheck the token's presence, and if it's removed, ownership may subsequently require re-verification.
Lead SEO specialist — Gennady
I usually recommend verifying a domain property via DNS if the owner has access to the DNS zone. This option covers the domain, including its subdomains and various protocols, and it's best to save the verification TXT record after successful verification.
If the record interferes with internal DNS accounting, first check other active verification methods and the Search Console user base. Removing the verification token without verifying the current property owners is not recommended.
How long does it take for DNS to update?

A new DNS record sometimes becomes available within a few minutes, but don't expect it to update instantly. Speed depends on your provider, DNS settings, caching, and other technical factors.
In some cases, DNS propagation can take several hours or longer. If the TXT record has been added correctly, it's best to check its public availability and repeat the verification later, rather than creating multiple identical records.
How to verify a website using an HTML tag?
The HTML tag is suitable for a property with a URL prefix where the user can edit the homepage code. Google issues a special meta tag that must be included in the final HTML markup.
This method is often used in CMSs that have a separate field for Google Site Verification. After the page is published, the meta tag must be present in the original HTML received by the search robot.
Where to get HTML tag?
Open the desired URL-prefix property or add a new one, then select the verification method via HTML tag. Search Console will display a predefined string with the name="google-site-verification" attribute and a unique value of “content”.
An example looks like this:
<meta name="google-site-verification" content="XXXXXXXXXXXX">
The code should be copied in its entirety. If the CMS only asks for the “content” field, you only need to paste the token, but first check the specific field's instructions.
Where to insert the Google Search Console HTML tag?
The meta tag is placed within the <head> section of the main page of the property being verified. It must appear in the HTML after the site is published, not just within the template editor or unpublished version.
The verification meta tag should not be placed after the <body> tag. If the CMS automatically migrates code or removes unknown tags, you should check the page source code after saving the changes.
Example of HTML tag
The working structure of the page might look like this:
<head>
<meta name="google-site-verification" content="XXXXXXXXXXXX">
...
</head>
Each property's token is unique, so copying the code from another site is not allowed. The value shown to the current user by Search Console is used for verification.
How can I check if the tag is installed correctly?
Open the website's main page and view its HTML source code. Search for google-site-verification using the page search and ensure the code is located within the <head> and contains the correct token.
After checking, you can return to Search Console and click the confirm button. If Google doesn't find the tag, first clear your server or CMS cache and recheck the published page.
Is it possible to remove the HTML tag after confirmation?
If the HTML tag is used as a valid verification method, it's best to leave it in the <head>. Removing the token may result in the loss of verification during Google's next automated check.
Before clearing old verification meta tags, you should check the ownership verification section and the list of owners. This is especially important after changing the agency, developer, or responsible employee.
How to verify a website via HTML file?

An HTML file is suitable for a URL-prefix property when a user can upload the file to the site's root directory. Search Console creates a unique file, which Google then requests at a specific URL.
This option is convenient if you don't want to edit the page template, but already have access to the server or file manager. The name and contents of the resulting file cannot be changed.
How to download the confirmation file?
From the list of verification methods, select HTML file and download the file suggested by Search Console. Its name typically contains a unique character string associated with the verification token.
Save the file without editing its contents or extension. If the operating system or editor changes the file name, Google will not be able to open the expected address.
Where to upload the file?
The file must be placed in the website's root directory so it opens at the URL shown in Search Console. This path shouldn't require authorization, special cookies, or logging into the admin panel.
After uploading, open the specified address in a regular browser and check the server's response. If a 404 error, a redirect to another page, or a login form appears instead of the file, the verification process won't work.
How to check the HTML file before verification?
Open the verification file URL in incognito mode to eliminate the impact of authorization and stored cookies. The server should return the file itself at the correct address without redirecting to the login page.
Additionally, check that your CDN, security system, or redirect rules aren't blocking the request. After successful verification, leave the file on the server while it's used for ownership verification.
How to verify a website via Google Analytics?
In some cases, you can use an existing Google Analytics installation for the URL prefix. This method works if the analytics code is correctly deployed on the website and the user's Google account has the necessary permissions for the relevant property.
With this type of verification, a separate TXT record or HTML file is not required. However, access to Search Console alone does not automatically grant access to Analytics, as these services use separate access systems.
If checking through Analytics doesn't work, first make sure you've selected the correct Google account and Analytics property. If you're unsure, it's easier to use an HTML tag or another method whose availability can be verified directly.
How to verify a website using Google Tag Manager?

Google Tag Manager can also be used to validate URL prefixes when Google's requirements are met. The page must have a properly installed GTM container, and the user must have the necessary permissions to work with it.
This option is convenient for projects where developers have already installed GTM and manage marketing tags through it. In this case, an additional verification meta tag may not be necessary.
Once verified, don't delete the container just because the Search Console verification has already passed. If the site uses GTM for analytics or events, any changes to its installation should be performed separately from the verification task.
Which Google Search Console verification method should I choose?
There's no universal method for all websites, as the site owner, developer, and SEO specialist have different access levels. When choosing, consider the type of property and the method the team can keep after verification.
A domain property will require DNS, and several options can be used for the URL prefix. The table below helps you quickly determine the appropriate method without trying every possible approach.
| Situation | The right way |
|---|---|
| There is access to the DNS zone | DNS/TXT |
| The entire domain needs to be verified | DNS |
| You can edit <head> | HTML tag |
| There is access to the root directory | HTML file |
| Analytics is already installed correctly | Google Analytics |
| There is a working GTM container | Google Tag Manager |
If verification is performed by a contractor, it's best to grant access to a specific service for a limited time, whenever technically feasible. Passwords for the registrar, hosting, and primary Google account should not be shared between specialists unless absolutely necessary.
Why doesn't Google Search Console verify ownership?
A validation error is usually caused by Google not seeing the verification token in the expected location. This could be due to an incorrect DNS zone, record propagation delay, site cache, an incorrect URL prefix, or a modified verification file.
Don't immediately create a new property and repeat the entire process. Checking each step sequentially usually reveals the exact problem more quickly.
Google can't see the DNS record

First, check the domain's NS and ensure the TXT record has been added at the actual DNS provider. A common error occurs when a domain is registered with one service, but the DNS zone is managed by a hosting service, CDN, or another company.
Then check the Host, Type, and Value using an external DNS lookup. If google-site-verification isn't yet publicly visible, Search Console may also not detect this record.
Google can't find the HTML tag
Check the original HTML of the main page, not just the CMS settings. The meta tag must be present in the <head> of the published page and contain the token issued specifically to this property.
If the code has been added correctly, clear the site, CDN, and template caches. Some systems delay the publishing of changes, so the code in the admin panel may differ from the HTML received by Google.
Google can't find the HTML file
Open the exact file URL indicated by Search Console in a private browser window. The file should respond without authorization, 404 errors, or redirects to the home page.
Don't rename the file or edit its contents after downloading. Also, check your server rules, CDN, and security plugins, which sometimes block unknown HTML files in the root directory.
The wrong version of the site has been selected
For a URL prefix, the protocol and subdomain matter, so http://example.com is different from https://example.com. The www.example.com version is also different from the address without the www part for this type of property.
Before verification, determine the primary version of the site using canonical and server redirects. If you need to cover all possible versions at once, it's easier to consider a domain property with DNS verification.
DNS is not controlled by the place where the domain is registered
Purchasing a domain from a specific registrar doesn't necessarily mean the DNS zone is maintained there. After changing the nameserver, DNS management may be completely transferred to the hosting provider, CDN, or a separate DNS service.
If a TXT record is added to an inactive zone, you won't be able to verify your website ownership in Google. Before changing records, always check the current NS records and log in to the provider they point to.
What to do after website verification?

After successful verification, check the access level your account is listed under and which other owners the property has. This is especially useful for older projects where access rights may have been passed between employees and contractors for years.
Next, move on to the site's technical data: indexing, sitemap, search queries, and page issues. Ownership verification grants access to the data, but site errors themselves are not automatically corrected after connecting to Search Console.
Check the owner's status
In Search Console settings, open the Users and Ownership Verification section. Verify that your account has the expected permissions and that the verification method is still working.
If old owners are discovered on a project, do not delete them without the site owner's consent. First, determine who owns the accounts and what verification tokens are currently in use.
Add the required users
Not every specialist needs owner rights for their daily work. SEO specialists, developers, or analysts can be assigned the access level that best suits their specific needs.
This approach simplifies project handover and reduces the risk of accidentally changing critical settings. After collaboration ends, unnecessary access rights should be promptly removed.
Check indexing and sitemap
Add an up-to-date sitemap.xml and check if Google can process it. Then review the indexing status of important pages, errors, and URL verification results.
The first Search Console data may appear gradually, so the lack of a full report immediately after connecting doesn't indicate an error. For SEO, it's more important to ensure that Google sees the site, sitemap, and main indexed pages.
To verify your website's rights with Google, first determine the property type and the access rights your team has. For the entire domain, use DNS, and for the URL prefix, you can use an HTML tag, HTML file, Google Analytics, or Google Tag Manager, if necessary.
After successful verification, do not delete the TXT, HTML file, or other valid token without checking the owners and verification methods. Then configure access permissions, add a sitemap.xml, and check indexing of the main pages.
If Search Console doesn't confirm a site, Seo-Gen can check DNS, HTML markup, active domain versions, and current access, and then configure the property without any unnecessary changes to the site.
More articles about SEO Promotion


