Google Tag Manager triggers: how to set up all pages


Google Tag Manager helps you manage analytics tags on your website without constantly changing its source code. It lets you track page views, button clicks, form submissions, and other visitor actions. However, to begin collecting data in the analytics system, you need to define the trigger conditions for each tag.
Triggers are responsible for these conditions. They respond to site events and check whether the associated tag should be fired. For example, one trigger might fire when viewing any page, another only after clicking the order button, and a third after a request is successfully submitted.
We'll cover the main types of Google Tag Manager triggers, setting up All Pages, and working with clicks, forms, and custom events. We'll also cover data validation in GTM and Google Analytics 4 to ensure analytics captures the actions needed to evaluate website performance.
What is a trigger in Google Tag Manager?
A Google Tag Manager trigger is a rule that defines the conditions under which a tag should fire. It tracks browser events, such as page loading, link clicks, form interactions, document scrolling, or element appearing in the viewport.
When a suitable event occurs, GTM checks the trigger settings. If the conditions are met, the associated tag is commanded to fire. A single trigger can be used for multiple tags, and multiple triggers can be connected to a single tag.
For example, an online store needs to know how many visitors clicked the “Buy” button. To do this, they create a click trigger, specify the desired element, and link the rule to a Google Analytics 4 event tag. Once configured, each qualifying click can be sent to analytics.
It's important to consider the limitations of tracking itself. Clicking a button doesn't confirm a purchase, and viewing a page doesn't mean the visitor has read its content. Therefore, the trigger type is chosen based on the action you actually want to measure.
How are tag, trigger, event and variable related?

To understand how GTM works, it's enough to understand the four main components. They work in the same sequence, but each performs its own task.
| Component | Purpose | Example |
|---|---|---|
| Tag | Performs an action once fired | Sends an event to GA4 |
| Trigger | Defines the conditions for firing a tag | Click on the order button |
| Event | Reports an action that has occurred | gtm.click |
| Variable | Provides a value for checking a condition or passing data | Click ID |
Let's say a visitor clicks the callback button. Google Tag Manager receives the click event, checks the element ID, and compares it to the trigger condition. If a match is found, the tag fires, sending the corresponding event to GA4.
Variables also help convey additional information. For example, a button ID, form name, or page address can be recorded along with a click. These parameters are later used to analyze visitor behavior.
An example of how a tag and trigger work when a button is clicked
Let's imagine a service page with a “Get a consultation” button. We need to count clicks on this button specifically, not including clicks on the menu, contacts, and other elements.
The processing sequence is as follows:
- The visitor opens a service page that has a Google Tag Manager container installed.
- The user clicks the consultation button, after which the browser generates a click event.
- GTM receives the element details and checks the trigger conditions, including its ID.
- If the conditions are matched, the Google Analytics 4 event tag associated with the trigger is fired.
- The tag sends data that can then be inspected in DebugView and used in GA4 reports.
Work scheme:
User Action → GTM Event → Check Trigger Conditions → Fire Tag → Send Data to GA4
This sequence helps identify errors. If a click event is present in GTM but the tag isn't firing, first check the trigger settings. If the tag fires but the event isn't in analytics, check its configuration, user consent, and data delivery.
How is a trigger different from a tag?

A tag contains settings for the action to be performed. For example, a Google Tag can power Google Analytics, while a GA4 event tag can send information about a visitor's interaction with a specific page element.
The trigger determines when this action will be executed. Without the appropriate trigger condition, the analytics tag will not respond to site events. However, the presence of a trigger does not guarantee successful delivery of information to the analytics system.
A single trigger can fire multiple tags. For example, a confirmed form submission can be sent to GA4 and another measurement system if allowed by site settings and user consents.
To manage such links, it's best to use descriptive names. The name GA4 – button_click – Consultation makes it easier to identify the tag's purpose than the name Tag 5. A similar principle applies to triggers, variables, and events.
How to understand the English terms Trigger and Tag?
Google's English-language documentation uses the terms “Tag”, “Trigger”, “Event”, and “Variable”. In localized interfaces (for example, Russian or Ukrainian), these terms are translated, although some technical notations remain in English.
The query “tag manager trigger” typically refers to setting up trigger conditions for Google Tag Manager tags. The phrase “trigger tag” is used when searching for information about the trigger's relationship with a tag. There is no specific trigger type with this name in the standard GTM interface.
For configuration, it is useful to remember a few expressions: Trigger Configuration refers to the trigger configuration, Firing Triggers refer to activation triggers, and Trigger Exceptions refer to exceptions that prevent execution under certain conditions.
Names may appear differently depending on the interface language. Therefore, when working with foreign instructions, it's best to focus on the setting's purpose and location, rather than relying solely on a literal translation.
Answers to your questions
What is a trigger in Google Tag Manager?
A trigger is a rule that defines the conditions for firing a tag in Google Tag Manager. It responds to a selected event and checks additional parameters, if specified in the settings.
For example, a trigger can activate a tag after clicking a specific button or opening a page. The action performed after activation is determined by the associated tag's configuration.
What does All Pages mean in GTM?
All Pages is a standard version of the Page View trigger, designed to fire tags when handling the container load event on site pages.
It's used for tasks that require execution during a normal page load. The result depends on the presence of a container, tag settings, user consent, and other constraints.
What is the difference between Page View and DOM Ready?
Page View responds to the early stage of GTM container processing, while DOM Ready occurs after the HTML structure of the document has been formed.
If a tag needs to find a page element, DOM Ready may be the appropriate option. For basic analytics tasks, waiting for a ready DOM is often unnecessary.
Can I use one trigger for multiple tags?
Yes, a single Google Tag Manager trigger can be linked to multiple tags. This is convenient when different analytics systems need to respond to the same event.
With this setup, it's necessary to verify the number of submissions and adhere to user consents. Multiple tags should not create duplicates of the same measurement in a single analytics system.
How to make a trigger for only one page?
Create a Page View and select Some Page Views. Then add a filter by Page Path or Page URL with the address of the desired page.
For example, Page Path equals /contacts/ will restrict launching to the specified path. After setting this up, check both the desired page and several other URLs to eliminate any accidental matches.
Why isn't the trigger firing in Google Tag Manager?
The reason may be an incorrect filter, an inactive variable, the absence of the required event, or blocking by additional conditions.
Open Preview and check if the expected event appears. Then review the variable values, trigger settings, exceptions, and user consent status.
How to track a button click in GTM?
First, define the HTML element and its stable ID. Then, create a Click trigger with a condition corresponding to the selected button.
Connect the trigger to the GA4 event tag and test it using Tag Assistant. Once tested, verify that the event is being sent to Google Analytics 4 with the correct parameters.
What is the difference between a GTM trigger and a GA4 event?
A GTM trigger defines the conditions under which a tag should fire. A GA4 event represents action information that Google Analytics receives and processes.
For example, a click event within GTM can trigger a tag that sends a button_click to GA4. The names and purposes of events in the two systems may differ.
Does All Pages work when navigating without reloading the page?
The standard All Pages trigger responds to the normal container load event. This event is typically not repeated automatically during client-side navigation within an SPA.
History Change, application events, or suitable GA4 mechanisms are used to measure such navigation. Before adding manual tracking, verify the existing setup to avoid duplicate views.
What is the All Pages trigger in Google Tag Manager?

All Pages is a standard pageview trigger used to fire tags when the corresponding GTM load event occurs. It's suitable for tasks where the tag needs to run on every page with the container installed.
The search query “Google Tag Manager All Pages Trigger” most often yields instructions on how to set up such a trigger and an explanation of how it differs from other page load events.
For example, All Pages can be used for basic analytics setup that should be present on the entire site. However, this rule doesn't guarantee that the tag will be executed under all circumstances: its operation may be affected by consent settings, exclusions, loading errors, and other limitations.
The key feature of All Pages is its timing. A standard Page View trigger responds to a GTM event that occurs when the loaded container is processed. At this point, the browser may still be rendering the page and loading resources.
How does the All Pages trigger work?
When a web container loads normally, Google Tag Manager logs a gtm.js event. This event corresponds to the standard Page View stage and is used by the standard All Pages trigger.
When such an event is processed, GTM checks the associated tags. If there are no filters and other settings don't prevent it from triggering, the appropriate tags are activated.
All Pages doesn't wait for images, fonts, and other resources to fully load. Tasks that require a complete HTML structure or the page to load completely require separate trigger types.
It's important to consider the specifics of websites with dynamic navigation. If a visitor navigates between sections without fully reloading the document, the gtm.js event typically doesn't fire again. Such transitions may require additional events and separate pageview settings.
What tags is All Pages suitable for?
All Pages is suitable for tags that need to be processed on all regular page loads. A typical example is the basic Google Analytics setup via Google Tag, when this scheme is provided by the analytics configuration.
Another option is a technical tag that needs to receive information about each document load. However, All Pages shouldn't be automatically applied to all scripts: some require a ready-made DOM, user consent, or a specific action on the site.
When connecting GA4, you need to check automatic page_view sending. If views are already being transmitted via Google Tag, an additional tag with the same event may create duplicates. Sites that use GTM, direct Google Tag integration, and analytics plugins simultaneously should be checked especially carefully.
All Pages is generally not suitable for custom conversions. If the tag needs to account for a completed order, submitted application, or subscription, it should be triggered by the confirmed action event, not by opening any page.
What's the difference between All Pages, DOM Ready, and Window Loaded?

All three types relate to page loading, but they respond to different stages. The correct choice depends on what data or elements the tag requires to function.
| Trigger type | GTM Event | When it fires | Typical application |
|---|---|---|---|
| Page View / All Pages | gtm.js | When processing container loading | Basic analytics tags |
| DOM Ready | gtm.dom | When an HTML document is parsed by a browser | Working with existing DOM elements |
| Window Loaded | gtm.load | After the window load event completes | Scripts that require loaded resources |
The sequence for a normal page load looks like this:
Page View → DOM Ready → Window Loaded
These are different events, so the same tag connected to multiple such triggers may fire repeatedly. If additional firings are not expected, you should leave the appropriate option and check the activation settings.
Page View – gtm.js event
Page View is an early event in the standard GTM lifecycle. It occurs when the container loads and is suitable for tags that don't need to access already-rendered HTML elements.
For example, a basic analytics tag can retrieve the current page's address and other available parameters without waiting for images to load. This triggering prevents data collection from being delayed until later stages.
However, gtm.js should not be confused with the Google Analytics 4 page_view event. The former refers to internal GTM processing, while the latter represents an analytics event that GA4 can receive when pageview measurement is configured.
DOM Ready – gtm.dom event
DOM Ready occurs after the browser has parsed the HTML document and generated its object model. This is the right time for scripts that need to find an existing element, read its attributes, or inspect the page structure.
For example, custom code might search for a specific block using a CSS selector. If it's run too early, the desired element might be missing because the browser hasn't yet finished processing the relevant part of the document.
DOM Ready doesn't guarantee the appearance of elements added later via JavaScript. On dynamic sites, a separate application event or monitoring for changes in element visibility is sometimes required.
Window Loaded – gtm.load event
Window Loaded corresponds to the load event, which the browser fires after the initial loading of the document and any dependent resources considered by this mechanism is complete. It typically occurs after DOM Ready.
This trigger is used when user code requires resources that haven't finished loading at the previous step. For example, calculations may depend on the size of an already loaded image.
Window Loaded shouldn't be applied to all analytics. If a page takes a long time to load resources, a late launch may result in the loss of some interactions that occurred earlier. For most standard events, it's better to select a trigger based on actual technical need.
How is All Pages different from Initialization and Consent Initialization?
Google Tag Manager provides events that are processed before a regular Page View. These are needed for tasks that are sensitive to the container initialization sequence.
| Trigger | Purpose |
|---|---|
| Consent Initialization | Initial consent state setup |
| Initialization | Early initialization of other components |
| Page View / All Pages | Regular container load processing |
Consent Initialization is used for consent management tags. For example, a CMP platform integration can set consent values before running analytics tags.
Initialization is used for other early execution scenarios. It should not replace Consent Initialization in settings that require proper initial consent processing.
Don't choose an early trigger just for speed. First, check the firing order required by a specific tag and what additional conditions are specified in its settings.
When is All Pages not suitable?
All Pages isn't suitable for actions that occur after the page loads and need to be tracked separately. For example, a purchase, a form submission, viewing a specific section, or clicking a button shouldn't be automatically registered every time a document is opened.
It's also inconvenient when the tag is only needed in a specific section of the site. In this case, you can create a Page View with a Page Path filter or select another event that suits the task.
Websites built on React, Vue, and Next.js require special attention. During client-side navigation, the URL may change without the page fully loading. To accurately measure such transitions, it's necessary to consider the app's routing and existing GA4 mechanisms.
What types of triggers are there in GTM?

Google Tag Manager supports various event tracking scenarios. Some triggers respond to visitor actions, while others work with document loading, browser history changes, or custom app events.
Before setting up, it is useful to determine what action needs to be recorded and by what features GTM will be able to recognize it.
| Trigger type | What does it track? | Example of use |
|---|---|---|
| Page View | Page loading | Launching basic analytics |
| DOM Ready | DOM Readiness | Working with HTML elements |
| Window Loaded | Window load | Running a script after loading resources |
| Click – All Elements | Clicks on elements | Pressing a button |
| Click – Just Links | Clicks on HTML links | Following a link |
| Form Submission | Form submit event | Submitting a standard HTML form |
| Scroll Depth | Reaching scroll depth | Viewing 50% of the page |
| Element Visibility | The appearance of an element in the viewing area | Showing an important block |
| Custom Event | Custom event | Confirmed application |
| History Change | Browser history change | Transition between SPA routes |
| Timer | Time interval | Checking time on page |
| YouTube Video | Embedded YouTube Video Events | Start or end viewing |
| JavaScript Error | Matching JavaScript errors | Error diagnostics |
| Trigger Group | Fulfillment of several conditions | Scroll and time on page |
Some types require additional preparation. For example, click tracking requires enabling built-in variables, while custom events require ensuring data is passed from the application.
Pageview triggers
Pageview triggers are used to fire tags at specific stages of document loading. They are convenient where the event is not dependent on a specific visitor action.
Page View responds to container loading, DOM Ready to the HTML structure being ready, and Window Loaded to a later stage. Initialization and Consent Initialization are intended for specific early startup tasks.
If the tag is only needed on a service page, you can use Page View with a URL filter. For example, the condition “Page Path equals /services/seo/” will limit its execution to the specified path. If the site has multiple language versions, the conditions will need to be aligned with their URLs.
It's a good idea to define the expected number of runs for each rule in advance. This is especially useful when testing analytics after implementing new page templates.
Click and interaction triggers

Click triggers track interactions with interface elements. They are used for buttons, links, menu items, and other objects that visitors click or perform a corresponding action on.
GTM offers two main options: All Elements and Just Links. The former works with a wider range of HTML elements, while the latter is designed for links <a>.
For accurate tracking, you need to add a filter. Without it, the All Elements trigger may respond to many clicks that aren't related to the selected business action.
In addition to clicks, you can use custom events. For example, if a site transmits an event for opening a modal window, it's often more convenient to measure this action directly via the dataLayer, especially when the interface changes regularly.
Form submission triggers
Form Submission tracks the HTML form submission event, which is available to the standard GTM mechanism. It can be suitable for simple forms that work via a standard browser submission.
However, modern websites often use AJAX requests and JavaScript handlers. Such forms may fail to generate the expected event or generate it before receiving a server response.
Therefore, it's necessary to verify not only the trigger's activation but also the result of the action. If the request was not saved due to an error, a successful conversion cannot be recorded.
For reliable measurement, it's usually more convenient to send the form_submit_success event after the application confirms the submission. This way, analytics receives a more accurate signal about the completed action.
Scroll and element visibility triggers
Scroll Depth tracks when a specified page scroll depth is reached. For example, you can record when the user scrolls past 25%, 50%, 75%, or 90% of its height.
These metrics help study visitor engagement with long articles and landing pages. However, the scroll depth achieved does not prove that a person actually read the corresponding amount of text.
Element Visibility monitors the appearance of a selected element in the viewport. You can set a minimum visible area percentage and additional triggering parameters.
For example, such a trigger is suitable for testing the visibility of a pricing block or a consultation form. If the element is located in a hidden tab, its appearance and actual visibility depend on the interface implementation and require testing.
Additional trigger types
Custom Event is used for events that the site itself transmits. It's suitable for complex forms, confirmed orders, opening individual components, and other app actions.
History Change helps track address changes via the History API, including pushState and replaceState operations. This type is useful for SPAs, but it's necessary to verify which transitions the app actually creates.
Timer responds to a specified time interval, while YouTube Video responds to supported events of the embedded YouTube player. JavaScript Error helps log certain JavaScript errors accessible to the GTM tracking mechanism.
The choice depends on the site's architecture. If the desired event isn't among the built-in capabilities, first check whether the application can transmit it via the dataLayer.
How to create a trigger in Google Tag Manager?

Trigger creation begins in the GTM container workspace. Before configuring, it's important to understand what event needs to be monitored and what conditions should limit its execution.
As an example, let's consider a trigger for viewing pages in a specific section. This scenario is convenient for getting familiar with the interface, as it doesn't require JavaScript configuration or searching for HTML elements.
Step 1: Open the Triggers section
Go to tagmanager.google.com and select the account with the desired container. Make sure you're opening the website for which you'll be creating tracking rules.
In the workspace menu, open the “Triggers” section and click “New”. A new trigger window will appear with name and configuration fields.
It's best to specify the name before saving. For example, PV – SEO Services – RU indicates the event type and site section. This approach is especially useful when many similar rules accumulate in a single container.
Step 2: Select the trigger type
Click the trigger configuration block and select the desired type from the list. For the example of opening a service page, Page View is suitable.
If you want to react to a button, select Click. For a confirmed action that the app transmits itself, you'll need a Custom Event.
The type must match the event source. The Page View setting won't determine whether the request was successfully submitted, and Click doesn't guarantee that the action after clicking was completed.
When in doubt, open Preview and check which events appear when the desired action is performed. This check often helps you choose a trigger before creating additional rules.
Step 3. Set the trigger conditions
For Page View, you can choose All Page Views or Some Page Views. The first option responds to relevant page views, while the second allows you to limit the launch with additional filters.
For example, for the services section you can set the condition:
Page Path contains /services/seo/
This filter is suitable if the selected part of the path is truly present only in the desired section. When address intersections occur, it's better to use an exact match or a regular expression.
After setting up, test several URLs, both suitable and unsuitable. Be especially careful when testing sites with different language versions, URL parameters, and non-standard URL generation rules.
Step 4: Save the trigger and link it to a tag
Click “Save”, then open the desired tag in the Tags section. In the Triggering area, select the created trigger as the activation condition.
If necessary, a single trigger can be connected to multiple tags. For example, if two independent measurements need to respond to the same confirmed action, a common rule can be used for them.
In this case, you should consider the settings of the tag itself. Some tags have additional restrictions related to user consent, execution frequency, or execution sequence.
Saving the configuration to the workspace doesn't necessarily mean the changes are published to the site. First, you need to test them in preview mode.
Step 5: Check your settings before publishing
Open Preview, connect a website page, and perform the action you want the trigger to track. Then check whether the expected event has occurred and whether the associated tag has fired.
For our example, open the URL from the selected section and ensure the rule is triggered. Then, navigate to a page in another section and check that the rule doesn't fire unnecessarily.
If the tests are successful, you can submit the changes for publication using Submit. When creating a container version, it's a good idea to indicate which triggers have been added or changed.
This change history helps us identify the cause of errors that appeared after subsequent analytics updates.
How to set up trigger conditions and filters?

By default, many trigger types can respond to all events in a selected category. For example, All Elements can track various clicks on a page, so to track a single button, you need to add a specific condition.
Filters allow you to compare variable values with specified rules. This allows you to trigger a tag on a specific URL, for a specific element, or when multiple requirements are met simultaneously.
What operators are available in filters?
GTM provides exact and partial comparison operators, as well as regular expression validation. These allow you to create both simple and more complex conditions.
| Operator | Example | Result |
|---|---|---|
| equals | Page Path equals /contacts/ | Exact match |
| contains | Page URL contains /blog/ | Presence of a fragment |
| starts with | Page Path starts with /ru/ | Checking the beginning of a string |
| matches RegEx | Page Path matches RegEx ^/(ru|uk)/services/$ | Pattern match |
In the regular expression example, the \| symbol denotes an alternative. This pattern can be applied to two language paths if the address structure exactly matches the specified condition.
Regular expressions are useful for page groups, but pattern errors can significantly expand the trigger's scope. Therefore, complex conditions are first tested on real URLs in Preview.
How to use GTM built-in variables?
Built-in variables provide values that GTM can retrieve without writing custom code. These include Page URL, Page Path, Click Element, Click ID, Click Classes, Click URL, and Click Text.
To enable variables, open the Variables section and navigate to the Built-In Variables setting. Select the variables needed for a specific tracking scenario.
After this, you can see the values of the corresponding variables for registered events in Preview mode. For example, when a link is clicked, Click URL will display the link URL if GTM was able to determine one for the selected element.
Click Text should be used with caution. Button text may differ in Russian, Ukrainian, and English versions, and may also change as a result of content editing. For continuous monitoring, stable technical features are preferable.
| Part of the condition | Value | Purpose |
|---|---|---|
| Variable | Page Path | Gets the page path |
| Operator | contains | Checks for the presence of a fragment |
| Value | /services/ | Specifies the desired section |
What does the trigger condition consist of?

Each standard filter condition consists of a variable, an operator, and a value. The variable provides the data, the operator determines the comparison method, and the value specifies the desired result.
For example, the rule Page Path contains /services/ checks whether the path of the current page contains the specified character sequence.
For multiple conditions, GTM checks whether they are met together within the selected event. Therefore, additional filters narrow the range of situations in which the tag will fire.
Condition by Page URL or Page Path
The Page URL contains the full address of the page, including the protocol, domain, and other URL components. The Page Path returns the path at which the browser opened the document.
To track a section within a single site, it's usually convenient to use Page Path. For example, the condition Page Path equals /ru/services/seo/ allows you to select a specific language page.
If the rule needs to work on multiple domains, you'll need to check separately whether path-only matching is appropriate. Identical URL paths can appear on different sites, so hostname matching is sometimes also checked.
For an exact match, use equals, and for a section with multiple nested pages, use a suitable contains or regular expression. Don't forget about the trailing slash and the site's routing features.
Conditions for Click ID and Click Classes
Click ID gets the value of the id attribute of the element on which the click was registered. If the button has a stable, unique identifier, it's convenient to create a precise condition using it.
Click Classes contains the CSS classes of the selected element. This option is suitable when there is no stable ID, but the developer has provided a separate class for analytics.
It's important to remember that classes are often used to style the interface and may change after design updates. Auto-generated names, which depend on the application build, are particularly unreliable.
If tracking is business-critical, it's advisable to agree on a persistent identifier or data attribute with the developer. This reduces the risk of event loss after template updates.
How to set up a button click trigger?

Button tracking helps analyze the actions visitors perform on your website. For example, you can find out how often users open a consultation form, proceed to checkout, or click a contact button.
To set it up, you need to define an HTML element, create a suitable Click trigger, and connect it to an event tag. The key is to isolate the desired click from other interactions on the page.
How to choose between All Elements and Just Links?
All Elements tracks clicks on various HTML elements, including buttons, images, and nested interface components. Just Links tracks clicks on HTML <a> links.
If the element is implemented as a <button>, All Elements is usually selected. For a regular link, Just Links is more suitable.
The difference is especially noticeable on websites with non-standard interfaces. A button might visually appear as a link, while sometimes a clickable element is implemented through a container with a JavaScript handler.
Therefore, it's a good idea to check the HTML markup before creating a rule. An element's appearance doesn't always indicate which trigger type will correctly detect the interaction.
Just Links has additional parameters related to tag waiting and click validation. These should be tested separately, as link behavior depends on the site's scripts.
How to identify the required element?
Open the page in your browser, right-click the element, and select Inspect. Use the developer tools to find the id, class, and other attributes.
If the button contains id="consultation-button", you can set a condition for the trigger:
Click ID equals consultation-button
After that, launch Preview and check the Click ID value when clicked. If the click lands on a nested element, GTM may retrieve information about that element specifically, so simply comparing IDs sometimes doesn't work.
In such situations, you can use Click Element with an appropriate CSS selector or negotiate with the developer for a more stable event.
CSS selectors allow you to identify an element by its position and attributes. However, excessive reliance on HTML nesting makes tracking vulnerable to layout changes.
How to pass a click event to GA4?
After creating the trigger, you need to configure data transfer. To do this, create a Google Analytics: GA4 Event tag in Google Tag Manager, linked to the desired data stream ID.
You can use button_click as the event name. The button_id and button_name parameters are useful for additional information.
Example setup:
| Parameter | Value |
|---|---|
| Event Name | button_click |
| button_id | consultation-button |
| button_name | consultation |
| Trigger | Click on the consultation button |
The event name must match the project's accepted analytics schema. Before creating a custom event, it's a good idea to check whether there's a suitable recommended GA4 event and whether similar information is being automatically reported.
After saving, launch Preview, click the button, and open the corresponding event. Then check its arrival in GA4 DebugView, including the passed parameters.
Some custom parameters may require custom definitions in your property settings to be used in regular GA4 reports.
Why isn't a button click always a conversion?
A click records the visitor's interaction with the interface. This click may open a form, initiate data validation, or execute a request to the server.
If a visitor clicks “Submit Request” but makes a mistake in their phone number, the request will not be sent successfully. A similar situation occurs if there is a server error or the connection is lost.
In such cases, a click event is useful for behavioral analysis, but it should not be automatically counted as a confirmed request.
Lead SEO specialist — Gennady
In my SEO projects, I use Google Tag Manager to track actions that help evaluate the quality of search traffic. Page views indicate a visit, while contact page clicks and form submissions provide additional insights into user engagement.
I pay special attention to what exactly the trigger records. Clicking the submit button doesn't necessarily mean the request has been successfully created. If such clicks are counted as conversions, GA4 data can distort the actual performance of organic search. For important business actions, I prefer events that the site transmits after a confirmed result.
This approach helps distinguish between intermediate interactions and final actions. Analytics allow you to separately analyze interest in the form and the number of applications actually received.
How to track form submissions via GTM?
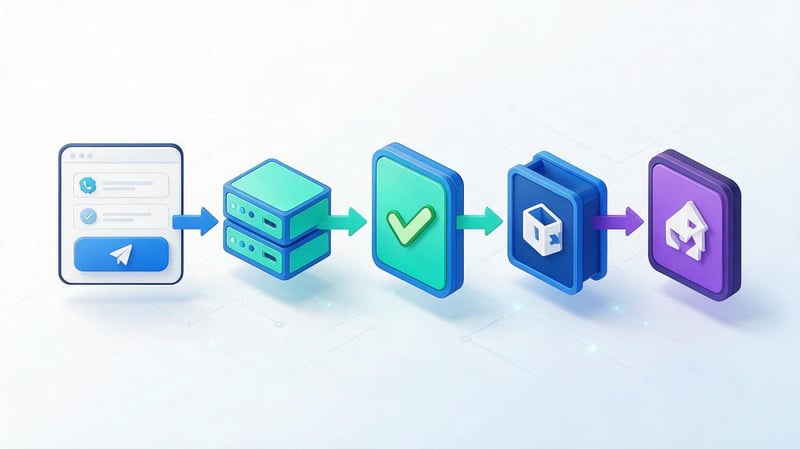
Forms are used for applications, registrations, subscriptions, and feedback. To evaluate their performance, it's important to understand at what stage an analytics event should occur.
On simple websites, a standard Form Submission is sufficient, but complex forms require additional verification. The main goal is to ensure that analytics register a successful result when it is considered a target action.
When to use Form Submission?
The Form Submission trigger is suitable for HTML forms that generate a submit event accessible to the standard GTM handler. To configure it, select the appropriate type and specify conditions that limit the required forms.
If necessary, you can use built-in variables associated with the form or a filter based on the page where it's hosted. After setting it up, test the behavior for both correct and incorrect submissions.
Please note that a standard submit event does not always confirm that data has been saved on the server. For example, the browser may initiate submission, after which a technical error occurs.
If the goal is to measure applications received, Form Submission alone is sometimes insufficient. In this case, a more precise signal from the application is required.
How to track successful submission of an AJAX form?
AJAX forms submit data without a full page reload. Their logic is typically handled by JavaScript code that sends the request and receives the server's response.
For such forms, it's convenient to provide a separate custom event. After successful confirmation of the operation, the application passes the information to the dataLayer, and GTM responds via a Custom Event.
For example, you can use form_submit_success with a form ID. This helps distinguish requests submitted from the website header, service card, or a separate contact page.
The event should only fire after the result has been verified. If the server returned an error, the user saw a failure message, or the request was rejected, a successful conversion should not be passed.
How to avoid false conversions?
The most common mistake is to count every click of the submit button as a conversion. This approach inflates results if visitors frequently encounter form errors.
Another source of problems is the repeated dispatch of the same event. This can occur when multiple handlers respond to the same result or when the user clicks a button repeatedly.
To verify, test successful submission, required field errors, server failure, and retrying the action. In each scenario, compare the expected events with the actual ones.
If a business-critical action is identified in GA4, it must be correctly configured as a key event. Beforehand, ensure that the event actually reflects a completed operation.
How do Custom Event and dataLayer work?

Built-in triggers are convenient for standard interactions that occur in the browser. However, complex websites perform multiple actions whose results can't be reliably determined from HTML elements alone.
Custom events and the dataLayer are used to convey this information. This is especially useful for forms, shopping carts, user accounts, and applications with dynamic components.
What is a custom event?
Custom Event is a trigger type that responds to an event with a specific name in the dataLayer. Its name is agreed upon with the developer and used in the GTM settings.
For example, after successfully submitting a request, an application might emit a form_submit_success event. Google Tag Manager will detect it and check the associated conditions.
Custom events are convenient because they can describe actions at the site's business logic level. When updating the button or form design, the agreed-upon event will continue to work as long as the developer maintains its transmission.
It's important to define consistent event names and parameters in advance. Different spellings of the same name will be interpreted as different values and may disrupt the trigger configuration.
How to pass an event via dataLayer?
Data Layer – the data layer through which a website transmits information to Google Tag Manager. It is typically represented by the window.dataLayer array, which contains objects with parameters and event names.
To send an event, use dataLayer.push(). Below is an example that a developer can call after a request has been successfully confirmed by the server.
window.dataLayer = window.dataLayer || [];

window.dataLayer.push({
  event: 'form_submit_success',
  form_id: 'consultation'
});
Here, event contains the event name, and form_id specifies the form ID. These values are examples and should correspond to actual site IDs.
After implementing the code, create a Custom Event trigger named form_submit_success. To pass the form ID, configure a data layer variable with the form_id key.
Then connect the trigger to the GA4 Event tag and specify the required parameters. Upon successful form submission, GTM will be able to receive the event and send the required data to Analytics.
Don't submit customer names, email addresses, phone numbers, or other personal data to GA4. Technical parameters needed for analytics are enough for the form.
How to use triggers on SPA sites?
SPA applications can change page content without a full document reload. This approach is common in React, Vue, and Next.js projects, although the exact behavior depends on the application architecture.
For example, a user navigates from a catalog to a product page. The page address changes, the interface is updated, but the standard GTM load event may not reappear.
To measure such transitions, they use History Change, application routing events, or already configured Google Analytics 4 mechanisms.
When working with History Change, it's important to check which history changes the site actually records. Not every transition automatically corresponds to a new page view, especially with complex client-side navigation.
It's important to check the automatic view measurement in GA4 separately. If it already responds to history changes, manually sending additional page_view data may create duplicates.
On multilingual sites, you should also monitor language settings, page URLs, and document titles. During client-side navigation, these values should match the page currently open.
What are trigger groups and exceptions?

Sometimes a single condition isn't enough to trigger a tag. For example, you need to consider users who scrolled to a certain depth in an article and spent a specified amount of time on the page.
In such cases, a Trigger Group is used. For situations where launching must be prevented, Trigger Exceptions are provided. These functions solve different problems and can be used in the same configuration.
How does Trigger Group work?
A Trigger Group combines multiple triggers into a single condition. The group fires after all the triggers included in it have been activated the required number of times.
Let's say you want to record interaction with an article under two conditions: the visitor reached 50% scroll depth and spent 60 seconds on the page.
To configure it, first create a Scroll Depth with a threshold of 50%, then a Timer with the appropriate interval and limits. After that, add both rules to the Trigger Group.
The order in which the conditions are met doesn't matter. The user can first stay on the page for a specified time and then scroll to the desired depth.
If the same trigger is added to a group multiple times, GTM will require the corresponding number of times it fires. This is suitable for scenarios where a repeated action needs to be recorded.
During a normal full page load, the group's state is reset. The standard Trigger Group is not designed to accumulate conditions across independent page loads.
Analyzing the sequence of actions across multiple pages will require separate logic for storing state and transmitting events. This should also take into account user consent and the specifics of the website's operation.
How to set up Trigger Exceptions?
Trigger Exceptions allow you to block a tag from firing under certain conditions. For example, you can exclude an internal test page from a specific analytics measurement.
To do this, open the tag settings and add a rule to the Exceptions area. You can select Page View as an exception, filtering by the test section URL.
If an exception condition is met, it prevents the corresponding tag from firing via the primary trigger. The result should be verified in Preview, as the interaction of conditions depends on the event being processed.
Exceptions can also be used to prevent individual unwanted launches. However, they do not replace the correct operation of Consent Mode and should not be used to bypass user choice.
Before adding multiple exceptions, it's a good idea to check whether it's easier to refine the conditions of the main trigger. A complex system of mutual blocks makes future analytics difficult to maintain.
How to test triggers in GTM?

After creating a trigger, you need to ensure it responds to the correct event and fires the correct tag. Simply checking the settings in the interface isn't enough: it's important to monitor the actual site behavior.
Google Tag Manager provides a preview mode for this purpose. Additionally, event transfer results can be verified in Google Analytics 4.
How to use Preview Mode and Tag Assistant?
In the GTM workspace, click Preview. This will open the Google Tag Assistant, where you'll need to enter the page address and connect to the site.
Once connected, perform the action you want to track. For example, open a service page, click the consultation button, or submit a test form.
Tag Assistant displays the sequence of logged events and information about the associated tags. Here you can see what values the variables contained and which rules were checked.
When setting up a click trigger, select the corresponding event and review its parameters. If the button ID differs from the value in the filter, the trigger won't meet the expected condition.
Preview mode works with the current container changes before publishing. Therefore, it should be used whenever new tags, triggers, or variables are added.
How can I determine why a tag didn't work?
If a tag doesn't fire, first check for the expected event. Without a suitable event, GTM won't be able to execute the associated trigger.
Then open the tag details. Tag Assistant includes sections titled “Tags Fired” and “Tags Not Fired”, which help you determine which tags fired during the selected event.
Pay special attention to filter conditions. For example, if the Click ID returns an empty value, checking for a specific ID will not yield a positive result.
Also check your exception and user consent settings. They can interfere with launching even if the primary trigger is correct.
If a tag has been activated but data hasn't appeared in GA4, you should check its type, stream ID, event name, parameters, and any sending errors. Launching a tag in GTM doesn't yet confirm successful event processing by the analytics system.
How to check events in GA4 DebugView?

DebugView allows you to monitor events coming into Google Analytics 4 in debug mode. It's useful for inspecting custom events and passed parameters.
Open the corresponding GA4 property and navigate to DebugView. Make sure the test device is sending events with debug mode enabled, for example, via a connected Tag Assistant.
Perform the desired action on the site and find its name in the event sequence. After selecting it, you can view available parameters, including the button or form ID.
Check the number of events separately. A single confirmed action should not create multiple identical analytical records unless re-submission is required by the measurement logic.
For business-significant events, check the key events settings. In GA4, this is how events that are of particular value to the organization are designated.
The absence of an event in DebugView doesn't always indicate a trigger error. The cause could be a blocked transfer, consent settings, debug mode, or the analytics property itself.
What should I check before publishing a container?
Before publishing, it's advisable to test several scenarios rather than limiting yourself to a single successful button click. The test should cover the main interaction scenarios with the site.
Use the following list:
- Test the trigger on both desktop and mobile devices, as interface elements may differ.
- Open different language versions of the page and make sure that the conditions do not depend on changing button text.
- Check for successful form submissions, form errors, and re-clicks to rule out false conversions.
- Test consent and opt-out for the relevant data processing categories by checking the correctness of Consent Mode.
- Run several SPA transitions and compare the number of events with the expected number of views.
- Verify that tags do not fire on pages and elements that should be excluded from the measurement.
After successful testing, create a container version with a descriptive name for the changes. For major analytics updates, it's helpful to keep a brief description of the new events and their triggering rules.
Common mistakes when setting up Google Tag Manager triggers

Trigger errors lead to missed events, duplicate conversions, and inaccurate reports. However, the GTM container itself may function without any visible technical issues.
To identify the problem, you need to compare the expected site behavior with actual events in Preview and GA4.
| Error | Consequence | Solution |
|---|---|---|
| Tracking all clicks | Extra events appear | Add exact conditions |
| Duplicate tags | The number of events is overestimated | Check sending sources |
| Unstable CSS classes | Events disappear after redesign | Use persistent identifiers |
| Invalid trigger type | The rule does not respond to the action | Check HTML and events |
| Ignoring SPA | Missed or repeated page views | Configure route processing |
| Consent error | The tag is not running correctly or is blocked | Check CMP and Consent Mode |
Problems often arise after updating a website, changing a form, or adding a new analytics tool. Therefore, monitoring measurements is essential not only during the initial setup.
The trigger fires on all clicks
If you select all clicks without restrictions for All Elements, GTM will respond to a wide range of interface interactions. Analytics may include events from menu clicks, accidental clicks, and other actions unrelated to the target button.
To fix this, add a filter by persistent ID or a suitable CSS selector. If necessary, limit the trigger's scope to specific pages.
After changing the settings, test the target element and several adjacent buttons. The rule should respond only to the intended actions.
If your site uses the same buttons in different blocks, decide in advance whether you need to combine them into a single event category or pass separate location parameters.
The same tag is fired twice
Duplicates occur when a single action triggers multiple identical dispatches. For example, an event can be sent directly by the website code and simultaneously via Google Tag Manager.
Another situation is when overlapping triggers are attached to a single tag. Also, consider recurring JavaScript handlers and automatic Google Analytics event measurement.
To diagnose the issue, find duplicate events in Tag Assistant and determine which tag is sending the event. Then, check the connections to Google Tag, GA4 Event, and additional integrations.
After correcting the error, repeat the test. For a confirmed action, the number of events must match the accepted measurement logic, including cases of repeated user actions.
Design change breaks tracking
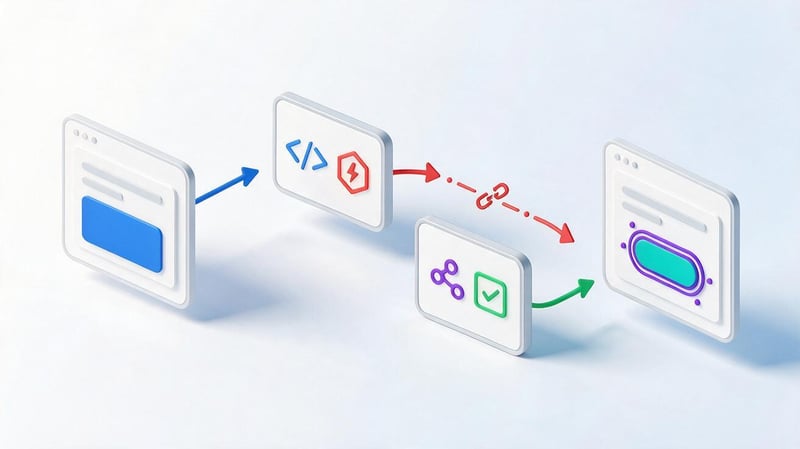
Triggers that depend on element styling often stop working after a template update. For example, a button's CSS class might change, even though its intended purpose for the user remains the same.
A similar issue occurs when using Click Text. After changing the text or translating the page, the filter no longer matches the new value.
For important events, it's better to use stable attributes or pass events via the dataLayer. These settings are less dependent on the interface's appearance.
Before redesigning, it's a good idea to compile a list of the analytics identifiers used. The developer should be aware of any markup changes that might impact existing measurements.
The trigger does not work on the mobile version or SPA
On the mobile version of a website, elements sometimes have a different HTML structure. For example, a button in the desktop header and a similar button in the mobile menu may have different IDs.
Therefore, a trigger configured only for a desktop element won't necessarily work on a smartphone. To test, use the actual mobile version and its events.
In SPAs, the issue may be related to the lack of a full document reload. The standard Page View doesn't have to fire on every client-side navigation between sections.
To resolve this, check your app routing, History Change, and existing GA4 settings. Then, ensure that pages are being counted without any omissions or duplicates.
Consent settings block the tag
Consent Mode affects the operation of supported tags depending on the user's consent status. Additional consent checks in GTM can also prevent launching under certain conditions.
If a tag isn't firing, open its Consent Settings and check the consent status in Tag Assistant. It's important to distinguish between Google Tag's built-in behavior and additional restrictions set in the container.
Consent Initialization should be used for initial consent setup. Regular analytics tags should not be migrated to this early trigger type unless necessary.
The correction must comply with the selected Consent Mode model and data processing requirements. You must not resolve an analytics error by ignoring the user's opt-out.
Google Tag Manager triggers determine when to fire tags and which visitor actions to include in analytics. All Pages is suitable for basic page load scenarios, Click helps track interactions, and Custom Event allows you to collect data on confirmed app actions.
After setup, be sure to check events in Tag Assistant and GA4 DebugView. This helps you find missed actions, duplicates, and filtering errors before they impact your reports.
Need to properly configure Google Tag Manager and GA4? Contact Seo-Gen for a web analytics audit, trigger verification, and targeted action tracking setup on your website.


