How to set up Google Tag Manager?


Google Tag Manager helps you manage your website's analytics and advertising tags through a dedicated interface. Once the container is installed, you can make many changes without constantly editing the page source code, and you can test your settings before publishing.
In this guide, we'll cover how to set up Google Tag Manager from scratch, connect Google Analytics 4, create events, and test data transfer. We'll also cover how to install Google Tag Manager on WordPress using a plugin or manually, and how to avoid double-installing the container.
What is Google Tag Manager and why do I need it?
Google Tag Manager, or GTM, is a website tag management system. A GTM container is installed on pages once, after which it can be used to create tags for Google Analytics 4, Google Ads, Meta Pixel, and other systems, as well as set trigger conditions.
GTM makes it easy to track actions that can't be measured solely by page views. For example, you can send phone clicks, form submissions, messenger visits, page scrolling, video views, registrations, or purchases to web analytics.
The following actions are most often configured through a container:
- sending data to Google Analytics 4 and advertising systems;
- clicks on buttons, links, phone numbers and email addresses;
- sending an application form, registration or callback;
- online store events including add_to_cart, begin_checkout and purchase;
- interaction with videos, external links and other page elements.
Once configured, data can be transferred to multiple systems simultaneously if project analytics require it. GTM doesn't replace the developer's work in tasks that require website changes, complex data layers, or server-side logic.
How is Google Tag Manager different from Google Analytics 4?
Google Tag Manager is responsible for managing tags and their trigger conditions, while Google Analytics 4 receives data and generates analytics reports. Therefore, GTM and GA4 typically work together, although they perform different tasks within the same analytics system.
For example, GTM can detect when a user submits a form and trigger an event tag. GA4 then receives the event, stores it along with its parameters, and displays the information in Realtime, DebugView, and standard reports.
Current Google documentation suggests connecting GA4 via a Google tag, which specifies the corresponding Tag ID. The old GA4 Configuration type is still found in manuals from previous years, but it is no longer worth using it as the basis for new instructions.
How do tags, triggers, and variables work?
Google Tag Manager uses three main entities: a tag defines the data to send, a trigger specifies the execution time, and a variable passes additional value. Together, they describe a specific user action and the analytics system's response.
Let's say a visitor clicks a phone number on a service page. The trigger checks the Click URL and detects a link that begins with tel:, after which the tag sends a click event to GA4 with the appropriate name and parameters.
The data transfer scheme looks like this:
User action → GTM trigger → tag → GA4 → analytics report
Variables help add context to an event. For a click, you can pass the Click Text, Click URL, or the current page address, and for a form, you can use its ID, name, or other available attribute.
Answers to your questions
Do I need to install Google Tag Manager and Google Analytics 4 at the same time?
Google Tag Manager and Google Analytics 4 perform different tasks, so they are often used together. GTM manages tags and trigger conditions, while GA4 receives events, processes them, and displays the data in analytics reports.
You can connect GA4 directly to your website or via Google Tag Manager. If you choose GTM, carefully check that the same Google tag isn't already installed using another method.
Where should I insert the Google Tag Manager code?
Google recommends placing the first web container fragment as high as possible within the <head> element. The second noscript block is placed immediately after the opening <body> element to ensure the installation structure matches the GTM documentation.
After installation, you should test several page types, not just the main one. On sites with different templates, some pages may be generated differently and accidentally left without a container.
How to install Google Tag Manager on WordPress?
Google Tag Manager on WordPress can be enabled via a dedicated plugin or manually via a template and hooks. For most website owners, a supported plugin is the easier option, as it better handles standard theme updates.
Before installing, be sure to check whether GTM is included in your existing code or another analytics plugin. If the container is already present, re-inserting it may cause duplicate events.
Is it possible to install GTM on WordPress without a plugin?
Yes, you can add the container manually if you have access to templates and an understanding of WordPress's structure. The first fragment should be placed within the <head> tag, and the second immediately after the opening <body> tag.
It's better to use a child theme or the hooks provided by the developer. Directly editing the parent theme's files is less reliable, as an update may overwrite your changes.
How to check if Google Tag Manager is working?
The primary testing method is Preview mode and Google Tag Assistant. In this mode, you can perform the desired action on the site and see which tags were triggered, which remained disabled, and what values were assigned to the variables.
After this, it's worth checking whether the event is received in GA4 using DebugView or Realtime. This double check shows the entire chain from the user's browser to the analytics property.
Why is my GTM event not showing up in Google Analytics 4?
First, check whether the tag fired in Preview and which Tag ID is used to send the data. If the tag fires correctly, check the selected GA4 property, consent settings, event parameters, and any configuration errors.
Also consider the data validation method. For recent test events, it's more convenient to use DebugView or Realtime, as standard reports aren't designed for immediate technical diagnostics.
Why is an event counted twice in GA4?
A common cause is duplicate events due to multiple analytics installations. For example, one Google tag might be running directly on the website, while a second one is running through Google Tag Manager with the same settings.
Another option is multiple tags with the same Event Name or two triggers that fire on the same action. Checking the chain with Tag Assistant usually helps quickly identify the source of the duplicate.
What do you need to prepare before setting up Google Tag Manager?

Before creating a container, determine which user actions actually need to be measured. If you initially set up tags without a plan, the container quickly becomes filled with similar events, and the names and trigger conditions begin to differ, even for identical actions.
For basic setup you will need the following access rights and data:
- Google account to create or connect a Google Tag Manager account;
- administrative access to the site or the ability to transfer the code to the developer;
- access to WordPress, if the site runs on this CMS;
- Google Analytics 4 property and web stream for transmitting analytical data;
- a list of conversions and additional events to track.
Before starting work, it's helpful to list events in a separate table and agree on the names. For a service website, this might be a form submission, a phone click, or a click to a messenger, while an online store will also require proper e-commerce setup.
How to set up Google Tag Manager?
If you're trying to figure out how to set up Google Tag Manager yourself, you should start with an account and a web container. Once the container is installed, you can connect Google tags, create events, test their execution, and only then publish the final version.
For the first launch, you don't need to create dozens of tags right away. Simply install the container correctly, enable basic analytics, and test one clear event, after which you can expand the measurement scheme.
Step 1: Create a Google Tag Manager account
Open Google Tag Manager and sign in with the Google account you'll use to manage analytics. For a work project, it's best to use a corporate account or grant access to multiple responsible employees so container management isn't dependent on a single person.
When creating an account, you will need to fill in basic information:
- Enter the name of your company or project to make your account easy to find among other resources.
- Select the country associated with the owner or primary market of the project.
- Proceed to create the first container that will be associated with a specific site.
After creating an account, check user access rights. In a production project, it's helpful to define in advance who can only view settings, who can edit the workspace, and who has permission to publish new versions of the container.
Step 2: Create a GTM container
A container stores tags, triggers, variables, and other project-specific settings. For a typical website, when creating a container, choose the Web platform, and use a domain name, such as example.com, as a convenient name.
This approach simplifies things if you have multiple websites on your account. Mobile apps, AMP, or server-side tagging use different container types, so you don't need to select them for a standard WordPress site without a separate task.
Once created, a web container receives an ID of the form GTM-XXXXXXX. This should not be confused with the GA4 web stream's Measurement ID of the form G-XXXXXXXXXX, as these IDs refer to different entities.
Step 3: Get Google Tag Manager Code
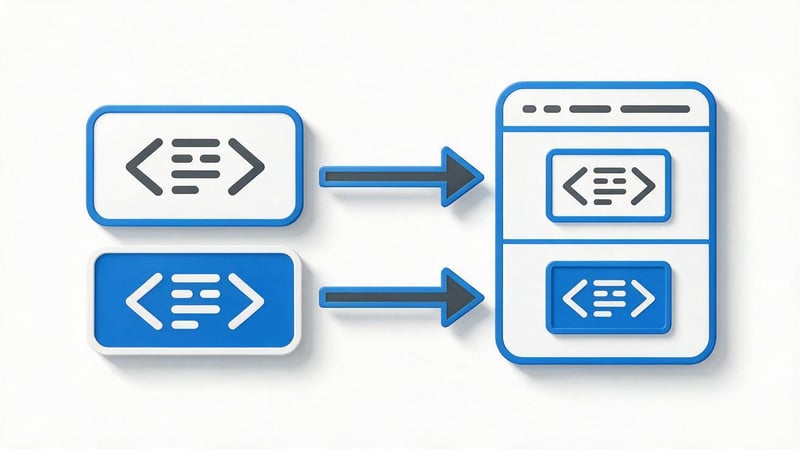
Open the created container and click its GTM ID at the top of the interface. The system will display two installation fragments that belong to the same container and should be present on the site's pages.
Google recommends placing the first fragment as high as possible within the <head>, and the second noscript block immediately after the opening <body>. This layout remains valid for the standard Google Tag Manager web container.
Don't copy the tracking code from someone else's article, even if the example uses a similar ID. You should get the code from your own container, as it already contains your GTM ID.
Where to insert the first GTM code?
The first fragment contains the container's main JavaScript code and should be loaded as early as possible after the <head> tag opens. The earlier the browser launches the container, the less likely it is that some events will occur before the necessary tags have loaded.
On a standard HTML website, the code is added to a common template used by all indexed pages. On a CMS, the installation location depends on the theme, integration, or special field for custom scripts, so it's best to check if GTM is installed in a different way before making any changes.
After adding the code, open several page types and verify that the container is present in their HTML source. Checking just the homepage isn't enough if the site uses multiple templates or a separate technology for some sections.
Where to insert the second GTM code?
The second fragment contains a noscript block, which is placed immediately after the opening <body> tag. It shouldn't be moved to the <head> or any other location at the bottom of the template just because it's easier to insert code in a specific CMS.
Both fragments must refer to the same GTM-XXXXXXX identifier. If the first code belongs to one container and the second to another, diagnostics become more difficult and there is a risk of transferring data to the wrong project.
After changing the template, clear your server cache and CMS cache, if used. Then reopen the page without logging in and check the actual HTML that a regular visitor receives.
Step 4: Add a Google tag for GA4
To transfer data to Google Analytics 4, open the Tags section, create a new tag, and select the Google Tag type. In the Tag ID field, enter the ID of the linked Google tag, then configure the tag to fire on all required pages.
For a standard installation, the sequence looks like this:
- Open the workspace of the desired container and go to the Tags section.
- Click New and give it a descriptive name, for example Google tag – GA4.
- In Tag Configuration, select Google Tag and specify the corresponding Tag ID.
- In Triggering, select Initialization – All pages if the basic configuration should run on all pages.
- Save your changes and proceed to the preliminary check.
Google specifies Google Tag as the current base tag type for GA4 configuration via Tag Manager. For new containers, it's best to adhere to this scheme to ensure the instructions are consistent with the service's current interface.
If Google Analytics is already installed directly in your website's code or through another plugin, first check the existing configuration. Installing the same analytics tool in multiple ways at the same time can result in duplicate views and events.
Step 5: Set up tags, triggers, and variables

Once you've connected your core analytics, you can move on to custom events. Start with an action that's easy to reproduce and test, such as a click on a phone number or the successful submission of a simple form.
In Google Tag Manager, each event can be conveniently named using a consistent system. For example, for GA4, you can use descriptive names like phone_click, form_submit, or another consistent name that you won't have to decipher when working with reports.
Configuring the same action with multiple tags without a specific reason is not recommended. Before creating a new event, first check whether it is already being sent automatically or through an existing container.
How to create a tag?
Open Tags, click New, and select the Google Analytics: GA4 Event type for the event you want to send to Google Analytics. Then, enter the event name and, if necessary, add parameters to help understand the context of the user's action.
For example, a phone click event can be supplemented with a page, Click Text, or the number itself, as long as such transmission complies with your data collection policies. Don't transmit personal data to GA4 just because it can technically be retrieved through a variable.
It's best to make tag names within GTM clear to other specialists. The format “GA4 – Event – Phone Click” is much easier to read than a collection of names like Tag 1, New Tag, or Test.
How to create a trigger?
The trigger determines the condition under which the tag should fire. For phone links, you can use the link click type and the condition that the Click URL contains or begins with “tel:”.
For a form, the condition depends on the website's implementation. Sometimes the standard Form Submission is suitable, while in other projects, it's more reliable to track the appearance of a success message, a custom dataLayer event, or a specific change in the interface state.
After creating a trigger, be sure to test both positive and negative scenarios. The tag should fire for the desired action and remain disabled for similar clicks that are not related to the selected conversion.
What variables will be needed?
For basic scenarios, the built-in variables Google Tag Manager already knows how to retrieve from a page are sufficient. Page URL, Click URL, Click Text, Click Classes, and Form ID are commonly used, while more complex tasks require custom variables.
Don't enable all built-in variables unless necessary. The clearer the container structure, the easier it will be to find errors after months of work and to understand the settings for a specialist accessing the project for the first time.
If the required data is received through the Data Layer, a separate data layer variable is created for it. Its name must exactly match the key the developer passes through the dataLayer.
How to install Google Tag Manager on WordPress?
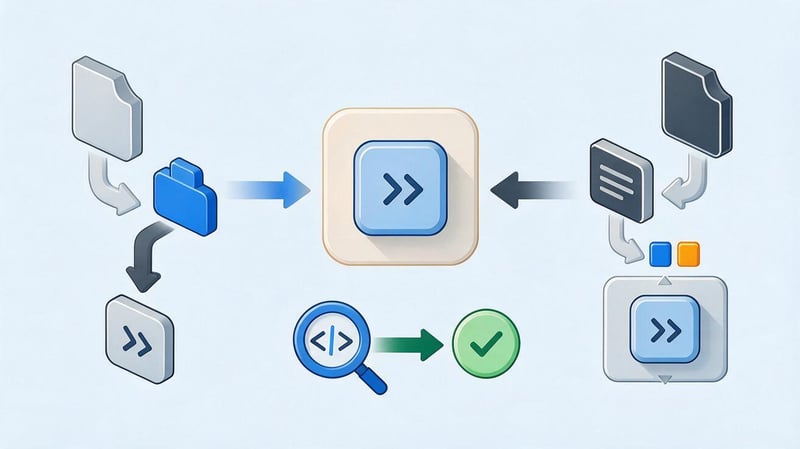
There are several ways to install Google Tag Manager on WordPress without manually editing each page. For most projects, it's more convenient to use a proven integration or a specialized plugin, as the code doesn't rely on editing individual templates.
Before installing, first check the source code and the list of active plugins. GTM may have been added by a previous developer, via a theme, Site Kit, GTM4WP, or another solution, so reinstalling it will create an additional container or duplicate events.
Method 1: Installing GTM on WordPress via a plugin
Site Kit by Google and specialized solutions like GTM4WP are available for WordPress. Google lists Site Kit as a supported method for connecting its services to WordPress, and GTM4WP remains an actively supported plugin for working with Google Tag Manager and WooCommerce.
The general installation procedure looks like this:
- Create a GTM container and copy the ID in the GTM-XXXXXXX format.
- Install the selected plugin through the “Plugins” section in the WordPress panel.
- Activate it and open the integration settings page.
- Specify the container ID and save the changes.
- Clear your site's cache and check it through Google Tag Assistant.
After installation, open several pages of different types, including a blog post, a category, a service page, and a form. The container should load reliably regardless of the template used for a specific URL.
How can I check if a plugin has created duplicate GTM containers?
First, check how many times the GTM-XXXXXXX identifier appears in the page's source code. Then, check the list of analytics plugins, theme settings, custom code fields, and other places where the container may have been added previously.
Duplicate code doesn't always look like two identical fragments next to each other. One container may be added by a plugin, while the other is loaded through an old theme integration or a third-party service, so it's best to double-check the tag chain using Tag Assistant.
If two identical installation methods are detected, leave one managed option. After removing the duplicate, clear the cache and retest the page, as the old HTML version may continue to be served to visitors for some time.
Method 2: Installing Google Tag Manager manually
Manual installation is suitable if the project has a developer or uses a custom theme where the site team controls where scripts are included. The container code must be added to the shared template so that both fragments appear on all required pages.
The first fragment is added as high as possible within the <head>, and the second is placed immediately after the opening <body>. This is the sequence Google specifies for the standard web container setup.
After changing the files, you can't just visually inspect the site. You need to open the source code of the finished page, ensure both fragments are present, and then connect the site to Preview to see the actual container launch.
Why is it not advisable to edit the parent theme directly?
If you add GTM directly to a parent theme file, the next update may replace the modified file with the original version. This will cause the container to disappear without any obvious error in the WordPress interface, and analytics will stop receiving new data.
For ongoing customization, it's best to use a child theme, built-in hooks, a specialized custom code module, or a suitable plugin. The specific option depends on the site's architecture and theme update policies.
After any WordPress, theme, or plugin update, it's a good idea to include analytics testing in your technical checklist. This is especially important for websites where leads and advertising campaigns are evaluated using GA4 events.
How to check if Google Tag Manager is working?

Just because a tag is saved within the workspace doesn't mean it's running correctly on the site. Before publishing, open Google Tag Manager in Preview mode and test the actual user action, trigger conditions, and variable values.
Testing is especially necessary after changing forms, buttons, CSS classes, or page structure. Even a previously correctly configured trigger may stop firing after a layout update.
Checking via Preview and Tag Assistant
Click Preview in the container workspace, which will open Google Tag Assistant. Enter the URL of the website you're testing, connect to the page, and perform the action for which the tag was created.
Next you need to check the chain:
- Find the event on the left side of Tag Assistant.
- Open the list of tags that fired on this event.
- Make sure the tag you want is in the Fired section.
- Check the values of the variables and passed parameters.
- Repeat the test on the page where the tag should not fire.
Google recommends testing your container using Preview and Tag Assistant before publishing the production version. This test helps identify trigger errors before incorrect events reach analytics.
How to check event transmission in GA4?
After the tag has successfully launched, open Google Analytics 4 and check the event using DebugView or Realtime. DebugView is convenient for monitoring test actions during setup, as it shows the event sequence and their parameters.
If the tag fired in GTM but the event didn't appear in GA4, check the Tag ID, event name, consent settings, and configuration parameters. Also, make sure you're viewing the property and web stream that the test request is actually sent to.
Standard GA4 reports aren't suitable for immediate technical verification of every new event. For initial diagnostics, it's more convenient to use modes designed for viewing fresh or debug data.
How to check that GTM is installed only once?
Open the HTML source and search for the container ID. The same GTM-XXXXXXX should not be added simultaneously manually, via a theme, and via multiple plugins without a specific technical reason.
Then connect Tag Assistant and view the list of detected tags. If a container or Google tag appears multiple times, you need to determine the source of each installation and maintain the correct configuration.
Additionally, check WordPress, CMS settings, header script fields, and advertising service integrations. This audit often uncovers legacy code that continues to work after migrating to the new analytics framework.
How to publish changes in Google Tag Manager?

Once the Preview shows that the tags are firing correctly, you can push your changes to the production version. In the container interface, click Submit, select Publish and Create Version, add a descriptive version name, and briefly describe the changes.
For example, a version might be called GA4 – Forms and Phone – 01.10.2026. The description should indicate which tags were added, which triggers were changed, and what was removed so that the container history remains clear in a few months.
The publication sequence is simple:
- Complete the check of all changed tags through Preview.
- Click Submit and select the publication to create a new version.
- Enter a title and description of the changes.
- Review Activity History before final publication.
- Click Publish and repeat the test action on the production site.
Google separates version creation and publishing: a saved version can be left without any changes being published to the site. Therefore, after setting up a version, always check that the new version has actually been published.
What events should I set up in GTM first?
The set of events depends on the project type and the actions associated with requests, sales, or other website goals. There's no point in creating dozens of events just to collect a large amount of data if no one uses it to analyze advertising and visitor behavior.
To start, you can use this guideline:
| Site type | Main events |
|---|---|
| Services website | Submitting a form, clicking on a phone number, email, messenger, or requesting a callback |
| Online store | view_item, add_to_cart, begin_checkout, purchase, and key ecommerce events |
| Content site | Scroll, video viewing, external transition, subscription, interaction with important blocks |
| SaaS | Registration, starting a trial, authorization, creating a project, and creating a subscription |
After triggering events, compare them with actual business data. If GA4 shows twenty applications, but the CRM received ten, the issue requires diagnostics before using these metrics in advertising or reporting.
For commercial projects, it's helpful to define primary and secondary conversions in advance. This way, a simple page view won't be counted equally as a form submission or a completed purchase.
What is a Data Layer and when is it needed?

The Data Layer is used to pass structured information from a page to Google Tag Manager. The developer adds an object to the dataLayer, after which GTM can retrieve the required values and pass them to GA4, advertising systems, or other tags.
The data layer often passes the order ID, amount, currency, product list, product category, form type, or internal event ID. For e-commerce, this scheme is more reliable than attempting to read critical data directly from the page's text and HTML elements.
For example, after a successful purchase, a website might send a purchase event along with the transaction_id, value, currency, and product data. In GTM, corresponding Data Layer variables are created for these values, and then used in the event tag.
A simple phone click typically doesn't require a separate Data Layer. It becomes especially useful when the required value isn't included in GTM's standard variables or when the data needs to come directly from the site's business logic.
Common Mistakes When Setting Up Google Tag Manager
Most GTM issues stem not from the complexity of the service itself, but from multiple parallel installation methods, overly broad triggers, or a lack of validation. The error can remain undetected for a long time if the team only looks at the presence of events and doesn't compare them with actual requests.
The most common situations are:
- The container is installed twice. The same GTM ID is added via the theme and plugin, so some tags may be executed multiple times.
- Incorrect container used. The GTM ID of a test project or another domain was sent to the production site.
- The changes have been saved but not published. The tag is still present in the workspace, but site visitors continue to receive the previous version.
- The trigger is too broad. The event is sent on every click instead of one specific action.
- A single event is sent by multiple tags. As a result, GA4 records two conversions instead of one.
- Google Analytics is connected both directly and through GTM. This setup can create unnecessary pageviews or duplicate events.
- The Tag ID isn't verified. Data is being sent to another GA4 property, even though the tag itself is technically working.
- The changes weren't tested in Preview. The error is only discovered after publication and already affects statistics.
- The code is added to the parent WordPress theme. After an update, the modified file is replaced, and the container disappears.
- An outdated guide is used. Older articles may refer to Universal Analytics or the old GA4 Configuration scheme.
After fixing an error, always repeat the full test, from the user action to the event appearing in the analytics system. Testing just one intermediate step doesn't indicate whether the data reached the intended property.
Lead SEO specialist — Gennady
I start setting up Google Tag Manager with a list of events that the business actually needs, and only then create tags and triggers. For each project, I set a consistent naming scheme, test events using Preview and Tag Assistant, compare the data with actual requests, and only then publish the new version of the container.
This approach is especially useful for SEO and end-to-end analytics, where a false conversion can distort the effectiveness of landing pages. If a single request is submitted to GA4 two or three times, even the most beautiful report no longer shows the true picture.
Does every website need Google Tag Manager?

Google Tag Manager is useful for projects that utilize multiple analytics and advertising systems, regularly experience new events, or require flexible user tracking management. Its benefits are particularly noticeable on service websites, online stores, SaaS, and projects with paid advertising.
For a small website with a few pages and a single, simple analytics system, GTM may not be necessary. Before installation, it's worth determining what tasks it will perform and who will maintain the container once it's up and running.
GTM is more useful when the team adheres to a clear structure and documents changes. A container with dozens of test tags, obscure names, and outdated triggers gradually becomes a source of errors rather than a convenient working tool.
Setting up Google Tag Manager starts with a clear measurement plan and proper container installation. After that, you can connect Google Tag for GA4, configure events, test tags and variables in Preview, ensure data is being received, and publish a new version.
If the container is already in use, first review the existing structure and eliminate duplicates before adding new tags. For WordPress, check your plugins, theme, and old integrations separately to ensure a single GTM ID isn't loaded in multiple ways.
Need to configure Google Tag Manager, GA4, and events for real leads or sales? Give Seo-Gen specialists access to your website and current analytics – we'll check your existing setup, configure the necessary events, and test data transfer before publishing.
More articles about SEO Promotion


