Tags in Google Tag Manager: setting up and testing


Google tags help track website visitor actions: page views, button clicks, form submissions, purchases, and other events. The data collected is used in Google Analytics 4, Google Ads, and other services to analyze traffic, evaluate advertising, and measure conversions.
Google Tag Manager (GTM) is used to manage these settings. Its interface allows you to add tags, select trigger conditions, pass event parameters, and test tracking. Most changes can be made without editing the site's source code if the necessary data is already available.
We'll explore the different tags in Google Tag Manager, how they differ from the global Google site tag, and how to configure event forwarding to GA4 and Google Ads. We'll also cover tag verification via Tag Assistant and errors that prevent data from being reported in analytics.
What are tags in Google Tag Manager?
A tag in Google Tag Manager is a customized code snippet or pre-built template that performs a specific action under specified conditions. For example, it might send a purchase event to Google Analytics 4, transmit advertising conversion information to Google Ads, or run a third-party script.
That's why Google tags are often referred to as tracking codes. However, their capabilities are broader: GTM can be used to manage marketing scripts and other actions for which appropriate templates or custom code are provided.
To use GTM, a container is installed on a website. It stores configurations of tags, triggers, and variables. After changes are published, the container uses these settings when visiting pages.
What are Google tags used for?
The main purpose of tags is to transmit information about user actions to analytics and advertising systems. Without proper tracking, a website owner may see visits but not understand which traffic sources lead to inquiries and purchases.
In practice, tags are used for several purposes:
- Measuring traffic. Google tag helps collect data about page views and other site interactions for Google Analytics 4.
- Tracking leads. A separate event records the successful submission of a feedback form, registration, or service order.
- Sales tracking. The purchase event passes the order ID, value, currency, and information about the purchased items.
- Advertising evaluation. The Google Ads tag helps measure user actions after interacting with ads.
- Remarketing. Advertising tags transmit predefined settings and signals for working with audiences in accordance with the terms of the consent.
For example, a user lands on a dental clinic's website from Google Ads and schedules a consultation. If configured correctly, analytics receives a request event, and the advertising system can track the corresponding conversion.
However, the tag itself doesn't determine the quality of the lead. To distinguish genuine requests from accidental clicks, it's necessary to correctly select the event that confirms the desired action.
How do tags, triggers, and variables work?
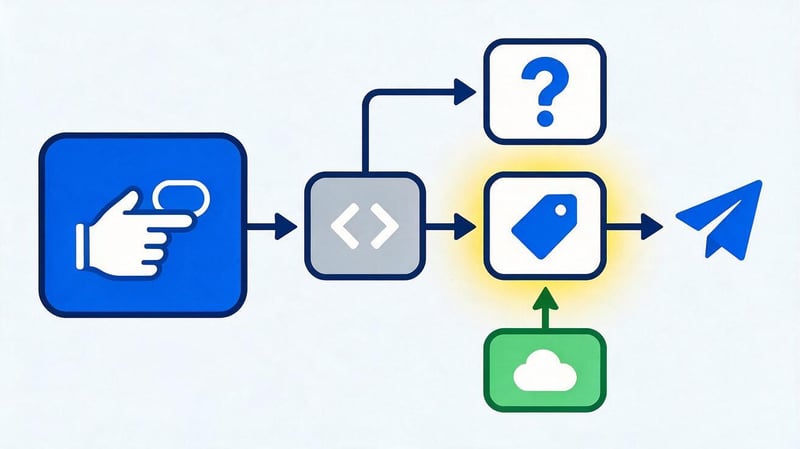
In Google Tag Manager, tracking is determined by three main elements: tags, triggers, and variables. Each element is responsible for its own specific configuration.
| Element | What it does | Example |
|---|---|---|
| Tag | Performs the specified action | Sends generate_lead to GA4 |
| Trigger | Defines the launch conditions | Form submitted successfully |
| Variable | Passes the required value | Form type or page URL |
| Container | Stores settings and manages their execution | GTM-XXXXXXXX |
Let's imagine a consultation booking form. After the request is successfully processed, the website sends a lead_form_success event. GTM detects it, checks the trigger conditions, and fires the corresponding GA4 tag.
If the form_type value is passed along with the event, the GTM variable reads it and adds it to the analytics event parameters. This allows you to distinguish between requests from multiple forms without creating a separate tag for each.
The sequence is as follows:
User action → site event → GTM trigger → tag → Google Analytics 4
This scheme is convenient when working with multiple services. A single confirmed user action can trigger multiple tags, but each tag must be configured and verified separately.
What is the difference between a tag and a trigger?
A tag defines the action to be performed, while a trigger specifies the moment and conditions for its execution. Confusing their purposes can easily result in an event being sent too early or not being recorded at all.
Let's look at the application form. The GA4 tag – generate_lead – is configured to send an event to Google Analytics 4. The lead_form_success trigger fires it after confirmation that the server has accepted the application.
With a different trigger, the same tag could fire immediately after clicking the “Submit” button. Then, analytics would also include submission attempts with validation errors, even if the user never submitted the request.
Therefore, tracking setup begins with defining an event that truly confirms the goal has been achieved. After that, a tag and parameters for data transfer are selected.
Answers to your questions
What is a Google tag in Google Tag Manager?
The Google tag is a tag used to configure data collection and transmission to connected services, including Google Analytics 4 and Google Ads. In GTM, you can create one through the interface and assign a suitable trigger.
For the basic configuration, specify the tag ID and then test it in Tag Assistant. If you need to measure specific actions, create the corresponding event tags.
What is the difference between Google's global site tag and GTM?
Global Site Tag is the former name for the technology used to connect Google tags via gtag.js. This code can be placed directly on website pages and send data to connected Google services.
Google Tag Manager manages tag, trigger, and variable configurations through a dedicated interface. It allows you to configure GA4 measurement, ad conversions, and integrations with third-party platforms.
Why does GTM show Tags Not Fired?
The “Tags Not Fired” status means the tag didn't fire with the selected event or in the context being checked. This may be normal behavior if its trigger conditions haven't yet been met.
If the desired action occurred, check the trigger settings, variable values, and consent status. Also, make sure the site delivered the expected event and is loading the correct container.
How to check Google tag in Chrome?
Open Google Tag Manager, launch Preview, and connect your site to Tag Assistant. Then perform the desired action and see which tags fire.
For additional verification, open Chrome DevTools and examine the Network tab. If the tag should send an event to GA4, check its name and parameters in DebugView.
Can I use Google tags without Google Tag Manager?
Yes, you can install Google tags directly into your website code using the gtag.js library. This option is suitable for projects that require a basic analytics connection without the need to manage multiple tags separately.
Google Tag Manager is more convenient if your site uses different marketing services, events, and trigger conditions. When choosing a setup method, consider existing integrations to prevent duplicate data collection.
How to add a Google Ads tag via GTM?
First, create the desired conversion action in Google Ads and obtain the parameters for connection via GTM. Then, create a Google Ads Conversion Tracking tag and specify the Conversion ID and Conversion Label.
After this, assign a trigger that corresponds to the successful completion of the target action. Test the launch using Tag Assistant and ensure that the conversion is being sent to the correct advertising account.
Why might Google tags duplicate events?
Duplication occurs when a single action is sent to analytics in multiple ways. For example, a purchase event might be sent via GTM and simultaneously via a built-in CMS integration.
Other causes include multiple identical triggers, the site resending an event, or reloading the analytics code. To troubleshoot, check the container, source integrations, and event sequence in Tag Assistant.
After making a correction, retest and ensure that each confirmed action is correctly accounted for.
What types of tags are available in Google Tag Manager?

Google Tag Manager supports ready-made templates for Google services and third-party platforms, as well as custom configuration options. The choice depends on the data you need to transfer and the service that needs to receive it.
For most websites, the basic setup includes a Google tag, Google Analytics 4 events, and Google Ads conversion tracking. Additional advertising and marketing tags are enabled as needed.
Before adding a new tag, it's worth checking your existing settings. If similar code is already installed via the CMS, gtag.js, or another container, re-inserting it may result in duplicate data.
Google Tag for Google Analytics 4
Google tags are used to configure data collection in Google services, including Google Analytics 4. They allow you to set basic measurement parameters and link your site to the desired analytics property.
To connect GA4 via GTM, create a Google tag and specify the corresponding ID. Google Analytics settings typically use a data stream ID of the format G-XXXXXXXXXX, while Google Tag configurations may use the ID GT-XXXXXXXXXX.
For individual actions, Google Analytics tags are created: GA4 Event. These tags transmit events with selected names and parameters, such as generate_lead, add_to_cart, or purchase.
Older guides may use the GA4 Configuration type. The current setup uses a Google tag instead. Also, don't use the instructions for Universal Analytics, as it's no longer used for standard data collection.
Google Ads Conversion Tracking Tag
Google Ads tags help measure user actions after engaging with an ad. Conversions can include submitting a lead form, completing a purchase, or other beneficial actions for your business.
To set it up via GTM, use the Google Ads Conversion Tracking type. This includes the Conversion ID and Conversion Label, which are taken from the parameters of a specific conversion action in your advertising account.
The Conversion ID is linked to the advertising account, and the Conversion Label identifies the desired conversion action. Additionally, you can pass the value, currency, and transaction ID.
The Conversion Linker mechanism is also used to track ad conversions. If the Google tag is already loading correctly on all pages, a separate Conversion Linker tag may not be necessary. This depends on the existing configuration.
After setup, you need to ensure that the ad conversion is only recorded when the selected action is completed. For purchases, you should also pass a unique transaction ID to prevent duplicate counting.
Remarketing and third-party tags
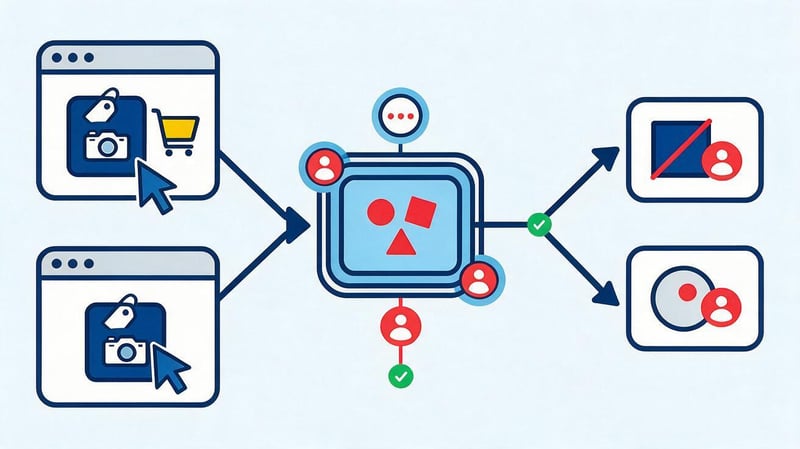
Remarketing tags are used to transmit predefined data about visitor interactions with a website. These settings can be used to create advertising audiences and tailor messages to users who have previously shown interest in products or services.
GTM offers Google Ads settings and the ability to connect third-party services, including Meta Pixel. Depending on the platform, ready-made templates from the community gallery or custom scripts are used.
For example, an online store might transmit information about product views, adding to cart, and order placement. For proper operation, event names, parameter sets, and data transfer rules must be agreed upon.
Before connecting a third-party tag, check the template's origin, required permissions, and service requirements. Pay special attention to personal data and user consent settings.
Custom HTML Tags and Templates
The Custom HTML type allows you to run custom HTML code with supported JavaScript. It's used when a specific service doesn't have a suitable built-in template or requires special integration.
However, this method requires technical verification. An error in the custom script could cause tracking failure, increase page load, or lead to the execution of unwanted code.
The GTM gallery also includes custom templates. These run in a restricted environment and require specific permissions, helping control access to data and browser features.
When connecting third-party solutions, you need to understand what events the tag handles, where the data is sent, and who is responsible for updating it. Unknown code fragments should not be installed without verification.
When is it best to choose a ready-made tag template?
A ready-made template is preferable when the desired service is already supported by Google Tag Manager. It provides predefined configuration fields, simplifies configuration verification, and reduces the likelihood of errors when writing code manually.
For example, the built-in GA4 Event type is typically used to send events to Google Analytics 4. There's no need to create a similar send via Custom HTML if the standard template covers the task.
A ready-made template also makes it easier to hand over a project to another specialist. The tag type name and its parameters make it easier to understand what data is being transferred and which triggers are responsible for launching it.
Custom code remains a valid option for non-standard integrations. However, before using it, it's important to evaluate available ready-made solutions and verify whether custom JavaScript is truly required.
How is Google Tag different from Global Site Tag and Google Tag Manager?

The terms Google Tag, Global Site Tag, and Google Tag Manager are often used in the same instructions. Due to the similarity of the terms, they can easily be confused, especially when installing analytics on a new website.
Google tag refers to the setup of data measurement in Google services, gtag.js is used for direct connection through page code, and Google Tag Manager manages tags and the conditions for their execution.
The difference becomes noticeable when adding multiple events. With a direct connection, some settings are made in the site code, whereas GTM provides a separate management interface.
What is the Google Global Site Tag?
Global Site Tag is the former name for the integration technology now called Google Tag. In older instructions, you might see the terms “Google Global Site Tag” and “global tag Google”. These terms typically refer to installing the gtag.js code for Google Analytics or advertising services.
With a direct connection, the developer adds the appropriate script to the website pages and specifies the desired service ID. After that, events can be sent and the provided parameters can be managed via gtag().
The Google tag can also be used in the GTM configuration. Therefore, the presence of a tag management system on a site does not necessarily mean that the basic Google tag is already correctly configured for the desired analytics property.
When checking, it's important to determine how analytics is connected and what identifiers are used. This is especially important after migrating a site to a new CMS or changing the tracking system.
Should I choose gtag.js or Google Tag Manager?
Both methods are suitable for connecting Google measurement, but differ in how you manage the settings. The choice depends on the number of services used, the complexity of the events, and who will support the integration.
| Criterion | gtag.js | Google Tag Manager |
|---|---|---|
| Installation | Script directly in the website code | GTM container on the website |
| Changing settings | Via Google Tag code and settings | Via the GTM interface |
| Third-party services | Require separate integrations | Templates and Custom HTML available |
| Event tracking | Calls from JavaScript | Tags, triggers, variables |
| Testing | DevTools, Tag Assistant, DebugView | Preview, Tag Assistant, DebugView |
| Version control | Through the site's versioning system | Through container versions |
| Developer participation | Required for many changes | Less for standard scenarios |
If the site is small and only requires basic analytics, a direct connection via gtag.js may be sufficient. For online stores and projects with numerous events, centralized management via GTM is more convenient.
However, installing the container doesn't replace the developer's work. To transmit information about purchases, successful requests, and other server actions, the data must be prepared on the website in advance.
How to create and configure a tag in Google Tag Manager?

Let's look at connecting Google Analytics 4 via Google Tag Manager and setting up a successful request event. This example assumes that a GA4 property has been created and the GTM container has been installed on all required website pages.
If you don't have a container yet, you'll first need to create an account on tagmanager.google.com, add a web container, and install its code according to Google's instructions. The container ID is in the format GTM-XXXXXXXX.
Before starting setup, ensure you have access to the required container and Google Analytics property. Also, make sure Analytics isn't reconnected using another method.
Step 1: Create a New GTM Tag
Open Google Tag Manager and select the desired website's container. In the workspace, go to the Tags section and click New.
In the window that opens, enter the tag name and select “Tag Configuration”. For a basic analytics connection, select the “Google tag” type.
Use a name that will help other specialists identify the purpose of the setting. For example, GA4 – Google tag – Main.
This naming convention is especially useful for containers with dozens of events. Tags can be grouped by services and actions to distinguish the basic configuration from individual conversions.
After selecting the tag type, a field for the Google ID will appear. This should be filled in with the value from the corresponding GA4 or Google tag setting.
Step 2: Adding the Google tag ID
Open Google Analytics 4 and go to the admin section. In the settings for the desired property, find Data streams and select the website's web stream.
The measurement ID in the G-XXXXXXXXXX format is available in the stream card. The tag ID and its assignment parameters can be found in the associated Google tag settings.
In GTM, paste the desired ID into the Tag ID field. Check each character, as an error in the value will result in data being sent to the wrong destination or the absence of valid measurement.
It is necessary to distinguish between the main formats of identifiers:
- GTM-XXXXXXXX is the identifier of the Google Tag Manager container installed on the site.
- G-XXXXXXXXXX is the Google Analytics 4 web data stream ID.
- GT-XXXXXXXXXX – Google tag identifier in the corresponding configuration.
- AW-XXXXXXXXXX – Google tag identifier associated with Google Ads.
After entering the ID, save the tag settings and proceed to selecting a trigger. If data is already being collected by another installed tag, first check the existing configuration and assignments.
Step 3: Setting up the launch trigger
For the basic Google tag, the built-in Initialization – All Pages trigger is typically used. It fires the tag during the container initialization stage, before the usual pageview triggers.
Open the Triggering block, select the appropriate option, and save the setting. This will cause the tag to fire when pages where the container is installed are loaded.
The standard All Pages trigger is used for other pageview trigger scenarios. The Consent Initialization trigger is primarily intended for setting consent status and should not be used unnecessarily for analytics tags.
Simply selecting Initialization – All Pages doesn't guarantee data collection. It's important to check the container loading, the correct identifier, and the impact of consent settings.
How do I set up a tag for only a specific action?
To track a specific action, create a custom trigger. For example, a form submission event should occur after the application is successfully processed, not immediately after the user clicks a button.
If the site sends the lead_form_success event to the dataLayer, you can create a Custom Event trigger in GTM and specify this name in the Event Name field.
Once saved, the trigger is assigned to a tag that should be executed when an event is received. This ensures that analytics will only receive data when the specified condition is met.
If a Click Trigger is used instead of a custom event, it's important to check what exactly is recording the click. The user could have clicked the button multiple times, received an error, and not submitted the form.
For commercial conversions, it's more reliable to use a confirmed site event or a success page if opening it actually corresponds to the result.
Step 4: Create a GA4 Event Tag
Now let's configure the successful request to be sent to Google Analytics 4. In GTM, open Tags → New again and select the Google Analytics: GA4 Event type.
In the Measurement ID field, enter the GA4 stream ID. In the Event Name field, enter generate_lead – the recommended Google Analytics event for lead registration.
To differentiate forms, add the form_type event parameter. Its value can be retrieved from a GTM variable that reads the data passed by the site via the dataLayer.
As an example, we will use the following configuration:
| Setting | Value |
|---|---|
| Tag name | GA4 – generate_lead – Form |
| Type | Google Analytics: GA4 Event |
| Measurement ID | G-XXXXXXXXXX |
| Event Name | generate_lead |
| Parameter | form_type |
| Parameter source | Data Layer Variable |
| Trigger | lead_form_success |
Save the tag and run Preview. After successful testing, the event can be marked as a key event in GA4 if the request actually matches the selected business goal.
Step 5: Save, Test, and Publish
The saved tag initially exists in the container's workspace. To test it, click Preview at the top of the GTM interface and connect the website address via Tag Assistant.
On your website, perform the action for which the event is configured. Then return to Tag Assistant and check if the desired tag appears among the fired tags.
If the result is correct, click Submit in GTM. Provide a descriptive version name, such as GA4 – lead form tracking, add a description of the change, and publish.
Version history allows you to restore the previous configuration if an error is detected. Therefore, it's advisable to publish verified changes in separate logical sets.
After publishing, repeat the test on the live version of the site. Successful testing of the draft does not yet confirm that the published container collects data correctly.
Examples of GTM tags for event tracking

After connecting a basic Google tag, you can move on to measuring visitor actions. Custom events, triggers, and parameters are used for different tasks.
Let's consider three common scenarios: a button click, a successful form submission, and a product purchase. They differ in the moment when the action is considered complete and the data set sent to analytics.
Example of a tag for a button click
Let's say your website has a button that takes you to a booking form. You want to know how many visitors click it to assess interest in the service and the convenience of the button's placement.
In GTM, you can use the built-in Click – All Elements trigger. The trigger conditions specify a suitable element attribute, such as a persistent CSS ID or an attribute value accessible via a variable.
If the button has an ID of appointment-button, the trigger can be constrained with the condition Click ID equals appointment-button. To send the data, create a GA4 Event tag named appointment_click.
The event name and its parameters must comply with the accepted analytics model. If there is a Google-recommended event for a specific action, it's best to use that event.
Tracking only by button text is less reliable. Editing the text, changing the site language, or changing the element's structure may cause this trigger to stop working.
Example of a tag for successful form submission
To measure requests, it's necessary to separate the button click from the form processing result. This is especially true for sites where submission occurs without a page refresh.
The developer can dispatch an event to the dataLayer after receiving a successful server response. For example, when the site confirms saving a request, the following code is executed:
window.dataLayer = window.dataLayer || [];

window.dataLayer.push({
  event: 'lead_form_success',
  form_type: 'consultation'
});
In GTM, a Custom Event trigger is created with the value lead_form_success. A separate Data Layer variable reads form_type, after which the GA4 tag sends generate_lead with the corresponding parameter.
This approach is suitable for websites with multiple forms. Analytics can distinguish between requests for a consultation, a callback, or a service appointment, as long as each value is transmitted correctly.
Client personal data, including phone number and email, must not be sent in GA4 parameters. For analytics, the technical designation of the form and other acceptable event characteristics are sufficient.
Example of a purchase tag for an online store

For an online store, the key event is usually a purchase. It conveys information about a completed purchase and is used in Google Analytics 4 e-commerce reports.
The event must contain a transaction ID, cost, currency, and an array of products. Available parameters are specified for each product item, including the product ID or name, price, and quantity.
Example of purchase data structure:
window.dataLayer = window.dataLayer || [];

window.dataLayer.push({ ecommerce: null });

window.dataLayer.push({
  event: 'purchase',
  ecommerce: {
    transaction_id: 'ORDER-1058',
    value: 2500,
    currency: 'UAH',
    items: [
      {
        item_id: 'SKU-101',
        item_name: 'Product',
        price: 2500,
        quantity: 1
      }
    ]
  }
});
This is an example of the data a site sends to GTM after an order is confirmed. To send data to GA4, you must additionally create a GA4 Event tag and configure the transfer of parameters from the ecommerce object.
The value must comply with GA4 revenue calculation rules, and the currency is passed as a separate parameter in ISO 4217 format. The transaction ID must be unique for the order.
Pay special attention to repeated visits to the confirmation page. If the purchase event is resent on every page visit, sales data may be distorted.
How to pass event data via dataLayer?
The dataLayer is a data layer through which a website transmits information to Google Tag Manager. The dataLayer.push() method is used to add events and parameters.
Unlike tracking clicks on visual elements, this method allows you to convey the actual status of an operation. For example, a website can report a confirmed request, a completed order, or a selected delivery method.
For GTM to process an event, the event field is specified in the object. Its value must match the Custom Event trigger name.
To read additional parameters, create variables of the Data Layer Variable type. If the data is nested within an ecommerce object, the variable can use the ecommerce.transaction_id or ecommerce.value path.
When dispatching events, it's important to maintain the order in which data is added. Also, don't reset window.dataLayer again after the container has loaded, as this could disrupt data processing.
A separate e-commerce parameter transfer scheme is used for purchases. After setup, it's important to check not only that the tag is firing but also that all required values are present in the received GA4 event.
How to check if Google tags are working?

Tag validation is performed before publishing a container and after making changes to the live site. This helps detect incorrect triggers, missing variables, and data transfer errors.
For diagnostics, we use Google Tag Assistant, Chrome Developer Tools, and DebugView in Google Analytics 4. Each shows a different part of the measurement process.
The check is considered complete when the desired action has triggered the expected tag execution, the corresponding request has been sent, and the target system has received the correct event parameters.
Checking tags using Google Tag Assistant
Tag Assistant is used to preview and debug your Google Tag Manager configuration. It displays events that occur during a site visit and helps you understand which tags are being fired.
To start testing, open the GTM container, click Preview, and enter the page URL. Once connected, perform the desired action on the site.
In the Tag Assistant window, select the corresponding event on the left side of the interface. Next, review the information in the Tags, Variables, and Data Layer tabs.
There are two important statuses available in the interface:
- Tags Fired – tags fired for the selected event or within the displayed session, depending on the view.
- Tags Not Fired – tags that did not run in the context under consideration.
You can also view variable values, trigger conditions, and the order in which events are executed. This information helps determine at what stage the problem occurred.
If the tag appears to have fired, further testing is required in the target service. The firing status alone does not confirm that GA4 has received the correct event.
Checking tags in Google Chrome
In Google Chrome, you can use Tag Assistant and the built-in DevTools developer tools. These help you check the container loading and the network requests your site makes.
To test requests, open DevTools with F12, go to the Network tab, and perform the desired action. If necessary, enable network logging to prevent requests from disappearing after navigating to another page.
For GA4 events, you can search for hits to Google Analytics data collection endpoints, including requests with “collect”. Then, check the request parameters and the ID of the desired property.
However, the existence of a request does not guarantee correct report generation. Data may be sent to another property, contain incorrect parameters, or be processed with limitations.
If diagnostics via Tag Assistant fail, additional checks are performed for ad blockers, browser extensions, cookie settings, and website restrictions.
How to run a Google tag test and check data in GA4?
Verifying a Google tag begins with determining how it was installed. Then, you need to confirm that the correct identifier has been loaded and that the data has been transferred to the connected service.
To test in Google Analytics 4, open Admin → DebugView and launch a debug session through GTM Preview. Then, perform actions on your site that should send events.
In DebugView, check the event name, time, and parameters. For example, for generate_lead, you can verify that analytics received the correct form_type value.
For a purchase, you must additionally check the transaction_id, value, currency, and items array. Missing one of these required parameters may result in incomplete e-commerce reports.
If the event is visible in Tag Assistant but does not appear in DebugView, check the stream ID, debug mode, user consent, and network data transfer.
Lead SEO specialist — Gennady
In my practice, I often encounter situations where Google Tag Manager is installed and the tags are technically triggered, but the analytics show incorrect data. For example, one request is counted twice because the event is sent both through GTM and directly from the website code.
That's why, when checking, I look beyond the “Tags Fired” status. I also want to make sure the event occurred after the intended user action, was sent once, contains the correct parameters, and actually appears in GA4. Only after this verification can the data be used to evaluate the effectiveness of SEO and advertising.
Why aren't GTM tags working and how can I fix them?
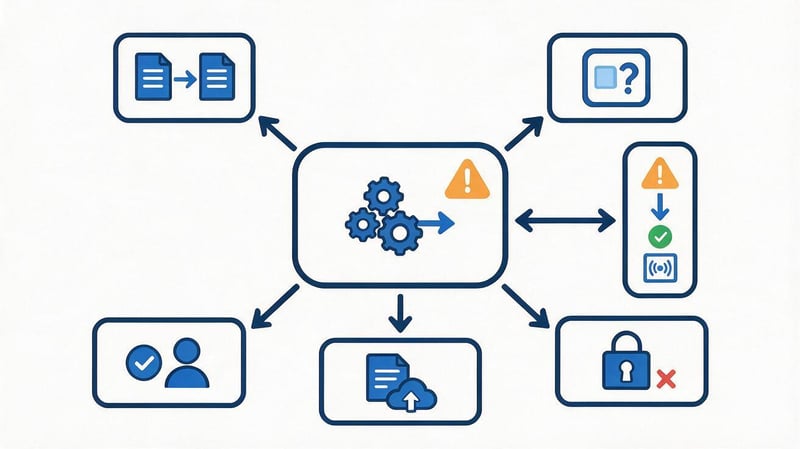
One of the most common issues when setting up Google Tag Manager is the absence of an expected event in analytics. The cause may lie in the trigger, variables, container, consent settings, or the site code itself.
Users often search for “gtm tags not fired” to find an explanation of the Tag Assistant status of the same name. However, first, it's necessary to determine whether the tag should have fired when the selected event occurred.
If the tag is intended for purchase, it doesn't have to be triggered during a normal page view. To diagnose the issue, you need to reproduce the intended action and check its conditions.
What does the Tags Not Fired status mean?
The “Tags Not Fired” status means the tag was not fired for the selected event or event set in question. This status does not, by itself, indicate a configuration error.
For example, a purchase tag might appear in this section when visiting the homepage. This is expected behavior if the trigger is configured only for successful checkout.
The problem occurs when the user performs the required action, but the tag still fails to fire. In this case, you need to open its settings in Tag Assistant and see which conditions are not met.
You need to check the selected event, variable values, blocking triggers, and consent status. If the site doesn't pass the expected event to the dataLayer at all, the problem may lie in the application logic.
After correcting the configuration, the action is repeated in Preview mode. Only then is the updated version of the container published to site users.
Incorrect triggers and variables
Trigger errors are often related to conditions that no longer match the actual page data. For example, a developer may have changed a button ID, but GTM continues to look for the previous value.
A similar situation arises with variables. If the trigger expects form_type = consultation, but the site passes form_type = appointment, the required condition is not met.
To diagnose the issue, open the event in Tag Assistant and check the values in the Variables tab. Then compare them with the tag's firing conditions.
For custom events, it's important to ensure the exact spelling of the name. lead_form_success and Lead_Form_Success are different values, so case is important.
On sites with dynamic content loading, some elements appear after the page is opened. In such cases, it's more reliable to dispatch an event after the actual operation has been completed, rather than tying tracking to the unstable HTML structure.
Container, publishing, and user consent errors

Sometimes the tag is configured correctly, but the GTM container is missing from the page. This can happen after changing the template, migrating the site, or incorrectly connecting analytics to the CMS.
Another reason is that changes have been saved to the workspace but not published. The new configuration may work in the Preview, while regular visitors continue to use the previous version of the container.
Ad blockers, browser restrictions, and Content Security Policy also affect data transfer. Consent Mode and the enabled consent management system are checked separately.
When using Basic Consent Mode, some tags may not load until the user consents. In Advanced Mode, the behavior differs and depends on the settings and the selected consent state.
In such cases, you can't simply disable restrictions without verification. First, you need to determine whether the tag's behavior complies with the selected consent model and data processing requirements.
How to determine the reason for tag failure?
Start troubleshooting with the action that should trigger the tag. Open the site in Preview, reproduce the event, and select it in Tag Assistant.
Next, check the configuration sequentially:
- Find the desired tag. Open Tags Not Fired and make sure you are checking the event for which the tag should fire.
- Examine the triggers. Check all trigger conditions, including URL, click, and custom event filters.
- Look at the values of the variables. Compare the actual data with what the trigger or tag configuration expects.
- Check the consent. Review Consent Settings and possible CMP limitations.
- Check the publication. Make sure the correct version of the container is published and loads on the page.
- Check data transfer. Check Network and DebugView if the tag fires but analytics doesn't show the event.
Common causes of errors can be summarized in the table:
| Problem | Possible cause | What to check |
|---|---|---|
| Tags Not Fired | The conditions were not met | Triggers and variables |
| The event is missing from GA4 | Invalid ID or transmission error | Measurement ID, Network, DebugView |
| Events are duplicated | Multiple sending sources | GTM, gtag.js, CMS settings |
| The tag is blocked | Consent or browser restrictions | Consent Settings, CMP, Network |
| The changes don't work | Container not published | Version and publication |
| Parameters are not passed | Error in Data Layer Variable | Field names and values |
Once the cause is identified, correct only the relevant part of the configuration. Avoid changing the trigger, analytics ID, and consent settings simultaneously, as this will make it difficult to determine which change affected the results.
How to securely manage Google Tag Manager tags?

As a site grows, the number of tags increases. New advertising campaigns, forms, e-commerce events, and third-party integrations appear. Without clear management rules, the container becomes difficult to test and maintain.
Regular audits help identify outdated settings, duplicate events, and scripts that are no longer used. To do this, simply record the purpose of each tag, the responsible specialist, and the date of the last change.
Particular attention should be paid to access, the transfer of user data, and the impact of third-party scripts on page loading.
Version and access control
Google Tag Manager supports container version history and different access levels. This is convenient when a developer, SEO specialist, and advertising specialist are working on analytics.
Each participant should be granted only the necessary permissions. For example, a specialist preparing configurations may not always need access to publish the container to the production site.
Before making major changes, it's helpful to record the current published version. If errors occur after updating, the previous configuration can be restored.
It's also worth using consistent naming conventions. GA4 – purchase, Ads – Lead Conversion, and Meta – PageView are much clearer than arbitrary designations like Tag 14 or New Tag.
Unused tags should be checked before deleting. Some settings may be triggered infrequently, for example, only after a purchase or submission of a specific form.
Consent Mode and user data protection
Consent Mode helps manage Google tag behavior based on user choices regarding data storage and use. It uses consent states, which are communicated through the relevant settings.
Google Consent Mode provides the following parameters:
- analytics_storage – manage consent for storing analytics-related data.
- ad_storage – consent to the storage of data used for advertising purposes.
- ad_user_data – consent to the use of user data for Google advertising purposes.
- ad_personalization – consent to the use of data for advertising personalization.
Consent banners or the Consent Management Platform (CMP) are typically used to collect and communicate user choices. Settings must comply with applicable requirements and actual data processing processes.
Consent Mode does not replace a privacy policy or consent mechanism. Also, you must not send personal data to Google Analytics that is prohibited by the service's terms.
When testing, it's important to check the behavior of tags before the user selects a consent and after the consent state changes. This helps detect instances where settings are applied too late or not updated.
How do tags affect website speed and SEO?
Each third-party script can create additional network requests and execute JavaScript in the browser. If there are too many such scripts, the page load increases and its performance can degrade.
Google Tag Manager simplifies managing connected tags, but it doesn't guarantee speedup. Performance depends on the container's contents and the behavior of third-party services.
Chrome DevTools and PageSpeed Insights are used for testing. Particular attention is paid to JavaScript execution time, third-party resource loading, and Core Web Vitals metrics, including INP.
Unused tags are best removed after verifying their purpose. For the remaining tags, limit their execution to necessary events and pages, if this meets the technical requirements.
From an SEO perspective, properly setting up GTM is primarily useful for measuring results. It helps analyze inquiries, purchases, and visitor behavior, but you shouldn't expect a direct boost in search rankings from installing tags.
Proper operation of Google Tag Manager tags begins with a clearly defined event and ends with data validation in the target system. For reliable tracking, triggers, variables, identifiers, and event dispatch rules must be aligned.
If GTM is already installed on your site, start by testing one important action, such as a successful lead or purchase. Make sure the event is sent once, contains the correct parameters, and appears in analytics.
Need Google Tag Manager testing and conversion setup? Contact Seo-Gen. We'll check your existing tags, identify tracking errors, and set up data transfer for SEO and advertising campaign evaluation.


