How to set up Google Analytics 4?


Google Analytics 4 collects data on website visits, traffic sources, and user actions. Once configured correctly, you can see where visitors came from, which pages they viewed, what actions they performed, and whether they submitted a request, registered, or purchased. Creating an account isn't enough: you'll need to set up a GA4 property, add a data stream, and install a Google tag on your website.
If you need to figure out how to connect Google Analytics to a website from scratch, it's best to follow a step-by-step approach. First, create an account and a property, then a web stream, and then connect the website via a CMS, code, or Google Tag Manager. Finally, you need to check Realtime, events, and key actions; otherwise, even an installed Google Analytics counter may collect incomplete or incorrect data.
What is Google Analytics 4 and why should you connect it to your website?
Google Analytics 4, or GA4, is Google's web analytics system for websites and apps. GA4 is based on an event-driven model: page views, scrolling, form submissions, adding an item to a cart, and purchases are recorded as events with parameters. This allows a single property to analyze visitor behavior at different stages of the website interaction.
After enabling analytics, the website owner receives data for checking SEO, advertising, content, and conversions. They can compare traffic sources, traffic channels, devices, landing pages, and user actions after landing. For online stores, e-commerce is also configured, transmitting data on product views, shopping carts, checkouts, and purchases.
What data does Google Analytics 4 collect?
Basic data collection begins immediately after the Google tag is correctly installed, but the available metrics depend on the website configuration and GA4. The system records users, sessions, page views, referral sources, devices, some geographic data, and standard events. Forms, calls, registrations, orders, and other business actions often require separate event configuration.
Reports allow you to analyze the number of users, engagement, acquisition channels, and on-page behavior. If the site transmits e-commerce data, GA4 receives events such as product views, adding to cart, checkout initiation, and purchase. The information collected also depends on cookie settings, Consent Mode, and the user's consent to data processing.
What do you need to prepare before setting up?
Before setting up Google Analytics, you need access to your Google Account, your website's admin panel, and the method you'll use to install the tag. Manual installation requires access to the template or HTML source. When using Google Tag Manager, you'll need a published GTM container that's already correctly connected to all your website pages.
It's helpful to identify in advance the actions that are important to your business and should be included in analytics. For a service website, this typically includes form submissions, phone calls, messenger click-throughs, or registrations. For an online store, ecommerce events are added, including view_item, add_to_cart, begin_checkout, and purchase.
Answers to your questions
How to connect Google Analytics to a website?
Create a GA4 account and property, add Web Data Stream, and copy the Measurement ID. Then connect the Google Tag via a supported CMS integration, manually in code, or via Google Tag Manager. After publishing, open the site and check for visits in Realtime.
If you need to connect Google Analytics to a site with multiple templates, test each one separately. The tag must work on all pages involved in the analyzed user path. A successful test of the main page alone is not enough for a full installation.
How to install Google Analytics on a website without Google Tag Manager?
Get the full Google tag in the current Web Data Stream settings and add it to the general HTML template. Google recommends placing the fragment immediately after the opening <head> tag on each tracked page. After publishing, check the ID and the data receipt in Realtime.
This method is suitable when a site has few marketing tags and the changes are performed by the developer. If, over time, numerous events, ad pixels, and complex trigger conditions are required, Google Tag Manager can simplify future configuration maintenance.
How to connect Google Analytics via Google Tag Manager?
Create a new Google Tag in GTM and add the Tag ID from the working GA4 stream. Configure the launch on the required pages, open Preview, and verify that the tag fires once with the correct ID. Once verified, publish the new version of the container.
Don't use old instructions that suggest creating a Universal Analytics tag for a new property. Modern GA4 setup in Tag Manager is done through Google Tag. Events can then be added as separate tags and tested in Preview.
How to check if Google Analytics is working?
First, open the site and perform a few navigations, then check Realtime. For detailed event testing, use DebugView and Preview Google Tag Manager. Additionally, check the Measurement ID and ensure there are no duplicate tags in the template or CMS plugins.
If the user doesn't appear immediately, wait a reasonable amount of time and check again. Google notes that the initial start of data collection after a new installation can take up to thirty minutes. A prolonged absence of data requires checking the installation and event processing.
How to set up a goal in Google Analytics 4?
GA4 uses the event model and key events, so the old Goals section from Universal Analytics no longer exists. First, set up an event that confirms the desired action, such as a successful lead request submission. Then, mark this event as a key event in the Analytics administrative settings.
For advertising purposes, key events can be additionally used when creating conversions in Google Ads. Don't assign a key event to every technical user action. It's better to include actions that have clear business value in this list.
Do I need to install Google Analytics on every page of my website?
The Google tag must be present on every page whose data needs to be collected. Typically, the tag is installed in the site's general template, so it automatically loads on all URLs. However, after a redesign, CMS migration, or the addition of new templates, this should be re-checked.
If some pages are missing the Google tag, the user journey becomes incomplete. Analytics may miss a pageview, an event, or a transition between sections. Be especially careful when checking your cart, checkout, account, and thank you pages.
Why doesn't Google Analytics show visitors?
This could be due to a missing or incorrectly installed Google tag, an incorrect Measurement ID, an unpublished GTM container, or a lack of test traffic. The initial data processing time should also be taken into account. Start troubleshooting by checking whether the tag actually loads on the page.
If the tag is working, check Consent Mode, the internal traffic filter, and the launch conditions in GTM. For testing, it's best to use DebugView and Preview, as they show the technical sequence of events in more detail than a standard report.
Can I use Google Analytics and Google Tag Manager at the same time?
Yes, these products perform different functions and are typically used together. Google Analytics stores and analyzes data, while Google Tag Manager manages tags, variables, and trigger conditions. GTM allows you to install the primary Google tag and send additional GA4 events.
Don't manually install the same Google tag in parallel without a good reason. If GA4 is already connected via GTM, a second instance in the site template can cause data duplication. After any change, test the actual tag execution in Preview.
How does Google Analytics 4 work?

Before connecting Google Analytics, it's important to distinguish between an account, a property, and a data stream. A mistake at this stage often leads to situations where multiple unrelated websites end up within a single property or data from a new project is sent to an old Analytics account. A proper structure facilitates access, integrations, and subsequent reporting.
For a typical website, the logic is as follows: a Google Analytics account contains a GA4 property, and a web stream is created within the property. The stream has its own Measurement ID, which is used when installing the tag. Once connected, events from the site begin to flow to the selected property and become available in Realtime and other reports.
Google Analytics account
An account is the top level of the Google Analytics structure and typically corresponds to a single company or organization. It can contain multiple properties, so there's no need to create a new account for each landing page or each domain within a single project. It's much more important to determine upfront who owns the data and who should manage access rights.
If analytics is being set up for a client, it's best to create an account under the business's control. A contractor, marketer, or SEO specialist should then be added as a separate user with the required role. Sharing a personal Google Account login and password complicates security and subsequent access management.
GA4 property
A property stores the settings and data for a specific project. When created, the project name, time zone, currency, and business information are specified, which affect the display of certain reports. For a single, typical corporate website, a separate GA4 property with its own web stream is usually sufficient.
If a company uses multiple related websites or applications, it's best to plan the structure before implementation. Consolidating everything into a single property simply for convenience isn't a good idea when projects have different owners, different business models, or require completely separate access rights.
Data stream
A data stream defines the source from which GA4 receives events. A Web Data Stream is created for a website, while separate iOS or Android streams are used for mobile apps. When creating a web stream, the primary URL, its name, and advanced statistics parameters are specified.
Each web stream contains its own measurement ID and Google tag settings. This is where you can check Enhanced Measurement, access tag settings, and get installation instructions. Google recommends creating a web stream after the property and then enabling data collection from the website.
What is Measurement ID?
Measurement ID is a GA4 stream identifier, typically beginning with G-. It is used when connecting analytics via a CMS, Google Tag Manager, and other integrations. It should not be confused with the GTM container ID, which has a different format and is specific to a separate tag management service.
You can find the ID in the property's administrative settings by opening Data Streams and the desired web stream. Before publishing, you must verify the ID with the property where the data should be sent. An incorrect ID will result in events being sent to the wrong property or not appearing in the expected reports at all.
How to Set Up Google Analytics 4: A Step-by-Step Guide
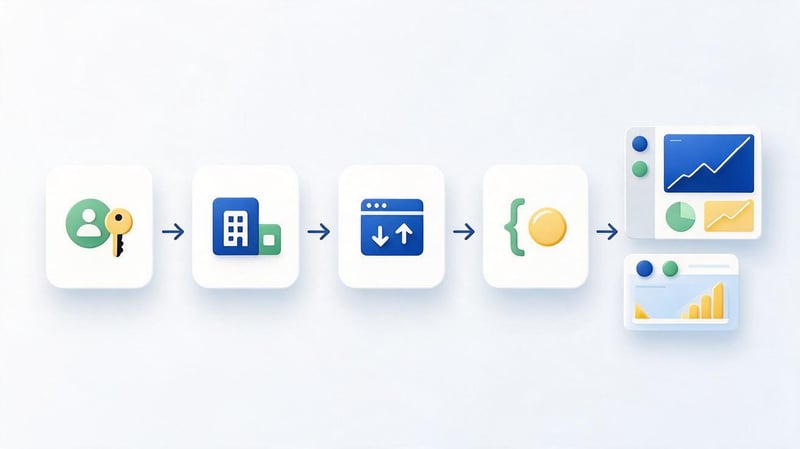
If you need to understand how to set up Google Analytics on a website from scratch, start with the GA4 admin panel, not by installing random code from an old guide. First, create an account, then a property and a web stream. Only then will the relevant Google tag and Measurement ID appear, specifically for the project you're working on.
This procedure helps avoid a common mistake when installing a tag from a test or third-party property on a website. After completing the first four steps, you can move on to the CMS, source code, or Google Tag Manager. The setup is complete only after verifying that events are actually being received from the website.
Step 1: Create a Google Analytics account
Open Google Analytics under the Google Account that should have access to the future analytics. If you don't have an Analytics account yet, create one and give it a descriptive name for your company or project. It's best to choose a name that will make it clear in a few years who owns the properties and data within the account.
During account creation, Google will prompt you with account data transfer options. These should be reviewed in accordance with the company's internal policies and privacy requirements. If the account already exists and belongs to the same business, creating a duplicate is usually not necessary: you can immediately add a new GA4 property.
Step 2: Create a Google Analytics 4 property
In the Admin section, create a new property and specify its name. Then select the time zone for reports, currency, and key business characteristics. It's a good idea to align these parameters with your company's actual geography and the currency in which it evaluates sales or advertising results.
Google will then prompt you to select business goals, which will influence the initial set of available reports. For a project with requests, it makes sense to focus on lead generation, while for a store, it's best to focus on sales. The report set can be changed later, so this choice doesn't replace the separate configuration of events and key actions.
How to choose a time zone and currency?
The time zone affects the date GA4 assigns events and metrics to. If a site operates primarily in Ukraine, the corresponding local time zone is typically selected so that daily reports align with the business calendar. For an international project, it's best to align the selection with the zone in which the team generates primary reports.
The currency is needed for monetary metrics, including e-commerce and advertising data. For a Ukrainian online store that sells products in hryvnia, it makes sense to use UAH. Frequent time zone changes after launch are undesirable, as the new settings affect subsequent data display and can complicate comparisons between periods.
Step 3: Create a data stream for your website

After creating a property, open Data Streams and select the Web option. Enter the main website URL without unnecessary technical details, create a descriptive stream name, and check Enhanced Measurement. After creating the stream, GA4 will display its details, including the Measurement ID and Google tag settings.
If analytics is connected to the main corporate website, the stream can be named based on the domain or project purpose. Avoid blindly using the same source for the test environment and the production site if testing activities could distort production statistics. It's best to consider separating the data before the team begins actively testing events.
What are advanced statistics?
Enhanced Measurement automatically collects a range of interactions without creating each tag separately in GTM. These can include page views, scrolling, outbound clicks, site searches, file downloads, and other actions. The specific set should be verified in the web stream settings, as individual events can be enabled or disabled.
Automatic collection doesn't eliminate the need to customize business events. Form submissions, confirmed registrations, or actual payments often require their own logic, as a simple button click doesn't confirm a successful action. When creating a web data stream, Google recommends enabling Enhanced Measurement and then disabling unnecessary elements individually.
Step 4: Find the Google tag and Measurement ID
Open the desired Web Data Stream and make sure you're copying the ID from the working property. You'll need the Measurement ID when setting it up via the CMS or Google Tag Manager. If you're using manual installation, you can open the instructions in the interface to get the full Google tag fragment for placement on your pages.
Google Tag and the GTM container perform different functions, so their IDs can't be used interchangeably. Google Tag transmits data to Analytics and other connected products, while Tag Manager manages tags and their firing conditions. Once you have the correct ID, you can proceed to installing Google Analytics on your website.
How to install Google Analytics 4 on a website?
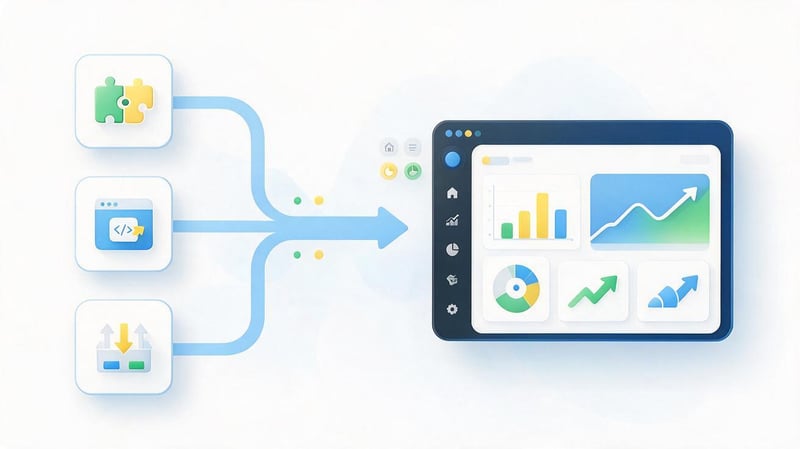
Once the property and stream are ready, all that's left is to choose a connection method. Google Analytics can be installed via the built-in CMS integration, directly through the website code, or using Google Tag Manager. For most projects with multiple marketing tags, GTM is more convenient, as future changes can be made without constantly editing website templates.
The choice of method depends on the CMS, development access, and the current technical design of the project. If a working GTM container is already installed on the site, do not manually add a second instance of the same Google tag. A duplicate installation can result in the resending of individual events and reporting errors.
Method 1. Connecting Google Analytics via CMS
Some CMSs and builders have a predefined field for Measurement ID or official integration with Google Analytics. In this case, the user enters the stream ID or logs in via Google Account, after which the platform automatically places the required tag. Before connecting, please check the current documentation for the specific CMS.
This method is suitable for website owners who don't require a complex system of custom tags. For WordPress, Site Kit or GTM are often used, while Shopify, Wix, and other platforms offer their own integration methods. Avoid installing multiple analytics plugins simultaneously without verifying the source code and network requests.
| CMS or platform | A practical way to connect |
|---|---|
| WordPress | Site Kit, native theme integration, or Google Tag Manager |
| Shopify | Supported Google or Google tag integration according to platform instructions |
| Wix | Built-in integration with Google Analytics or Google tag |
| WooCommerce | WordPress integration, dedicated ecommerce solution, or GTM |
| Own CMS | Google tag in a template or Google Tag Manager container |
After connecting, open several website pages and ensure the tag is present on more than just the homepage. Pay special attention to blog templates, product cards, shopping cart, checkout, and utility pages. For a site with multiple templates, installing the tag on just one layout will result in incomplete data collection.
Method 2. How to install Google Analytics via website code?

If your CMS doesn't support integration, you can add the Google tag directly to the HTML template. In the GA4 interface, open the installation instructions, select the manual method, and copy the full code of the current tag. Don't use fragments from an old article or other resource, as they may contain the wrong identifier.
The tag is placed in a common template that is displayed on all pages where analytics are needed. After publishing, clear your server and CMS caches, if used, and then open the source code of several URLs. Google specifies that the full tag fragment should be placed immediately after the opening <head> element on each page being tracked.
Where to insert Google Analytics code?
When installing manually, the code is added immediately after the opening <head> tag, rather than in a random location in the footer or on a specific page. On sites with server-side templates, it's more convenient to change the overall layout so that the new version automatically appears on all relevant URLs. It's a good idea to save a backup copy of the file or template version being modified before publishing.
If a project uses different templates for the catalog, blog, and checkout, each one should be tested separately. This error often occurs after a redesign, when the developer transfers the main layout but forgets to add analytics to the new template. As a result, some visits and transitions between sections are lost.
How do I check if the tag is installed on all pages?
First, check the source code of several pages of different types and ensure that the ID matches the current Measurement ID. Then, use the tag checking and Realtime tools, navigating between site sections. Checking only the homepage is not enough, especially when the CMS uses different templates for the blog, catalog, and dashboard.
It's also helpful to follow the user's primary journey, from the landing page to the thank-you page after submitting a request or order. If data is missing at any stage, the cause is often a missing tag, a redirect to a different domain, or an incorrect consent setting. Google explicitly states that Analytics only collects data from pages that have the required tag.
How to connect Google Analytics via Google Tag Manager?

Google Tag Manager is suitable for projects that use ad pixels, events, Consent Mode, and other marketing tags in addition to GA4. After installing the container, most subsequent changes can be made in the GTM interface, eliminating the need to edit the site code for each new event. Changes should still be published only after preliminary review.
If a user is looking to connect Google Analytics via GTM, the sequence is quite short: create a Google tag, specify the correct Tag ID, assign a trigger, test the container, and publish the version. The old instructions for the Universal Analytics tag type should not be used for the new GA4. The current GTM uses Google Tag.
What do you need before setting up?
Before you begin, you must have a GA4 property, a Web Data Stream, and a Google Tag Manager container. The Measurement ID must be copied from the correct stream, and the GTM container must be installed on all required pages. If the container is only present in one template, installing the Google tag within it will not resolve the issue.
Also, check who has permission to publish changes to GTM. In production projects, it's helpful to use clear names for tags, triggers, and variables so that another specialist can restore the container's logic months later. Random names like tag1 or test-new-final quickly make the workspace unclear.
Creating a Google tag in GTM
Open the desired container, go to the Tags section, and create a new tag. In the configuration, select Google Tag and add the Tag ID corresponding to your working GA4 property. Then, assign a trigger, save your changes, and open the preview mode to test the tag's actual behavior.
It's best to make the name clear, for example, GA4 – Google tag – G-XXXXXXXXXX. This naming simplifies container auditing and reduces the likelihood of accidental duplication. Google describes Google Tag as the current method for basic GA4 configuration via Tag Manager.
Which trigger should I use?
The primary Google tag requires activation on all required website pages. Google's current instructions for adding the tag in GTM use the Initialization – All Pages trigger, after which the created configuration should be tested and published. For complex Consent Mode, it's best to align the specific container design with how consent status is managed on the website.
This trigger shouldn't be confused with Consent Initialization – All Pages, which is designed for tags that set or update the user's consent status. This trigger is used for CMP and Consent Mode logic to ensure consent settings are applied before other tags.
Preliminary inspection and publication of the container
After saving the changes, open Preview and connect the site being tested. Check that the Google tag is triggered on the intended pages, that the ID matches the working property, and that no duplicate instances of the same tag are appearing. Then perform a few clicks and actions that should be recorded in analytics.
It's recommended to publish the container only after successful testing. For the production version, provide a descriptive name and a brief description of the change, such as enabling GA4 or adding a specific event. This version history significantly simplifies rollbacks when subsequent changes to the container introduce an error.
How to check Google Analytics connection to a website?

The presence of code in the HTML source code does not necessarily confirm correct data collection. Once Google Analytics has been connected to the site, you should check the tag's execution, event receipt, and whether the data corresponds to the specific property. For initial diagnostics, it's best to use Realtime, DebugView, and Google Tag verification tools.
It's best to test across multiple page types and key user scenarios. Visit the homepage, article, service, product page, and form, if such templates exist. Then, repeat the action that should be considered an event and verify that it actually appears in GA4 under the expected name.
Real-time verification
Realtime shows recent user activity and is suitable for an initial connection check. Open the website in a separate browser or on another device, navigate between several pages, and then open the realtime report. If the setup is working, the user and related events will appear.
New data may not appear immediately after initial installation. Google notes that it can take up to thirty minutes for data collection to begin after the tag is installed, so a lack of statistics after a few seconds doesn't necessarily confirm an error. If there's no data after a reasonable amount of time, proceed to verify the tag and identifier.
Checking via DebugView
DebugView is used for more detailed inspection of events and their sequence during testing. It allows you to see which events are coming from the test device, what parameters are passed along with them, and whether the same action is being sent multiple times. This mode is especially useful when setting up forms, e-commerce, and custom events.
Check the complete user flow, not just a single random click. For a form, this includes opening a page, interacting with fields, and successfully submitting the form. For a store, this includes viewing a product, using the cart, initiating checkout, and purchasing. This way, errors in the flow can be detected before incorrect statistics accumulate.
Google tag check

When connecting manually or working through a CMS, it's helpful to check the tag ID directly on the site. Make sure it matches the Measurement ID of the current stream and is present on all relevant URLs. If multiple identical GA4 implementations are running on the same page, you need to find the source of the duplication.
Separately check old plugins and code left over from the previous version of the site. After migrating to GTM, developers sometimes retain a manual GA4 setup in the template, causing the new Google tag to work in parallel with the old one. This situation requires a technical check, not the addition of another counter.
What to do if data is not received?
Start troubleshooting with the simplest things: check the presence of the Google tag, the correct Measurement ID, and the GTM container's publication. Then, make sure the site actually received test traffic and that the data has been processed. Google lists missing tags, incorrect installation, lack of visits, and delayed processing as the main causes of empty reports.
If the basic installation is working properly, check Consent Mode, filters, triggers, and cross-domain transitions. An incorrect analytics_storage state can change the behavior of analytics tags, and an active internal traffic filter can exclude the specialist's device. Diagnostics should proceed from the installation to the settings, not the other way around.
| Verification stage | What should happen? | What to check when an error occurs |
|---|---|---|
| Page loading | Google tag is launched | ID, page code, GTM container |
| First visit | The user appears in Realtime | GTM publication, Consent Mode, blockers |
| Test action | The required event is transmitted once | trigger, event conditions, duplicates |
| Key action | The event is recorded as a key event | Event name and Key events settings |
| Purchase | Purchase contains correct parameters | dataLayer, transaction_id, value, currency |
The verification process can be represented as a simple workflow: website → Google tag or GTM → GA4 data stream → Realtime and DebugView → regular events → key events → reports. If the failure is early, subsequent reports will also be incomplete. Therefore, the technical data submission is confirmed first, and then the marketing metrics are assessed.
What basic GA4 settings need to be done after connection?

The work doesn't end once Google Analytics has been installed on your website. The basic tag provides the basis for reports, but data quality depends on additional property settings. It's important to check data storage, internal traffic, unwanted referrals, cross-domain tracking, and consent policies.
It's best to make these adjustments before several months of statistics accumulate with errors. Some filters only apply to new events, so updating them six months later won't restore already excluded or incorrectly attributed data. Before enabling irreversible filters, it's a good idea to use test mode and verify the effects.
Setting up data storage
GA4 has a separate Data Retention parameter for user and event data. Standard properties offer two- and fourteen-month periods, and this setting primarily affects the data needed for some detailed analyses. Standard aggregated reports operate according to a different logic and do not automatically disappear when the period ends.
For a project where specialists regularly use Explorations and compare long periods, the setting should be verified immediately after property creation. The extension applies to data that hasn't yet been deleted, but deleted information is not restored. Therefore, it's best to agree on storage parameters before actively accumulating statistics.
Setting up internal traffic
Company employees, developers, and contractors can access a website daily, significantly skewing the statistics of a small project. GA4 allows you to identify internal traffic by IP addresses and apply the appropriate data filter. The impact of internal traffic is especially noticeable on websites with a small number of daily users.
Enabling an exclusion without testing is risky because data filters affect new incoming events, and the excluded data cannot be restored. First, set up a rule, test it, and ensure that the exclusion doesn't include your regular audience. Google specifically warns that the effect of an active filter on processed data is irreversible.
Setting up unwanted referrals
Unwanted referrals are used when an external technical domain is involved in a user scenario but shouldn't become a new traffic source. A typical example is a user switching to a payment service and then returning after payment. Without proper configuration, the system may attribute the purchase to the payment domain instead of the actual marketing source.
Don't add all unfamiliar referral domains to the list, as they may contain genuine referral sources. First, analyze the user's path and ensure that the domain is truly a technical part of your own process. GA4 can mark such referrals with the ignore_referrer parameter to prevent them from spoofing the session source.
Setting up cross-domain tracking
Cross-domain tracking is necessary when a single user navigates between multiple company-owned domains within a single scenario. For example, the main website may be on one domain, while the service registration or personal account may be on another. Without configuration, this transition can create a new session and complicate analysis of the original source.
In GA4, the list of associated domains can be configured through the Google Tag interface. After making changes, be sure to run the actual cross-domain route and check the source, session, and events. Google considers proper cross-domain measurement a core data cleanliness practice, along with internal traffic and unwanted referrals.
Privacy and Consent Mode
Consent Mode communicates the user's consent status to Google and influences tag behavior. Parameters used include analytics_storage, which is related to analytics storage, as well as parameters for advertising data and personalization. The setting should be aligned with the actual consent banner, legal requirements, and policies applicable to the specific business.
If your site uses CMP, first check for Google Consent Mode support, then configure the correct default values and update them after user selection. You can use Tag Assistant and the Consent tab for diagnostics. Google specifically states that Consent Mode requires an existing consent mechanism, such as a banner on the site.
How to set up events in Google Analytics 4?

The event model determines which visitor actions will be available for analysis. Before creating dozens of custom events, check out automatic collection and Enhanced Measurement. GA4 already collects many basic actions without additional custom tags, so there's no need to duplicate them under new names.
The event name should reflect the specific action and remain consistent across all project environments. If a marketer uses form_submit for one action, a developer uses send_form, and GTM sends lead_success, reporting quickly becomes cumbersome. For standard business scenarios, first check Google's recommended event names.
Automatically collected events
Some GA4 events are received automatically when Google tags are running. There's no need to create separate tags for them if the basic setup is correct. You can verify the receipt of such events using DebugView, Realtime, and subsequent reports after data processing.
Automatic capture is useful as a basis, but it doesn't capture all business actions. For example, the system might detect a thank-you page view, but without proper logic, this doesn't always mean a confirmed request. For important actions, you need to choose a capture method that reflects the actual state of the form, order, or registration.
Enhanced Measurement Events
Advanced statistics adds the collection of interactions often required on regular websites. Depending on the enabled settings, these may include scrolling, outbound clicks, internal searches, file downloads, and other events. Their status is checked in the settings of a specific Web Data Stream.
Don't create a second scroll or similar event in GTM just because such a tag was in the old container. First, look at what GA4 is already reporting, then remove unnecessary duplication or disable the corresponding Enhanced Measurement feature. A clean event schema simplifies reporting and subsequent maintenance.
Recommended events
Google publishes recommended events for common business scenarios, including e-commerce and lead generation. When a suitable standard name already exists, it's recommended to use it along with the provided parameters. This makes the data structure clearer and facilitates the use of ready-made reports and integrations.
Before implementation, check the documentation for the specific type of site you need. You can't automatically add ecommerce events to a corporate site or send purchase on a regular form submission. The event name must correspond to the actual action the user performed.
Custom events
Custom events are needed when an automatic or recommended event isn't sufficient for a specific scenario. For example, a business might want to track a successful calculator calculation, an appointment confirmation, or the completion of a complex multi-step process. For such an event, the name, trigger condition, and required parameters should be defined in advance.
Before creating a custom event, answer a practical question: what decisions will the team make based on this data? If no one will use the event in reports, advertising, or diagnostics, adding it will only complicate the structure. Analytics should remain understandable to the specialists working with it after implementation.
What events should be set up for lead generation?
For a service website, successful form submissions, registrations, confirmed callback requests, call initiation, and other actions that represent a genuine request are typically important. Button clicks can be collected separately, but they cannot be automatically counted as completed leads. A user could click a button and close the form without submitting.
Distinguish between micro- and macroconversions at the analytics level. Viewing contacts or starting a form helps analyze the user journey, while a successful submission indicates a completed action. For advertising and business reporting, it's common to select a few truly significant events rather than every available click.
What events does an online store need?
For a store, the basic sequence includes viewing a product card, adding the product to the cart, initiating checkout, and then purchasing. The recommended names are typically view_item, add_to_cart, begin_checkout, and purchase. The events are accompanied by parameters for the product, price, currency, and transaction ID.
The purchase event requires special attention, as duplicating it directly distorts revenue and order counts. The event should be sent after a confirmed purchase and have a stable transaction_id that matches the order. Test ecommerce with test transactions before running ad optimization using this data.
Lead SEO specialist — Gennady
I recommend starting your GA4 setup with a list of actions that are truly important to your business. First, identify lead requests, calls, registrations, purchases, and other significant actions, then check which events Analytics already collects automatically. After that, add custom logic only for those actions that can't be accurately captured using standard tools.
This order helps keep analytics clear and suitable for SEO reports. When a property contains dozens of random events with similar names, it's more difficult for a specialist to connect organic traffic to real inquiries. For SEO, a few verified key events and correct source attribution are usually more important than a large number of technical events.
How to set up a goal in Google Analytics 4?

The query “how to set up a goal in Google Analytics” is still used, even though the familiar Goals mechanism from Universal Analytics is missing from GA4. In the current system, important user actions are marked as key events. First, the site sends a standard event, after which the desired action can be marked as key for the business.
For example, a successful form submission can be transmitted as a separate event and then used as a key event. Advertising integrations can also generate conversions for Google Ads. This separation helps distinguish the technical fact of an event from its business significance and advertising use.
How to create the required event?
First, define a technical condition that clearly confirms the user's action. For a form, it's better to record a successful server response or an application event after confirmation, rather than a simple click on the submit button. For a purchase, use a completed transaction with order details, rather than a visit to the shopping cart.
You can create a transmission via the website code, dataLayer, and GTM, or via GA4 if the scenario supports this configuration. After implementation, be sure to check the event in DebugView and ensure the name and parameters match the measurement plan. Only after this check should the event be used in key reports.
How to mark an event as a key event?
If an event is already being received in Analytics, you can mark it as a key event in the administrative settings. For events that haven't yet appeared, GA4 also allows you to pre-specify their name in the Key Events section. Once the event is received, the system will process it as a key action.
The name must exactly match the event sent by the site. A capitalization error, an extra character, or a different name will result in the expected action not being counted as a key event. After configuration, run the test scenario and wait for data to appear in the relevant reports.
How is a key event different from a Google Ads conversion?
A regular event records a user action within GA4. A key event indicates that this action has particular business significance. Conversion in Google Ads is used in the advertising system to measure and optimize advertising results, so these entities are related but perform different functions.
Don't call every event a conversion just for the sake of familiar terminology. Page views, scrolling, or form starts can all be useful events, but businesses don't necessarily need to use them as key events. A clear distinction makes reporting easier for SEO, PPC, and the project owner.
How to set up GA4 eCommerce?
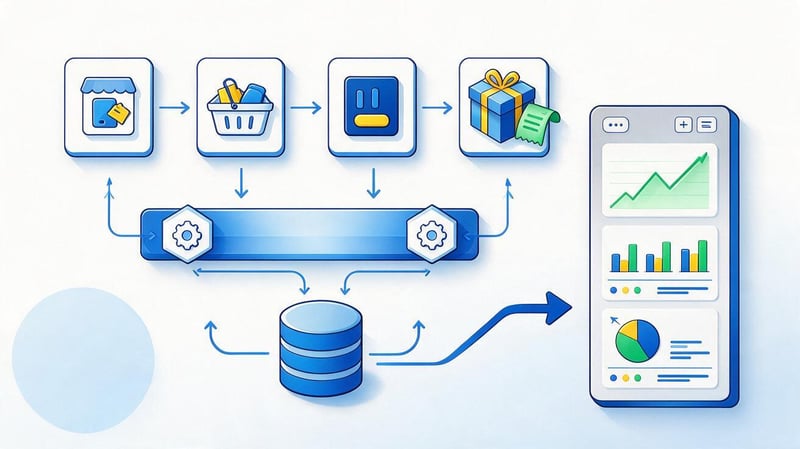
Ecommerce settings are essential for websites where users select products or services, go through the shopping cart, and complete a purchase. A simple Google tag isn't enough for full-fledged ecommerce, as GA4 requires additional events and order parameters. In most projects, this data is generated by the website and transmitted via the dataLayer or a direct implementation.
Before development, map out your ecommerce events and determine what data is available at each step. After implementation, run several test orders with different products and payment methods. The test should cover not only the presence of purchase, but also the correctness of the cost, currency, order composition and transaction identifier.
When is Ecommerce setup needed?
E-commerce is essential for online stores and other projects that can reliably convey purchases and related data. It's useful for analyzing products, purchase funnels, revenue, and the effectiveness of acquisition channels. Without e-commerce, owners can see visits and events, but they don't have a complete breakdown of customer behavior.
A standard contact form doesn't require e-commerce integration. Even if a company sells a high-value service, the request and the actual sale may occur on different days and be recorded in the CRM. In this case, it's better to separately measure leads in GA4 and link them to sales through a suitable analytics system.
Which e-commerce events should be transmitted?
The primary customer journey typically includes view_item, add_to_cart, begin_checkout, and purchase. Depending on the store, viewing the product list, removing from cart, applying a promotion, returns, and other recommended events may be added. Each event should be sent precisely at the time of the corresponding user action.
For purchases, order parameters are especially important, including the transaction ID, price, and currency. If a single order confirmation sends an event multiple times after a page refresh, revenue will be inflated. Therefore, ecommerce is technically verified before using these metrics for SEO and advertising evaluation.
What is dataLayer?
A dataLayer is an object for exchanging structured data between a website and Google Tag Manager. The developer enters event, product, or order information into it, after which GTM reads the required values and passes them to GA4. This approach separates the website's business data from the marketing tag configuration.
The dataLayer is especially convenient for e-commerce because order cost and contents cannot be reliably extracted from HTML text using random selectors. The object structure should be agreed upon in advance between the developer and the analytics specialist. After implementation, the values are verified in GTM Preview and GA4 DebugView.
How to connect Google Analytics 4 with other services?

After the basic GA4 setup, you can connect the services needed for a specific project. Google Ads is typically used for advertising, integration with Google Search Console is useful for SEO, and BigQuery is used for detailed analysis of large data sets. Individual reports and dashboards are conveniently built in Looker Studio.
There's no need to enable all integrations just for the sake of it. Each connection should solve a specific problem and be used by the team. Before connecting, check access rights, the correct property, and the owner of the external account to ensure that project data isn't linked to a test or unauthorized account.
Google Analytics and Google Ads
Linking with Google Ads helps you use analytics data to analyze advertising campaigns and related user actions. Before connecting, make sure you've selected the correct ad account and GA4 property. This is especially important for large companies with multiple ad accounts, as incorrect linking can quickly create confusion in reports.
After integration, separately determine which key events should be used by the advertising system. Not every GA4 event is suitable for advertising optimization. If you pass on too many weak actions, such as regular page views, advertising algorithms may focus on metrics that have little connection to actual business value.
Google Analytics and Google Search Console
Search Console displays organic search queries, impressions, clicks, and site rankings in Google search, while Analytics analyzes user behavior after clicking through. The combined use of these data helps us understand the path from search demand to site interaction. For SEO, this is more useful than evaluating only sessions or rankings.
When connecting, check the correct Search Console property and Analytics web stream. The systems' data differ in methodology and don't necessarily match exactly, so discrepancies in clicks and sessions shouldn't be automatically considered an error. Instead, compare trends and specific reasons for differences.
Google Analytics and BigQuery
BigQuery is essential for projects that need to work with raw GA4 events, build custom models, and combine analytics with other sources. For a small website without an analytics team, such integration may not be necessary right away. First, it's important to ensure that the underlying events and business metrics are already being collected correctly.
For large online stores and services, exporting data opens up more opportunities for in-house analysis than the standard interface reports. However, BigQuery doesn't correct errors in the original data collection. If purchases are duplicated or events have invalid parameters, the same issues will be reflected in the exported data.
Google Analytics and Looker Studio
Looker Studio is convenient for regular reports that require combining metrics from various sources in a single interface. For example, an SEO dashboard might include GA4 data, Search Console, and additional business metrics. Before creating visualizations, it's important to agree on which metrics are truly relevant to the report recipient.
Don't transfer the entire Analytics interface to the dashboard. A manager would benefit from a few stable metrics related to traffic, leads, and sales. An SEO specialist will also need landing pages, organic channels, and key events to help assess the quality of search traffic.
How to grant access to Google Analytics 4?

It's best to grant access to GA4 to the specialist's own Google Account rather than sharing the owner's password. This approach allows you to change or remove permissions for a specific user at any time without affecting access for the entire team. Permissions can be granted at the account or property level, depending on the task.
If a contractor works with only one site, access to the relevant property is usually sufficient. Before assigning a role, determine whether the person should be able to change settings or only view reports. Excessive permissions increase the risk of accidentally changing the configuration or deleting an important setting.
How to add a user?
Open Admin and the access management section for the desired account or property. Add the specialist's Google Account and assign a role that matches their work task. After that, the user will receive their own access and will be able to log in to Analytics without using someone else's password.
If someone changes events, integrations, or other settings, they will need more extensive permissions than someone who only views reports. Access should be revoked after the collaboration ends. It's a good idea to periodically review the user list and delete old contractor accounts.
What roles are available?
GA4 provides the following roles: Administrator, Editor, Marketer, Analyst, and Viewer. These are assigned at the account or property level and provide different capabilities for managing settings and data. Roles should be selected based on the principle of least necessary privileges, rather than granting Administrator to every person who requests access.
An SEO specialist often doesn't need full administrative access to view and analyze data, but someone directly configuring events and integrations may need additional permissions. Be sure to check access to GTM, Search Console, and Google Ads separately, as Analytics permissions don't automatically grant control over these services.
Common Mistakes When Setting Up Google Analytics 4
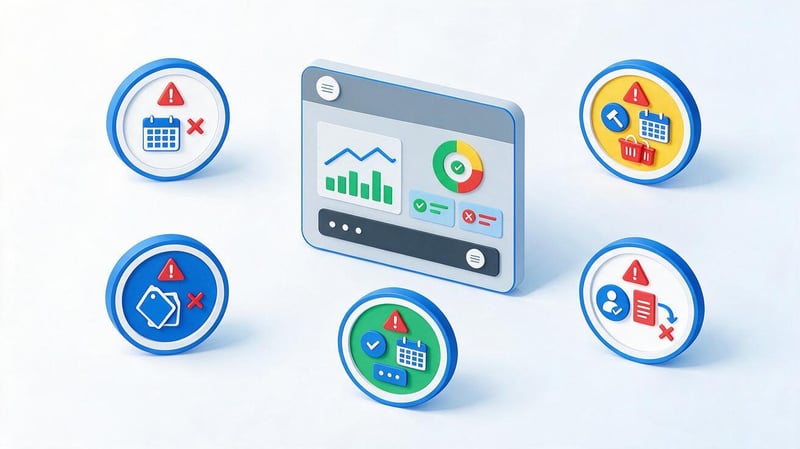
Most post-installation issues are not related to complex GA4 features, but to incorrect identifiers, duplicate tags, and insufficient pre-publishing validation. It's best to detect errors in Preview and DebugView before the property accumulates several weeks of invalid events. Lead requests and purchases are particularly susceptible to duplicates.
After any changes, you need to re-run the main user flows. If the developer has replaced a form, payment service, or checkout template, the old GTM logic may no longer work. Analytics require testing after website changes, just like the functionality of the form or shopping cart itself.
| Error | What's happening | How to fix |
|---|---|---|
| Invalid Measurement ID | Events are sent to the wrong property | Check the ID in the Web Data Stream and the installed tag |
| Google tag is not present on all pages | Part of the user path is missing | Check every major website template |
| Analytics installed twice | Events may be duplicated | Check code, CMS, plugins, and GTM |
| GTM container not published | Site users are not receiving the new setting | Check the Preview, then publish the version |
| Invalid trigger condition | The event is triggered extra times or does not trigger at all | Check Triggering and the real scenario |
| Inconsistent event names | Reports are getting confusing | Use a single measurement plan |
| Internal traffic is not excluded | Employees distort statistics | Set up a rule and test the filter |
| purchase is sent again | Orders and revenue are inflated | Check transaction_id and sending time |
| Consent Mode Error | Some measurements work unpredictably | Check CMP, consent state, and Tag Assistant |
Bugs shouldn't be fixed by adding new tags over old ones. First, determine which implementation is already working and where each event is coming from. Then, remove unnecessary configuration, repeat testing, and only then publish the changes to production.
Google Analytics 4 Post-Setup Checklist
Before finalizing the project, it's helpful to conduct a short verification test. It takes less time than trying to figure out the cause months later when a marketer discovers lost leads or duplicate purchases. The test involves checking the property itself, tag installation, and several real user actions.
Use this list after the initial connection and after major changes to the site:
- A valid Google Analytics account has been created, and the business remains its owner.
- A separate GA4 property has been created with the correct name, time zone, and currency.
- Added Web Data Stream for the main site and verified its URL.
- A valid Measurement ID for the current working data stream was received.
- Google tag is installed via CMS, website code or Google Tag Manager.
- There is no second instance of the same analytics tag on the pages.
- Realtime shows the test user and the main page views.
- DebugView receives events in the correct sequence and without duplicates.
- Enhanced Measurement is checked and unnecessary automatic events are disabled.
- Internal traffic and unwanted referrals are configured after preliminary testing.
- Business events have clear names and correct launch conditions.
- Truly significant events are marked as key events in the GA4 property.
- The store's ecommerce, value, currency, and unique transaction_id have been verified.
- Consent Mode is consistent with the banner and checked through diagnostic tools.
- Google Ads and Search Console are linked to the correct working accounts.
- The team received separate user accesses with the necessary roles.
After completing the checklist, it's useful to reopen the site from a new device and run through one complete target scenario. This test demonstrates the actual performance of the entire chain after publication. Only then can the data be used wisely for regular SEO, advertising, and business reporting.
To properly configure Google Analytics 4, first create an account, a property, and a Web Data Stream, then obtain a Measurement ID and connect the Google Tag using your chosen method. After installation, be sure to test Realtime and DebugView, configure the required events, define key events, and only then move on to integrations and advanced reporting.
The quality of analytics depends on how accurately events correspond to actual user actions. If GA4 is already installed but the data is questionable, start with an audit of Google tags, GTM, events, ecommerce, and Consent Mode. After a technical review, you can use the reports for SEO, advertising, and lead evaluation without constantly questioning the accuracy of the underlying data.
If you need to set up Google Analytics 4 for a specific website, document your business goals, key events, and current technical setup before starting work. Afterward, a specialist will be able to configure data collection, verify event transmission, and prepare analytics for future SEO and marketing efforts.


